Manage User Access to eCourtDate With Your Azure Active Directory.
Identity Profiles (IDPs) allow you to configure oAuth2.0-based authentication and authorization flows for your users.
We recommend creating at least three separate IDP profiles:
-
Console IDP - for IT and technical users
-
Staging IDP - for business and testing users
-
Production IDP - for all users
Steps:
1) Create an IDP in the Console IDPs page: https://console.ecourtdate.com/idps
-
Click on Add IDP and choose the desired region (we recommend using 2 separate IDPs for staging and production)
-
Choose a unique sign-in URL.

2) Once created, you'll get sign-in, redirect, and logout links needed for Azure configuration:

3) Go to your Azure Active Directory tenant and create a new App Registration:

4) In the Authentication tab:
-
Add a platform configuration, choose Web, then add the Redirect URL from the Console as the Redirect URL value:

5) In the same Authentication tab: use the Console Logout URL as the Front-channel logout URL and enable Access Tokens.

6) In the Certifications & Secrets tab: create a Client Secret and use the value as the Client Secret in the Console IDP. Do the same for Client ID which can be retrieved from the Overview tab Application (client) ID value.
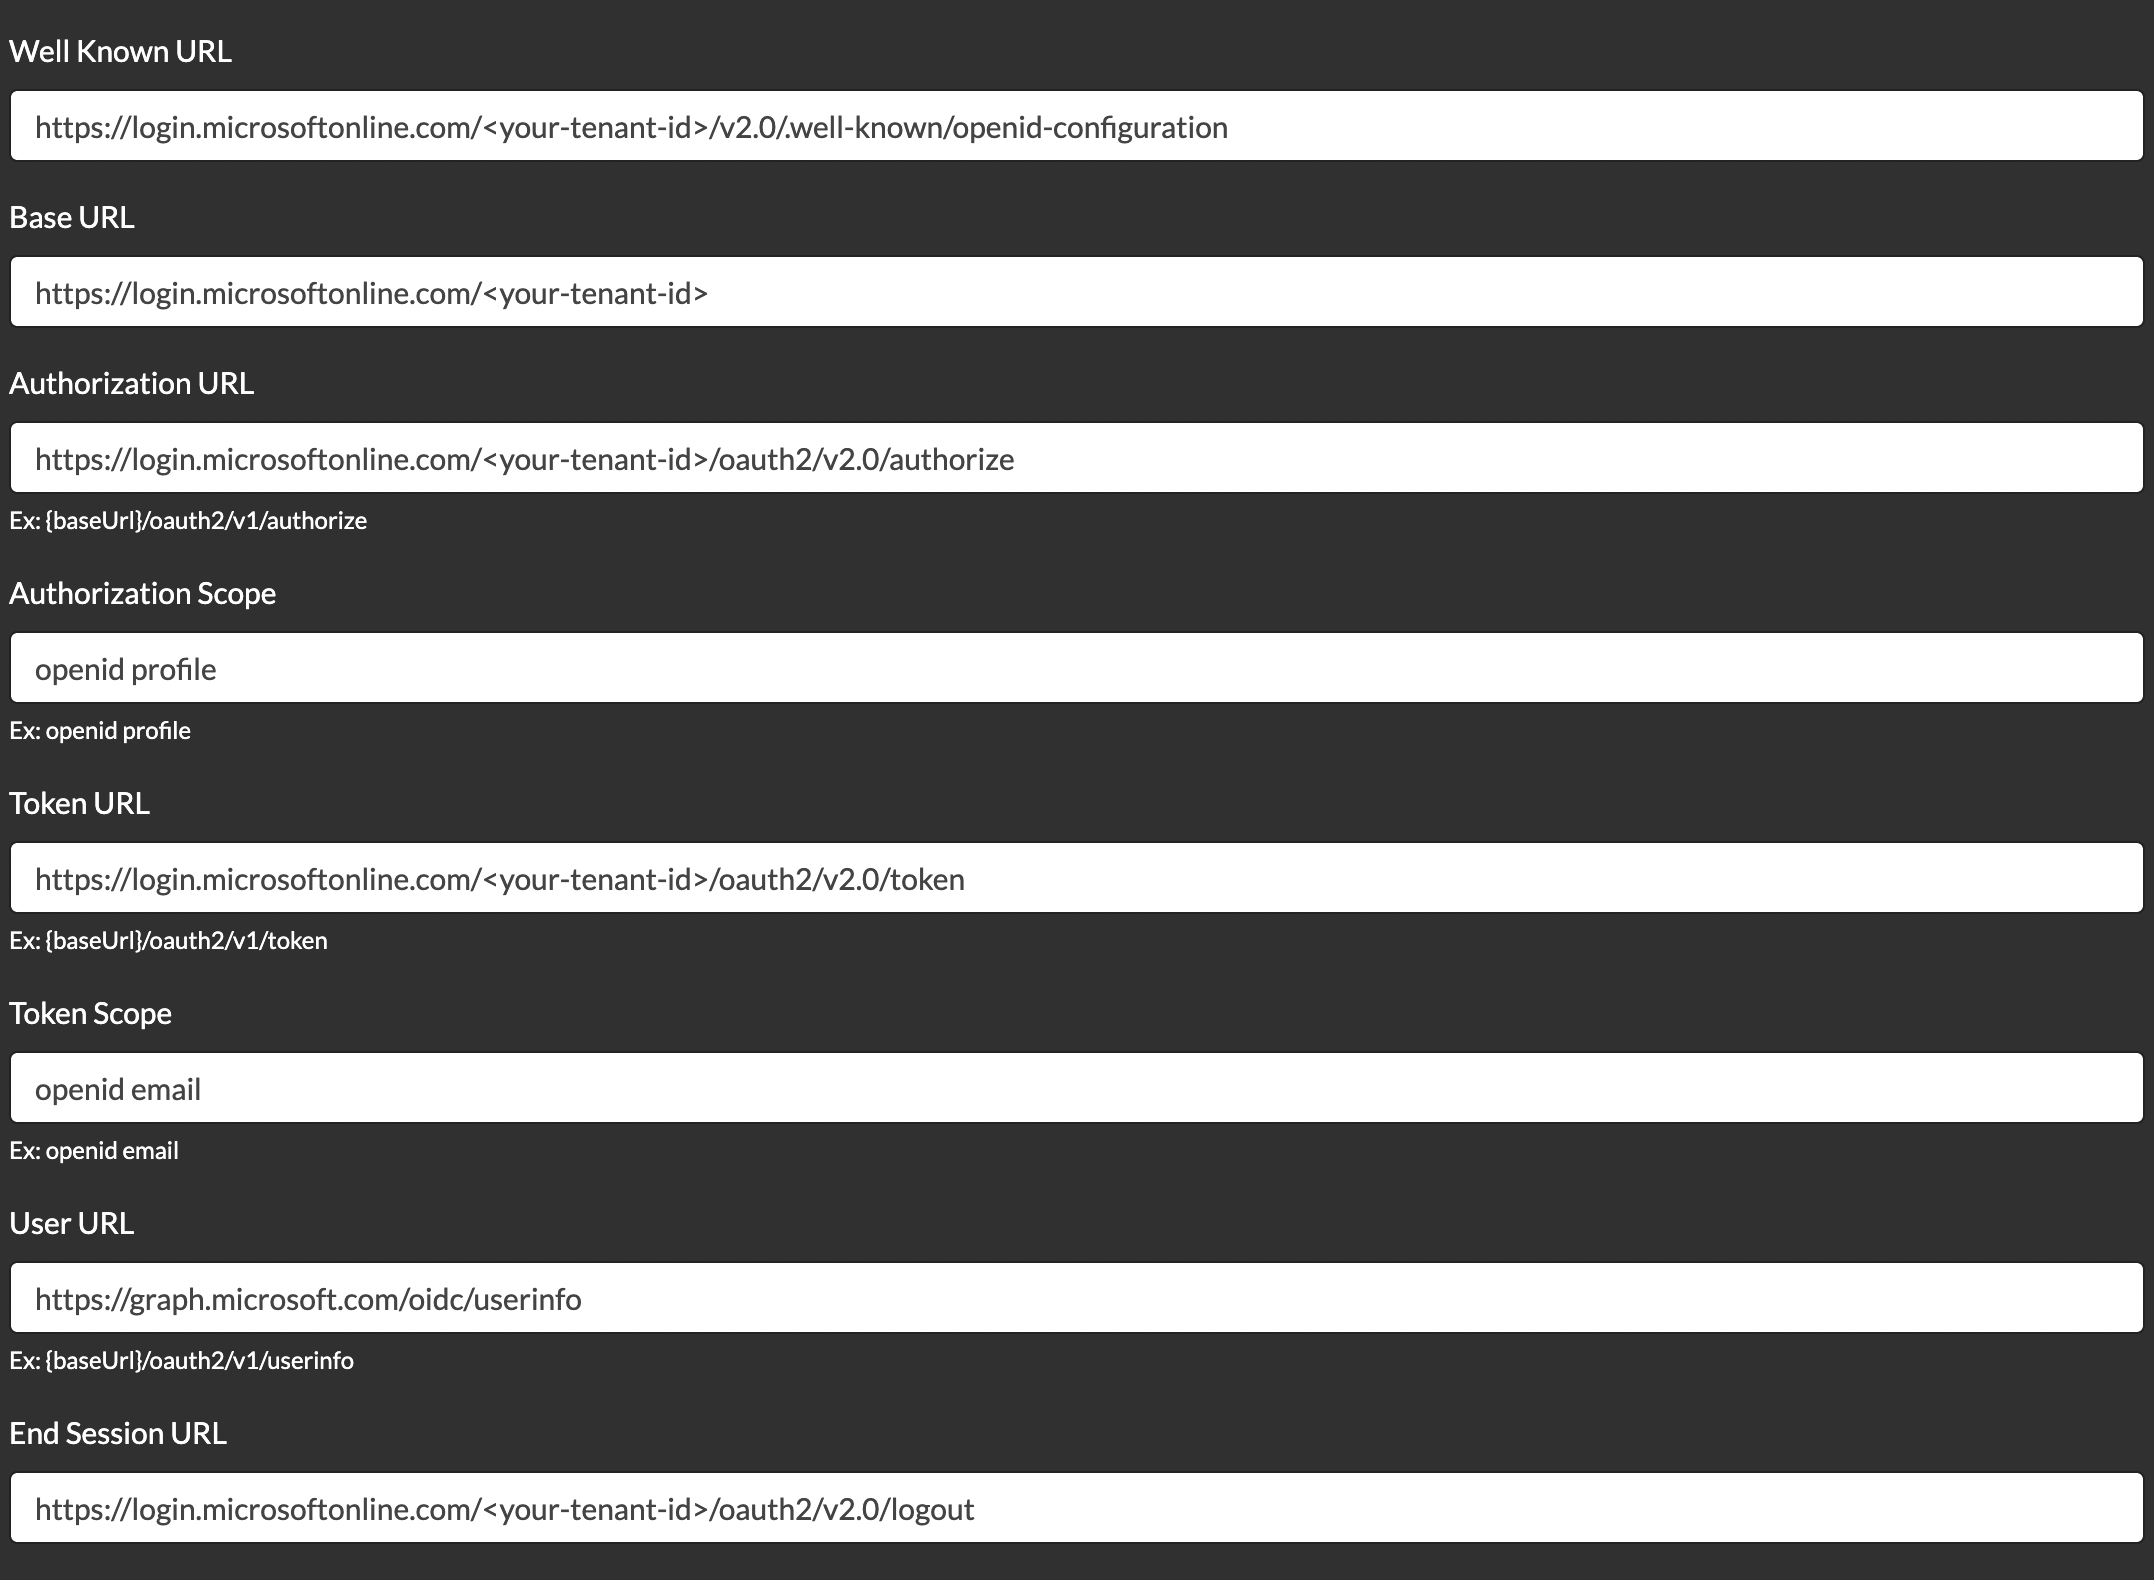
7) In the Overview tab: use the values from the Endpoints button to configure the following settings in the Console IDP:
-
Well Known URL: https://login.microsoftonline.com/<your-tenant-id>/v2.0/.well-known/openid-configuration
-
Base URL: https://login.microsoftonline.com/<your-tenant-id>
-
Authorization URL: https://login.microsoftonline.com/<your-tenant-id>/oauth2/v2.0/authorize
-
Token URL: https://login.microsoftonline.com/<your-tenant-id>/oauth2/v2.0/token
-
End Session URL: https://login.microsoftonline.com/<your-tenant-id>/oauth2/v2.0/logout
8) In the Console IDP, choose the Default Agency as well as any other Enabled Agencies that the IDP should grant users to.
9) (optional) To use your Azure group memberships to assign eCourtDate roles, add the GroupMember.Read.All permission:

10) (if Step 9 is completed) In Token Configuration, click on Add groups claim, choose the Group types and ID, then click on Add:
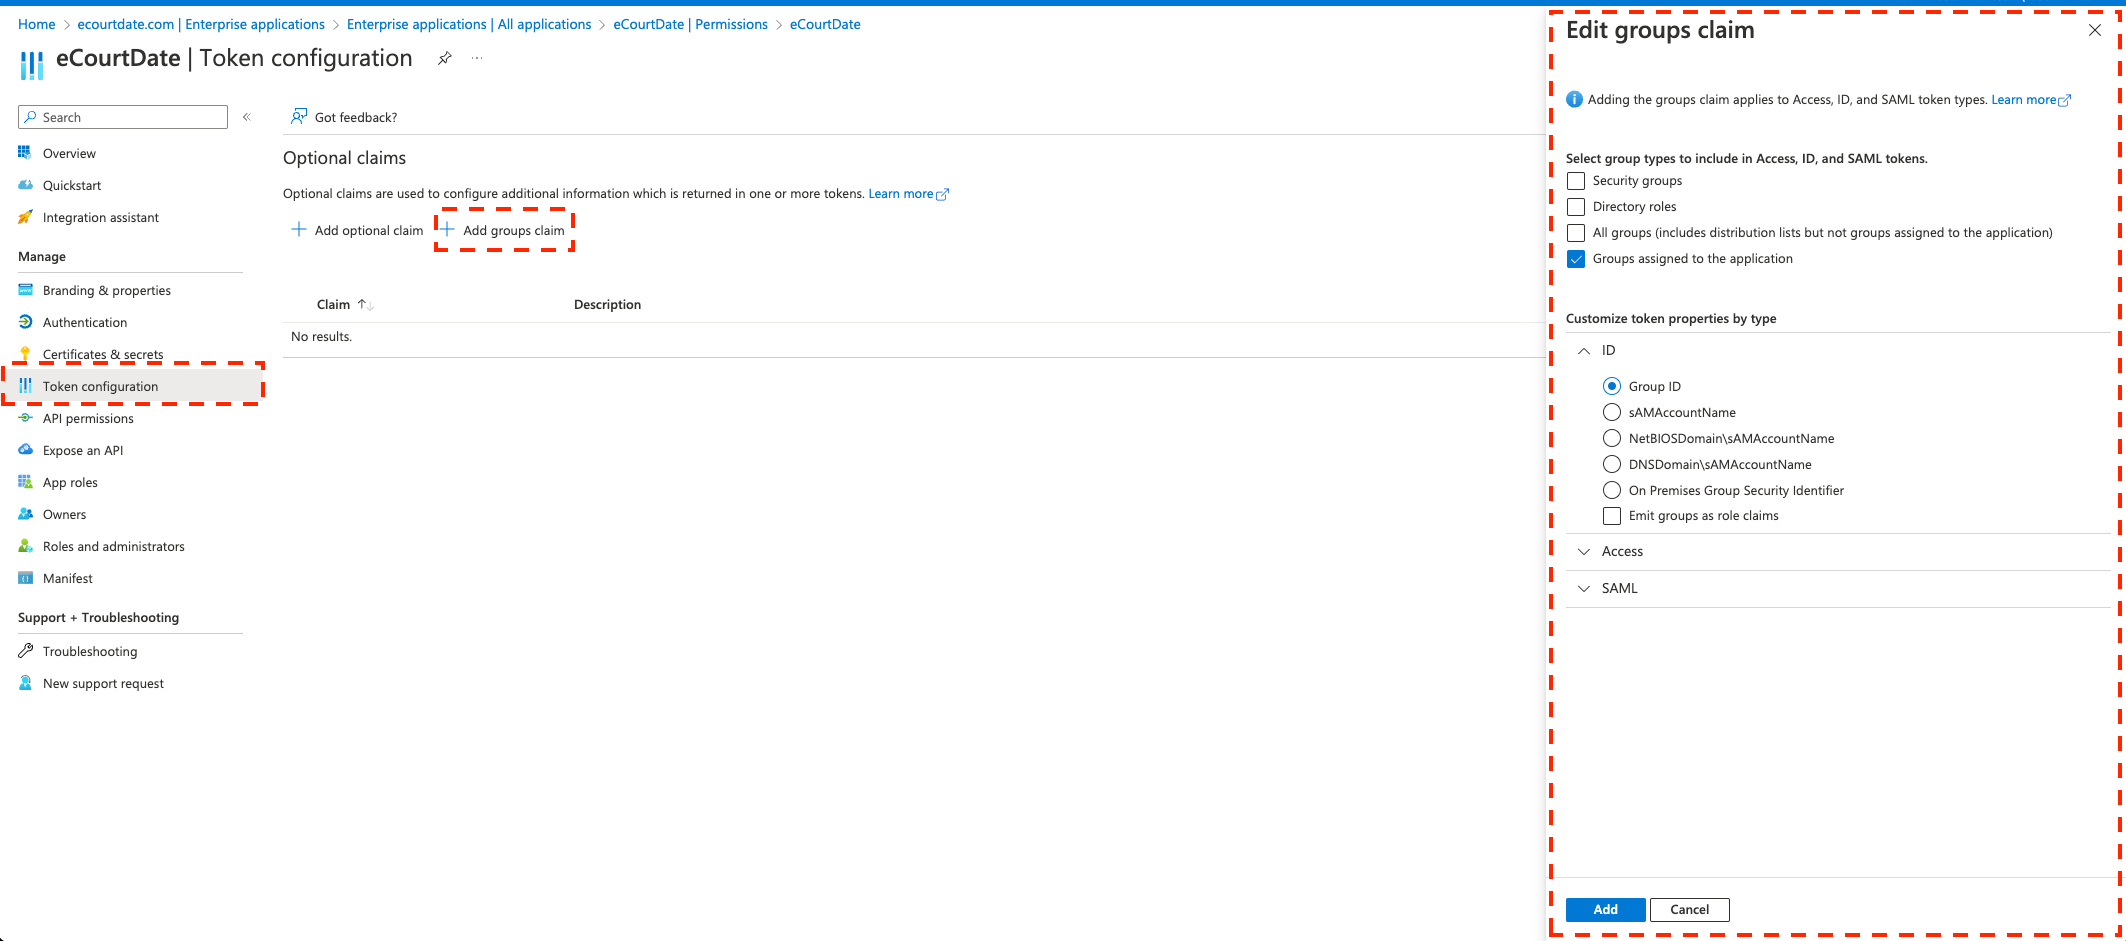
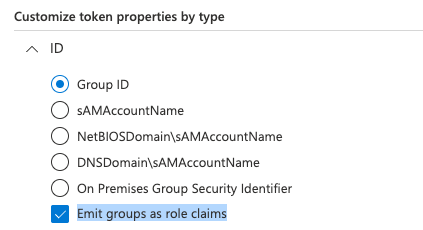
If you wish to use Azure Groups to assign eCourtDate User Roles, enable the Emit groups as role claims option:
If you wish to use Azure Groups to assign eCourtDate Agencies instead, enable the Directory Roles option to pass the user's roles:

To assign agencies, the group name must match the following format (case insensitive): {AgencyReference_ECOURTDATE}.
For example, if your agency reference is: municipal-court-123 then the Azure group name should be municipal-court-123_ECOURTDATE
Prerequisite: the agency must be included in the IDP Enabled Agencies setting to be used for Group -> Agency assignment.
Note: Any Role that is a case-insensitive match to one of the following: SECURITY or ADMIN or ROOT will be assigned Super Admin in addition to any other roles. You may need to enable the Security groups in the above setting.
Once completed, Azure AD users can log in automatically to their assigned agencies using the Sign-in URL.
While signing in, the user's access is regenerated based on the latest identity and permissions returned by Azure Active Directory.