Agency Emails are the email addresses used to send and receive multilingual email messages. At least one configured Agency Email is required for each agency to be able to send and receive emails.
Why Use an Agency Email?
Agency Emails are the email addresses used to send and receive multilingual email messages. At least one configured Agency Email is required for each agency to be able to send and receive emails.
Click Admin > Settings in the top navigation, then click on the Agency Emails tab.
How to Create a New Agency Email
Step 1) Go to the Agency Emails page.
Step 2) In the Create Agency Email form, enter the email address you'd like to use (or leave blank to use an auto-generated email).
Step 3) Click the Create button.
- Once created, you will get redirected to the edit page. Skip to Step 3 in How to Edit an Agency Email.
- If there is an error (such as the desired email address not being available), try filling in the form again with a different email address.
How to Edit an Agency Email
Step 1) Go to the Agency Emails page.
Step 2) Click on the email that you'd like to edit.
Step 3) Configure any desired settings. Click Save to apply any changes.
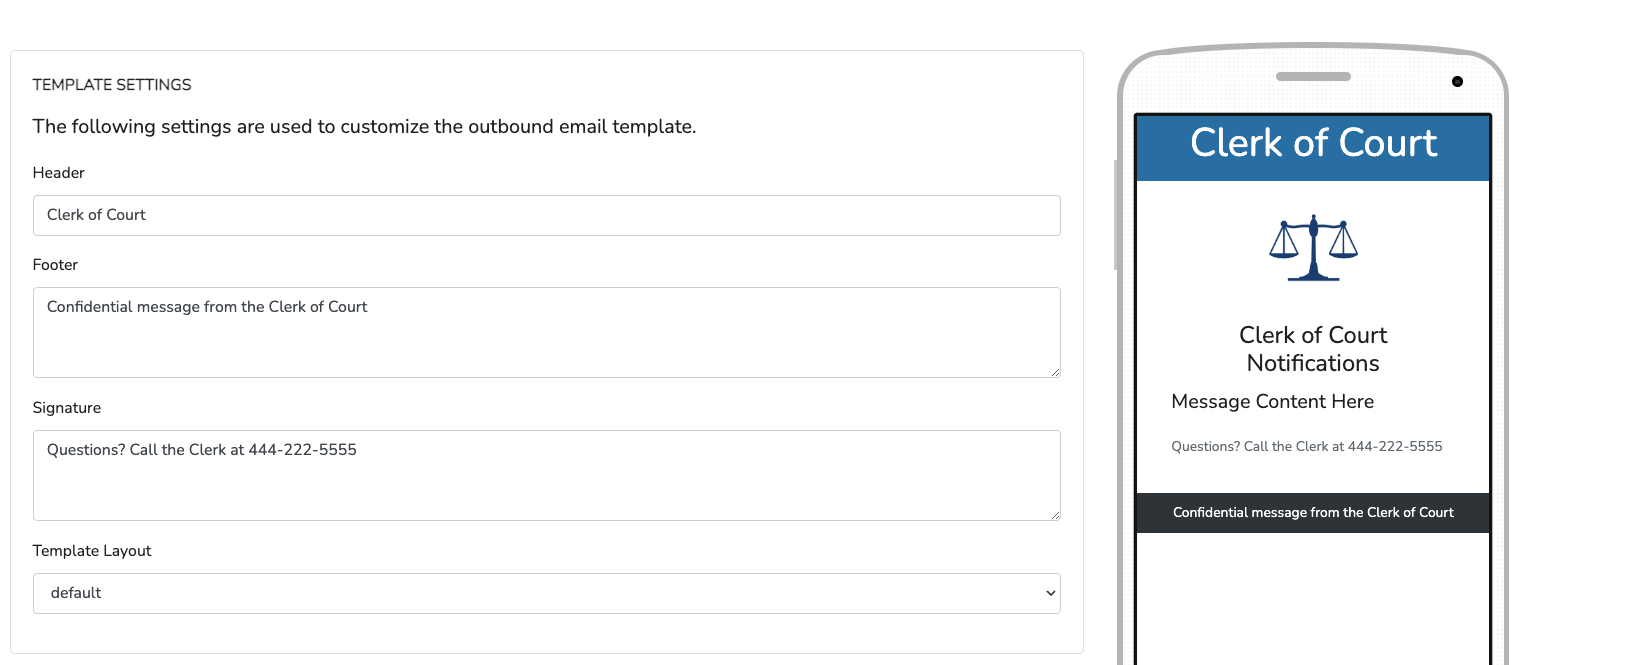
Template Settings
The following settings control the layout for outbound emails. Preview how your outbound emails will look through the device.
- Header
- Footer
- Signature
- Template Layout
Outbound Settings
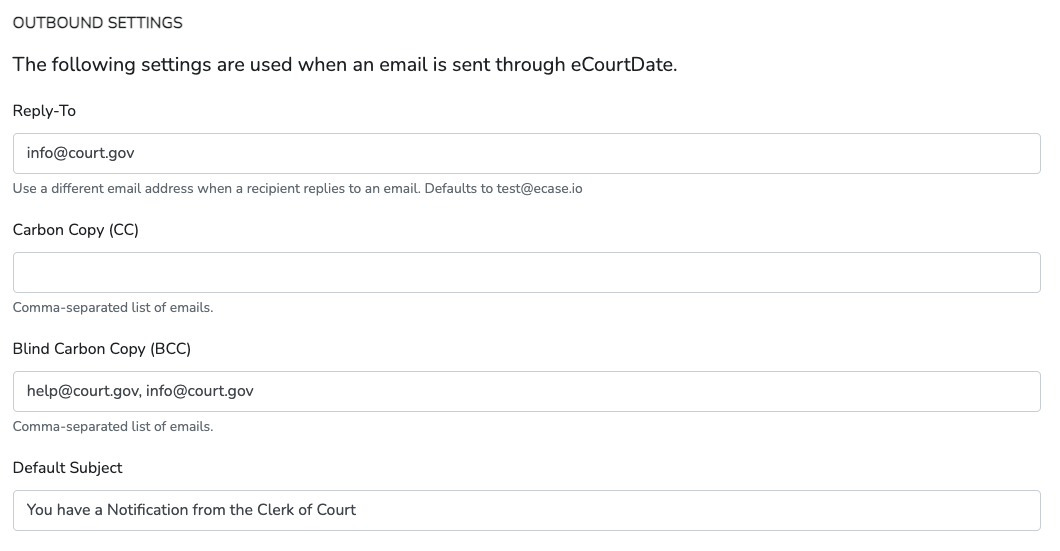
The following settings control outbound email options.
- Reply-To: enter an email address to customize when a recipient replies to an outbound email. (leave blank to use the default Email Address).
- Carbon Copy: enter an email address to add as a cc on outbound emails.
- Blind Carbon Copy: enter an email address to add as a BCC on outbound emails.
- Default Subject: enter a default subject for any outbound emails. Used if there's no subject specified for any message.
- Header: enter the header line used in outbound email templates.
- Footer: enter the footer line(s) used in outbound email templates. Example: "Message from [AgencyName]. Our address: [AgencyAddress]".
- Signature: enter the signature used in outbound email templates. Example: "This is a confidential message from [AgencyName]."
- Template: choose HTML to customize the outbound email template or leave it as default to use a minimalist email template.
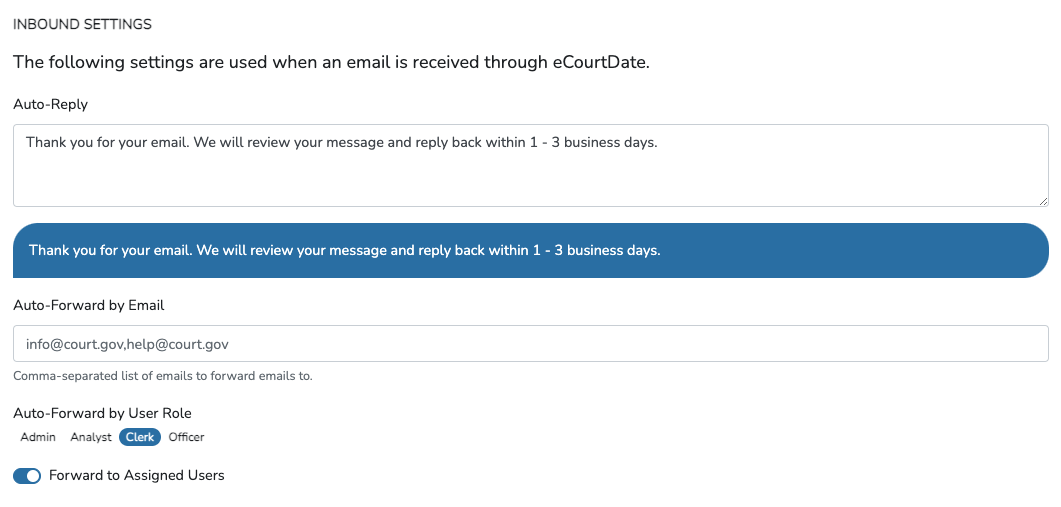
Inbound Settings
The following settings control what happens when an email is received.
- Auto-Forward Inbound Emails: enter a comma-separated list of emails to auto-forward emails. Example: amy@court.gov,stacy@court.gov
- Auto-Forward Inbound Emails by User Role: choose from existing roles to auto-forward emails to any user with the assigned role.
- Inbound Auto-Reply: enter a message sent automatically in response to inbound emails.
- Forward to Assigned Users: enable this option to forward emails from known clients to their assigned users automatically.
How to Verify an Agency Email
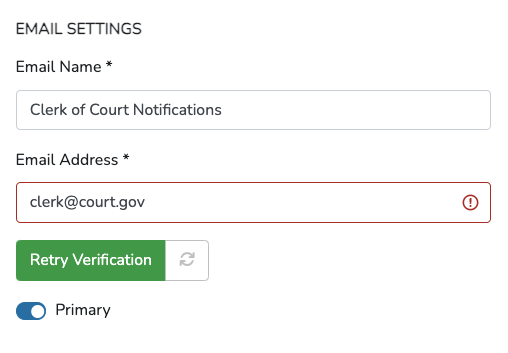
You'll need to verify ownership to use an email address with your domain (example: clerk@court.gov).
Step 1) Create or edit the Agency Email you want to verify.
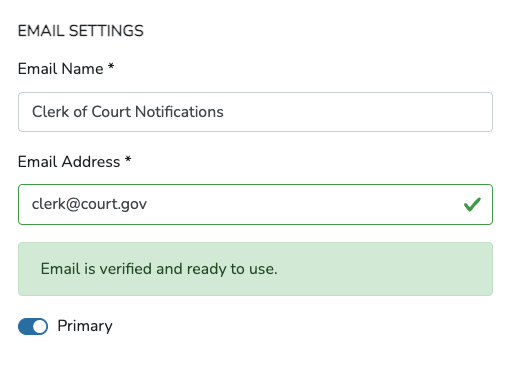
Step 2) If the email address is verified, you'll see a confirmation message saying, "Email is verified and ready to use." Skip the remaining steps in this section.
Step 3) If the Email Address is not verified, click the Retry Verification button. You'll receive an email from AWS GovCloud requesting you to verify ownership of the address. Click on the link to complete verification and return to the edit page (you may need to refresh the page after verifying).
How to Use an Agency Email in Messages
Skip this section if you only have one Agency Email configured. All outbound email messages will use the sole agency email.
Primary Agency Email
If you have multiple Agency Emails, enable Primary on the email you'd like to default to. Any outbound message to an email address will use the Primary Agency Email unless overridden through one of the options below.
Flows
Customize the Agency Email when sending a message through Flows.
Step 1) Click Admin > Messages in the top navigation and then the Flows tab.
Step 2) Click on the Flow that you'd like to edit or create a new one.
Step 3) Choose the email you want to use in the Agency Email setting. Click Save to apply any changes.
- Any newly created messages to an email will use the configured Agency Email as the sender.
- If the Flow already has scheduled messages that use a different email, click Tools > Sync Messages to regenerate related messages. As this process may take a few minutes, you'll receive an email once it's complete.
Auto Messages
Customize the Agency Email when sending a message through Auto Messages.
Step 1) Click Admin > Messages in the top navigation and then the Auto Messages tab.
Step 2) Click on the Auto Message that you'd like to edit or create a new one.
Step 3) Choose the email you want to use in the Agency Email setting. Click Save to apply any changes.
- Any newly created messages to an email will use the configured Agency Email as the sender.
Bulk Messages (Bulk Actions)
Customize the Agency Email when sending a message through a Bulk Action.
Step 1) Click on Bulk Actions in the top navigation.
Step 2) Create a new Bulk Action or edit one that has yet to run.
Step 3) Choose the Agency Email that you'd like to use. Click Save to apply any changes.
Scheduled One-Off Email Messages
Customize the Agency Email for a one-off scheduled email message.
Step 1) To list scheduled messages, click the Dashboard from the top navigation, then look for the Scheduled Messages list.
Step 2) Use the Search field to filter messages or click on the Messages tab for more granular search options.
Step 3) Choose the email you want to use in the From setting. Click Save to apply any changes.