Agency Settings
How to Create Locations
6 min read
Updated Feb 15, 2026
Locations in eCourtDate represent the physical and virtual places where your agency operates, allowing you to assign unique settings like business hours and default judges to each one.
Locations in eCourtDate represent the physical and virtual places where your agency operates, allowing you to assign unique settings like business hours and default judges to each one.
Overview
- What it is: Locations are configurable records representing physical addresses or virtual meeting links used by your agency
- Why it matters: Assigning locations to events, payments, cases, and messages ensures accurate record-keeping and enables location-specific settings such as business hours, default judges, and message controls
- Who uses it: Agency administrators and staff responsible for managing courtrooms, offices, and virtual hearing rooms
- Expected outcomes: Each location has its own settings, rooms, and messaging controls that apply automatically when records are assigned to it
Prerequisites
- You must have admin access or the Create Locations and Update Locations permissions
- You must be signed into your eCourtDate staging or production agency
- For physical locations, have the full street address ready
- For virtual locations, have the meeting URL ready (Zoom, Teams, etc.)
How-To Steps
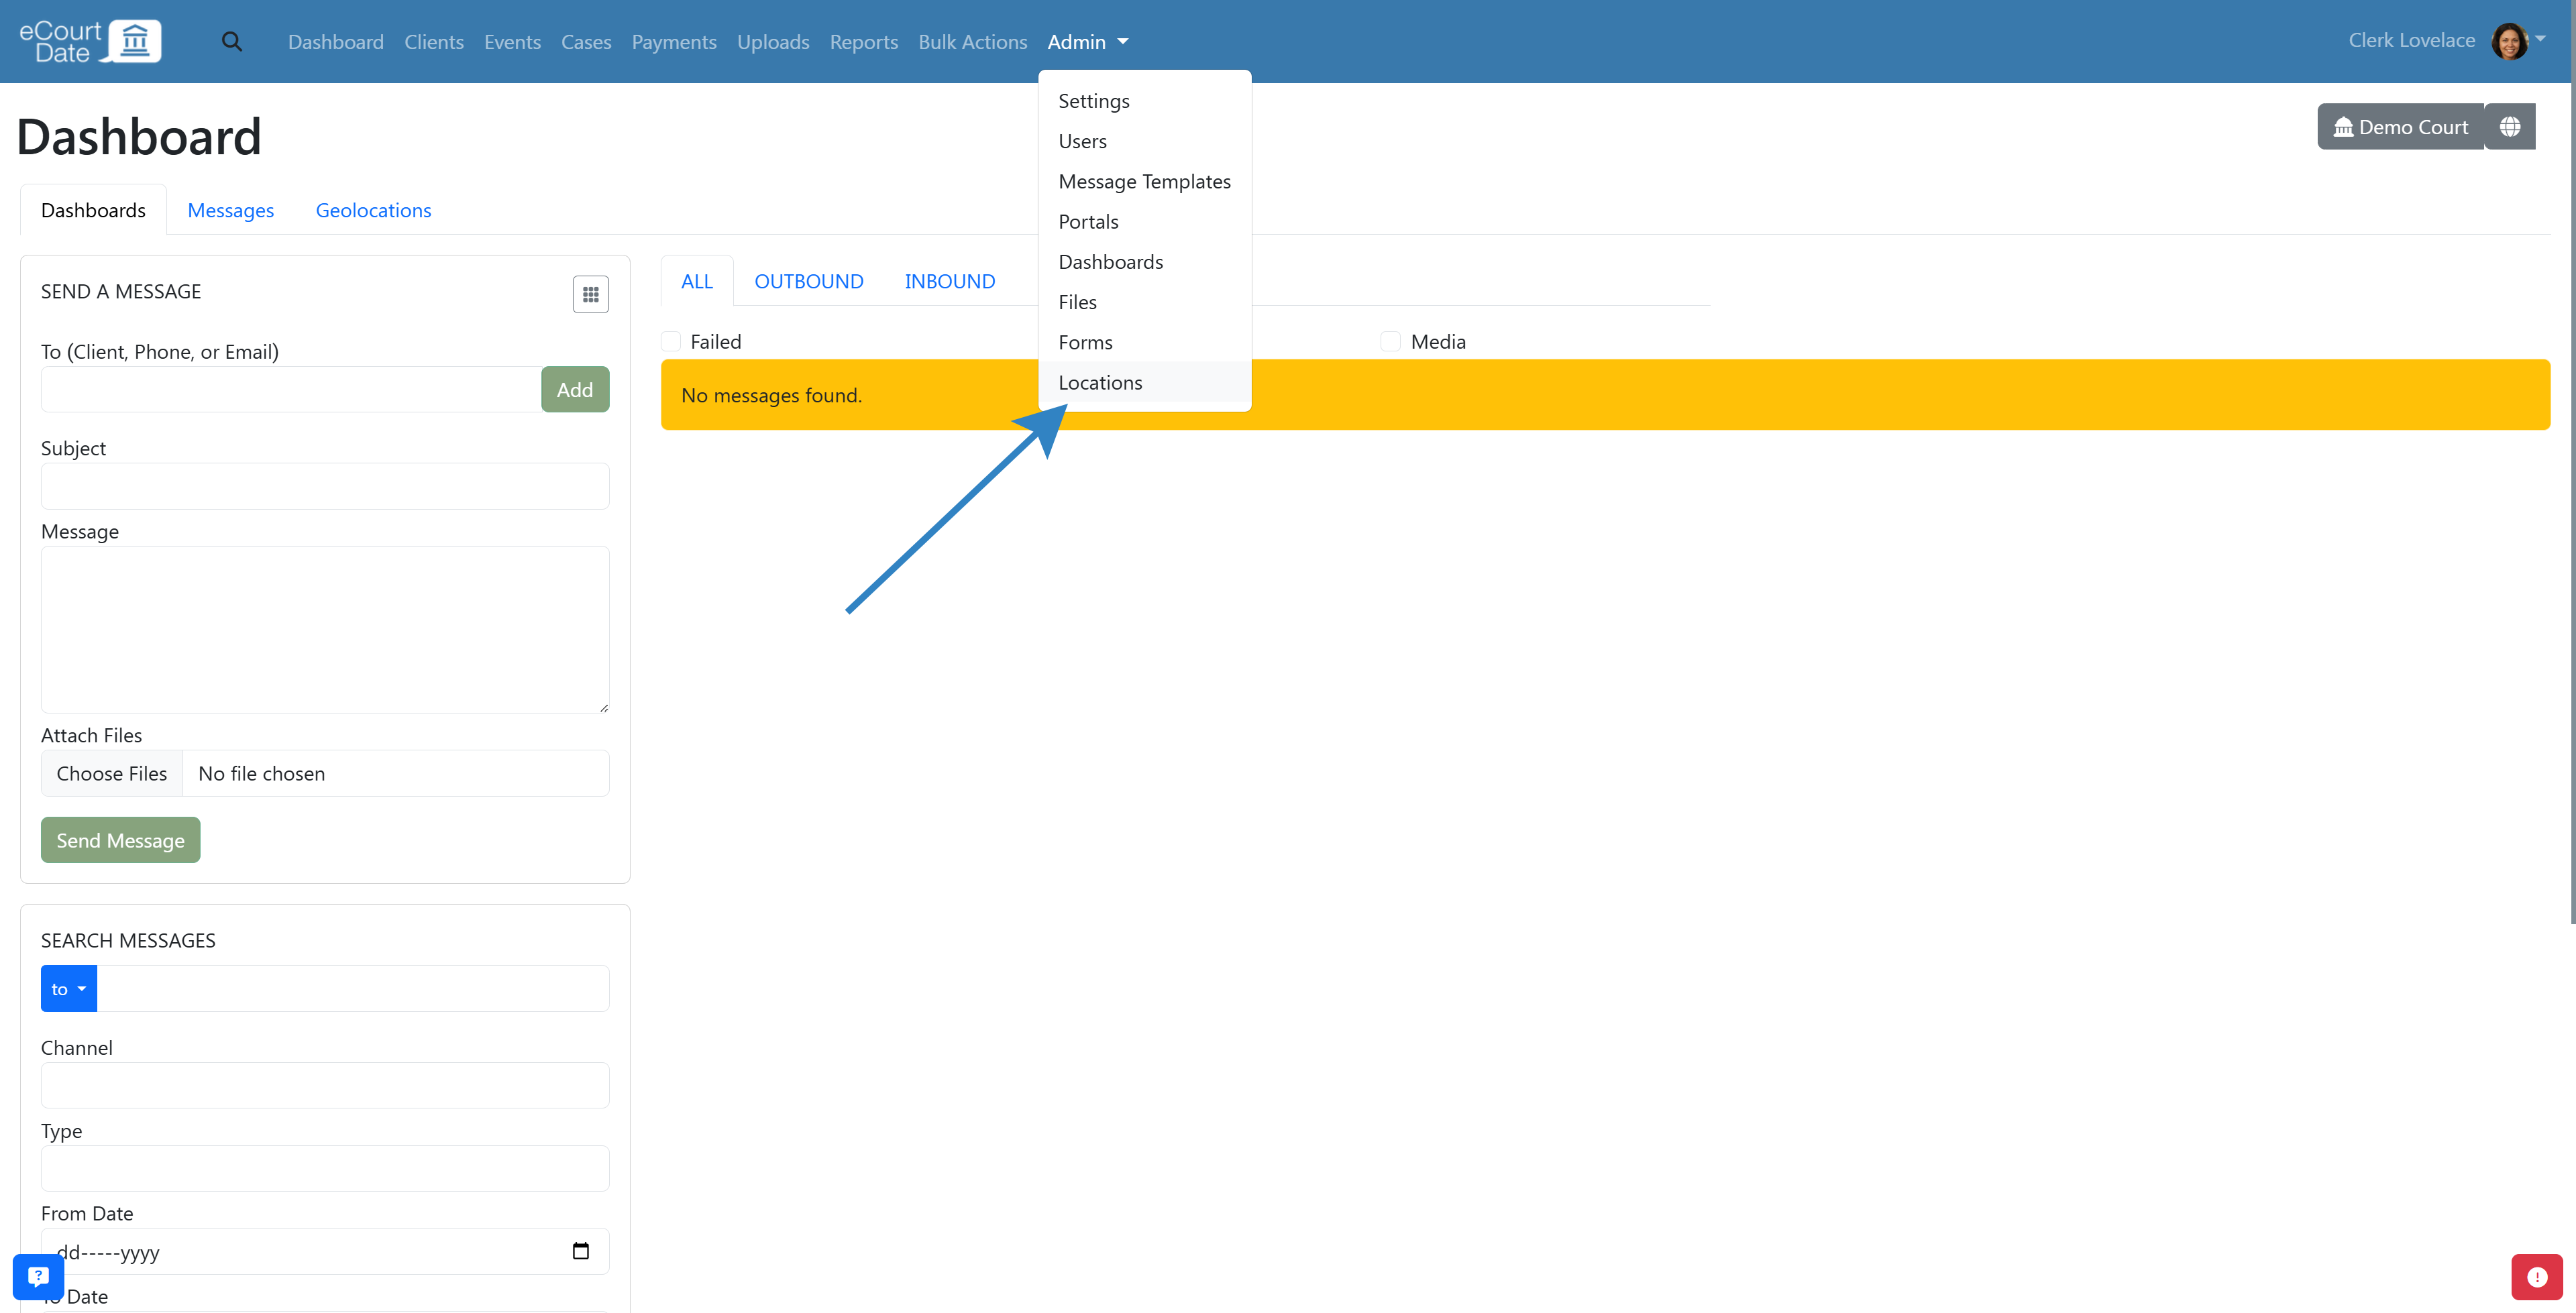
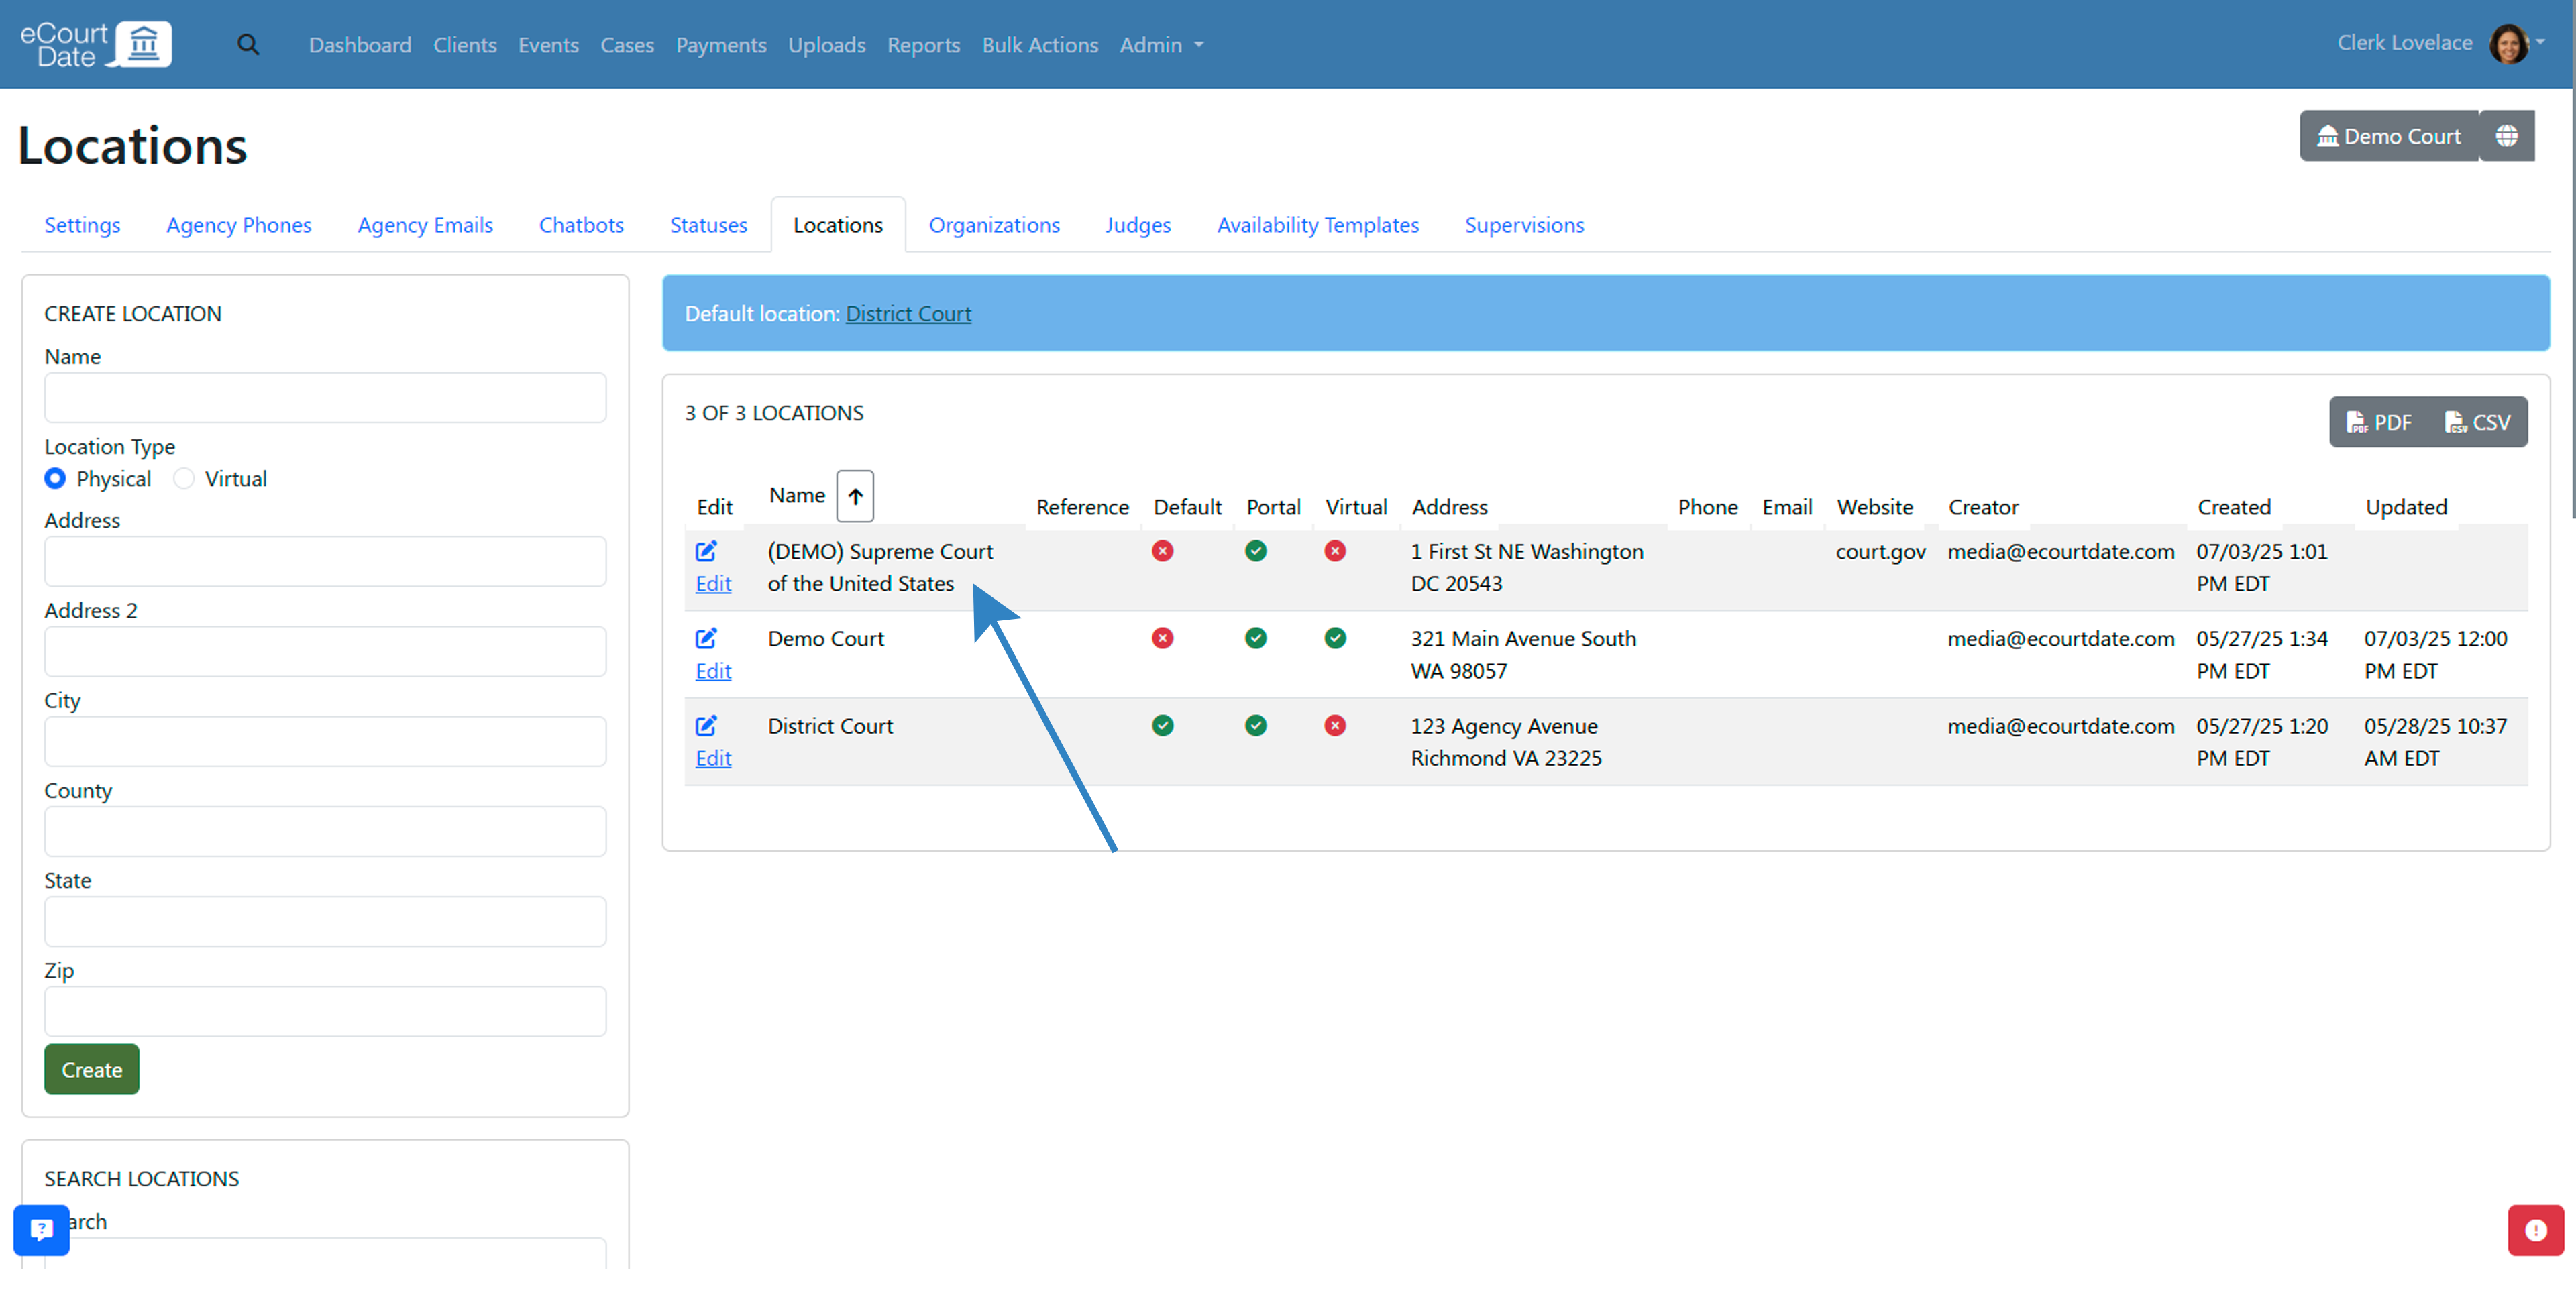
Step 1: Navigate to Locations
- Click Admin > Settings in the top navigation bar.
- Click the Locations tab.
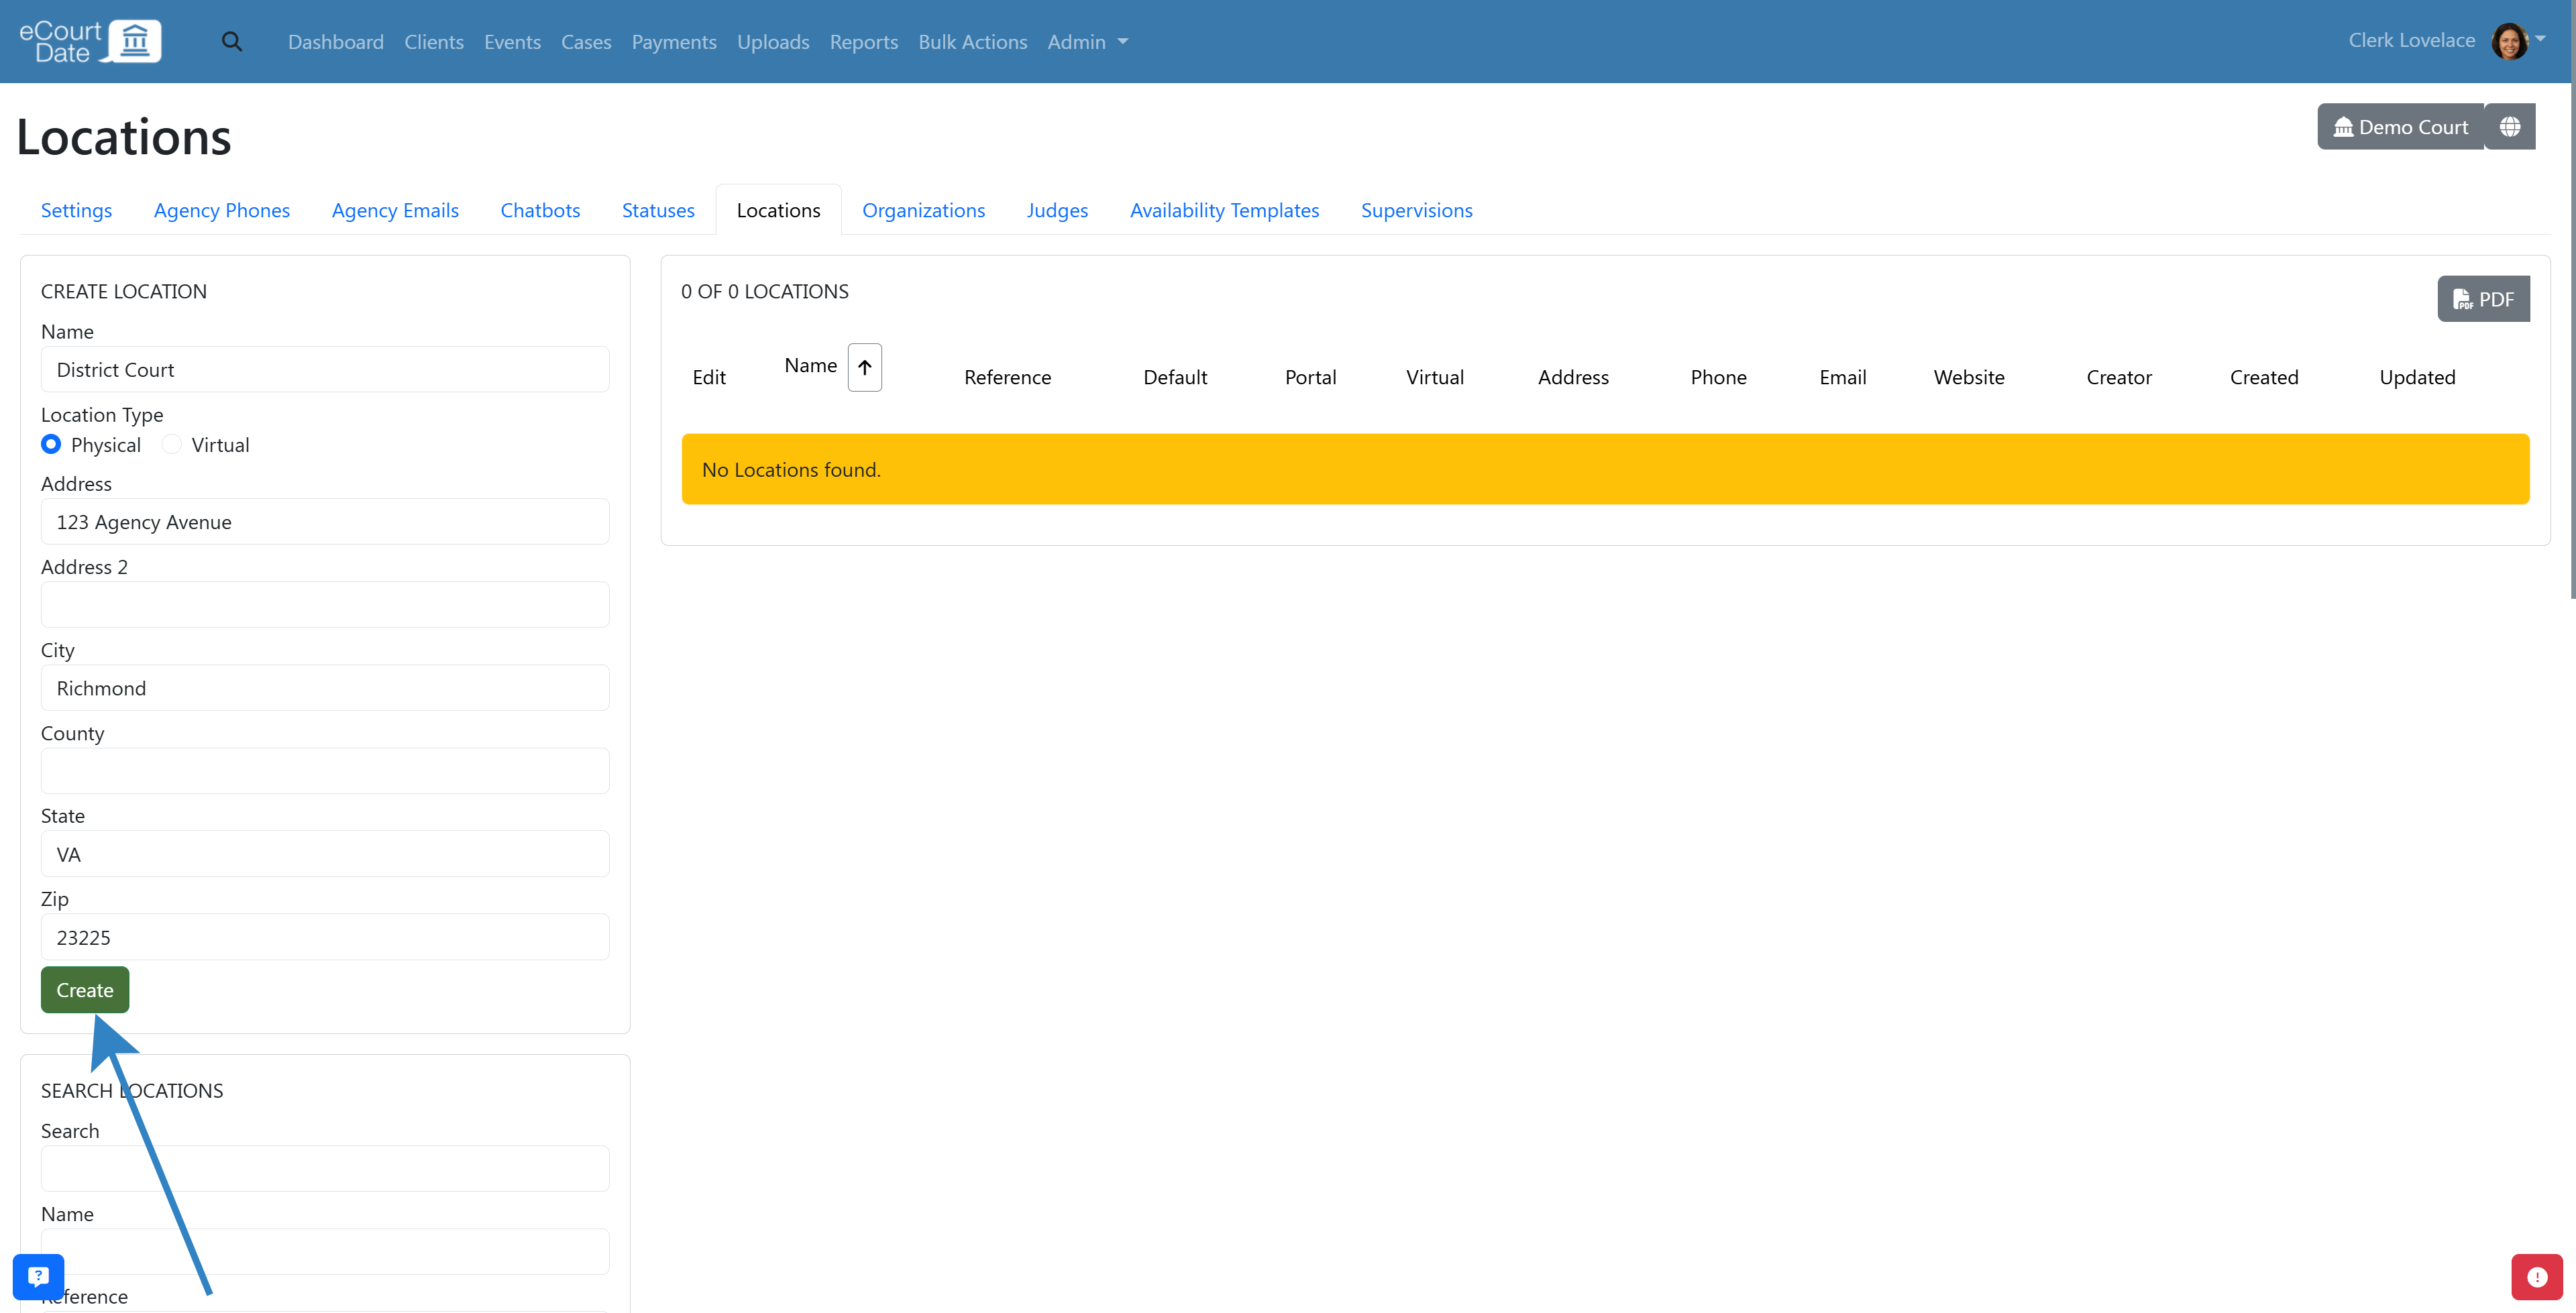
Step 2: Create a Location
Before creating a location, verify that the location does not already exist. Edit an existing location instead of creating a duplicate.
- Fill in the Create Location form with the location name.
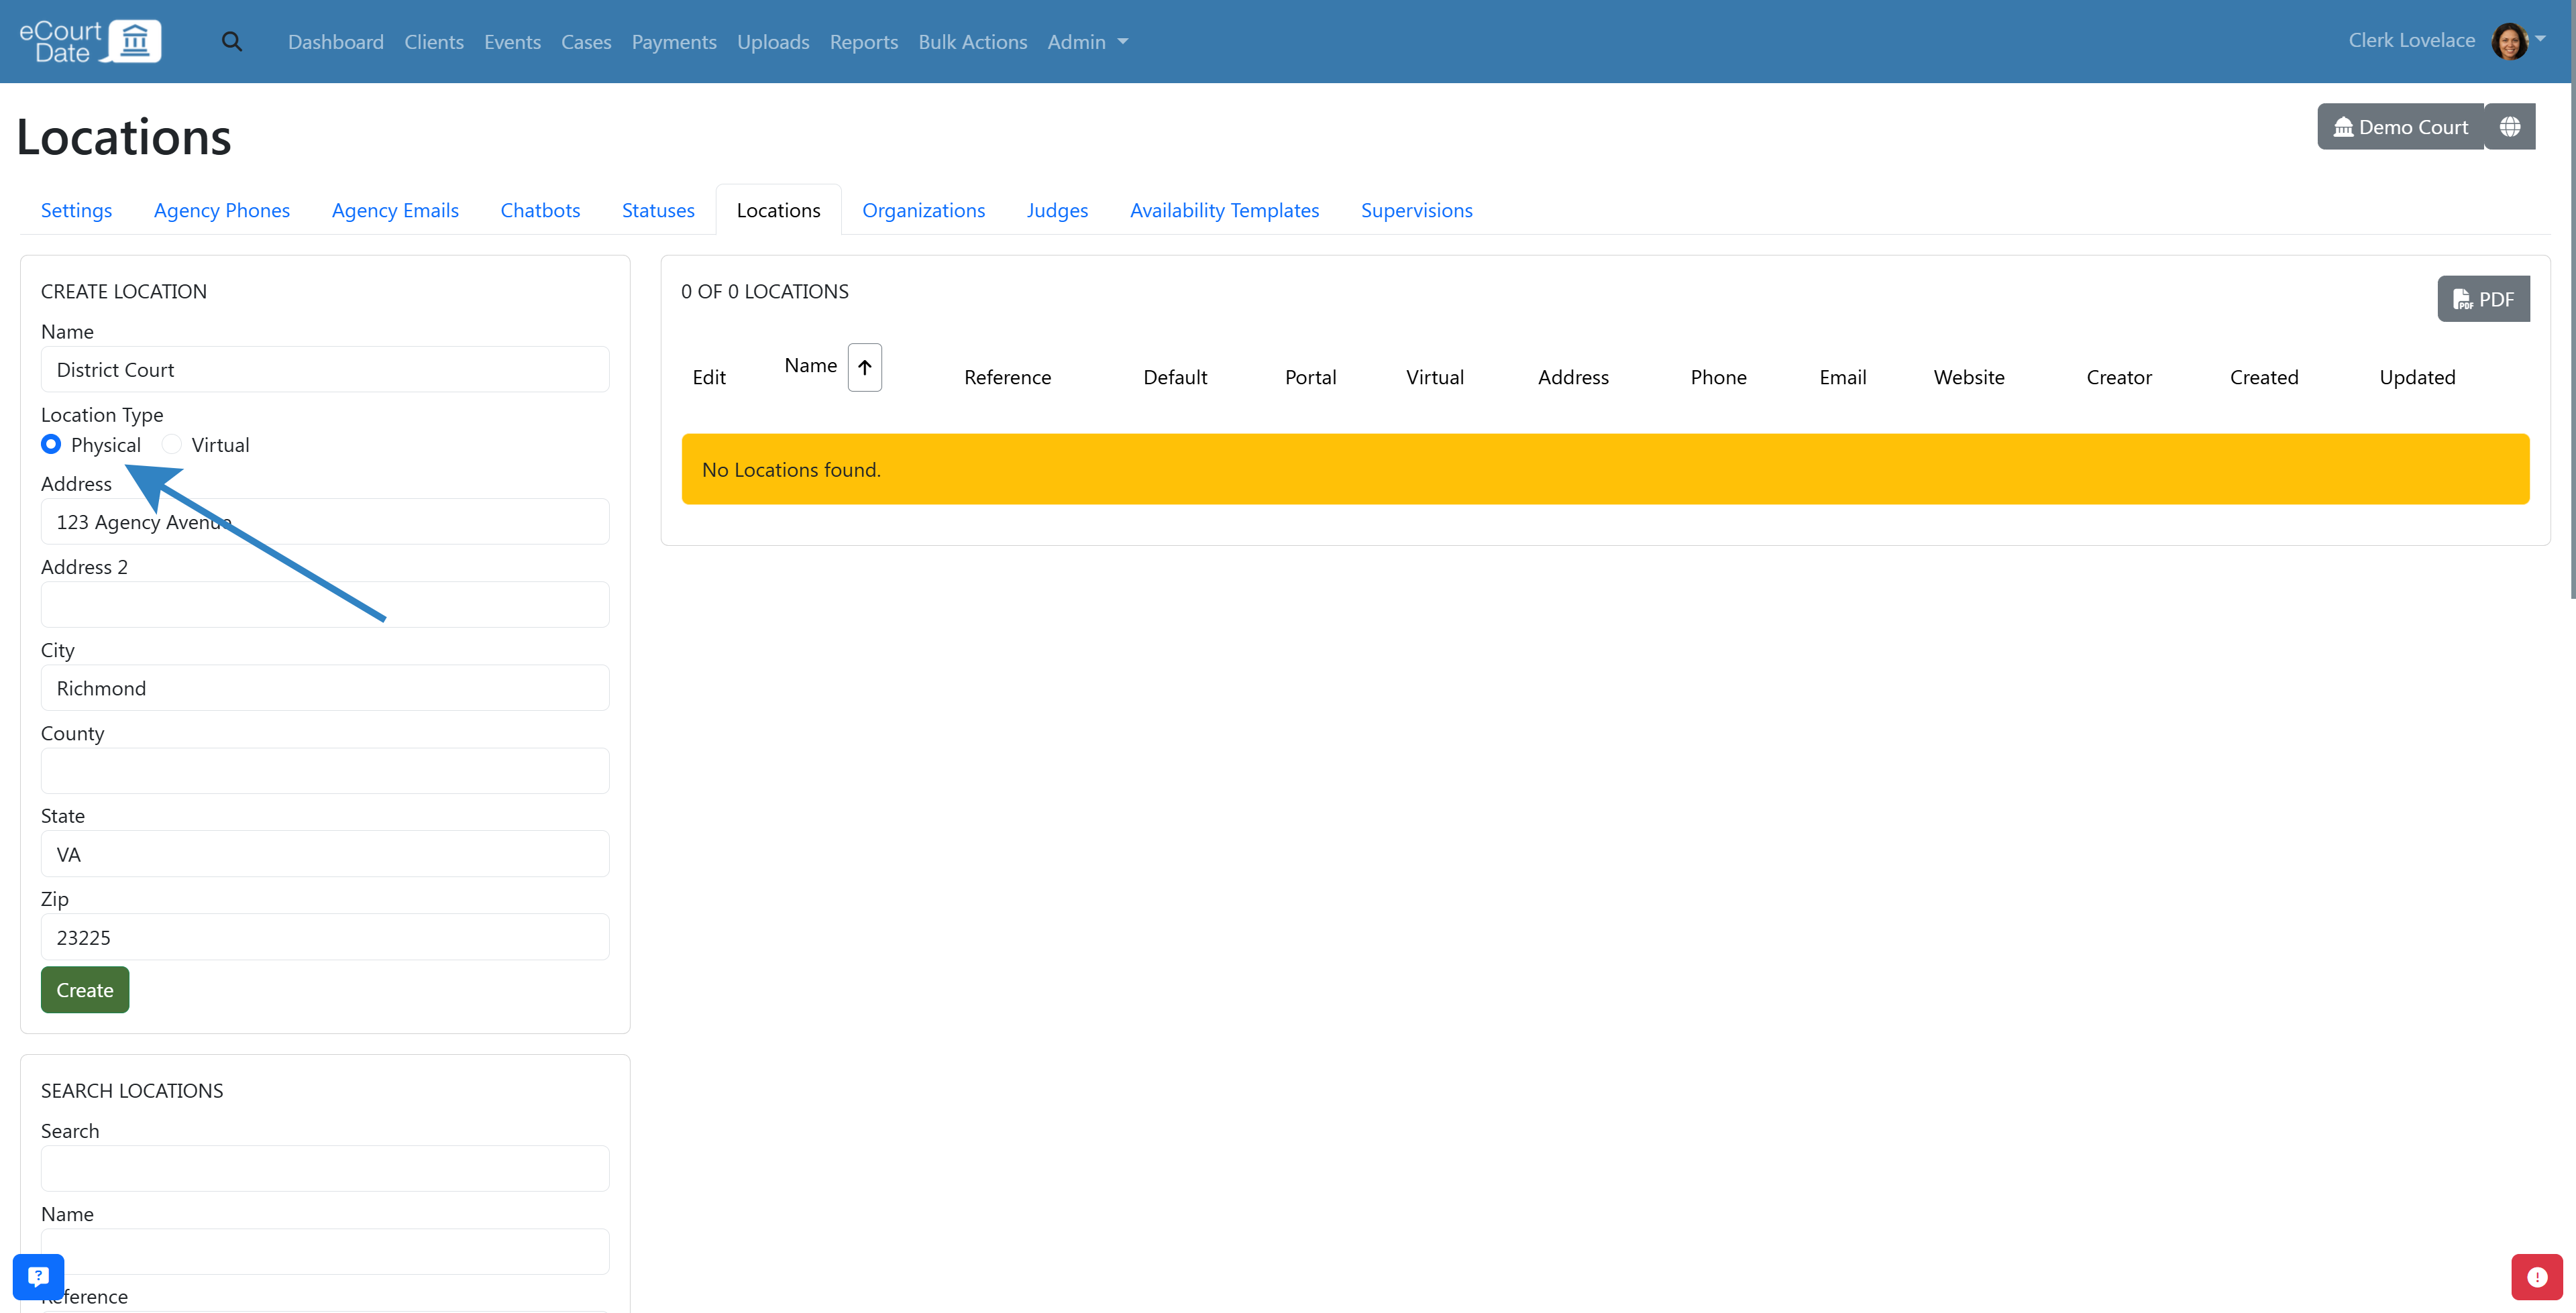
- For a physical location, enter the full Address.
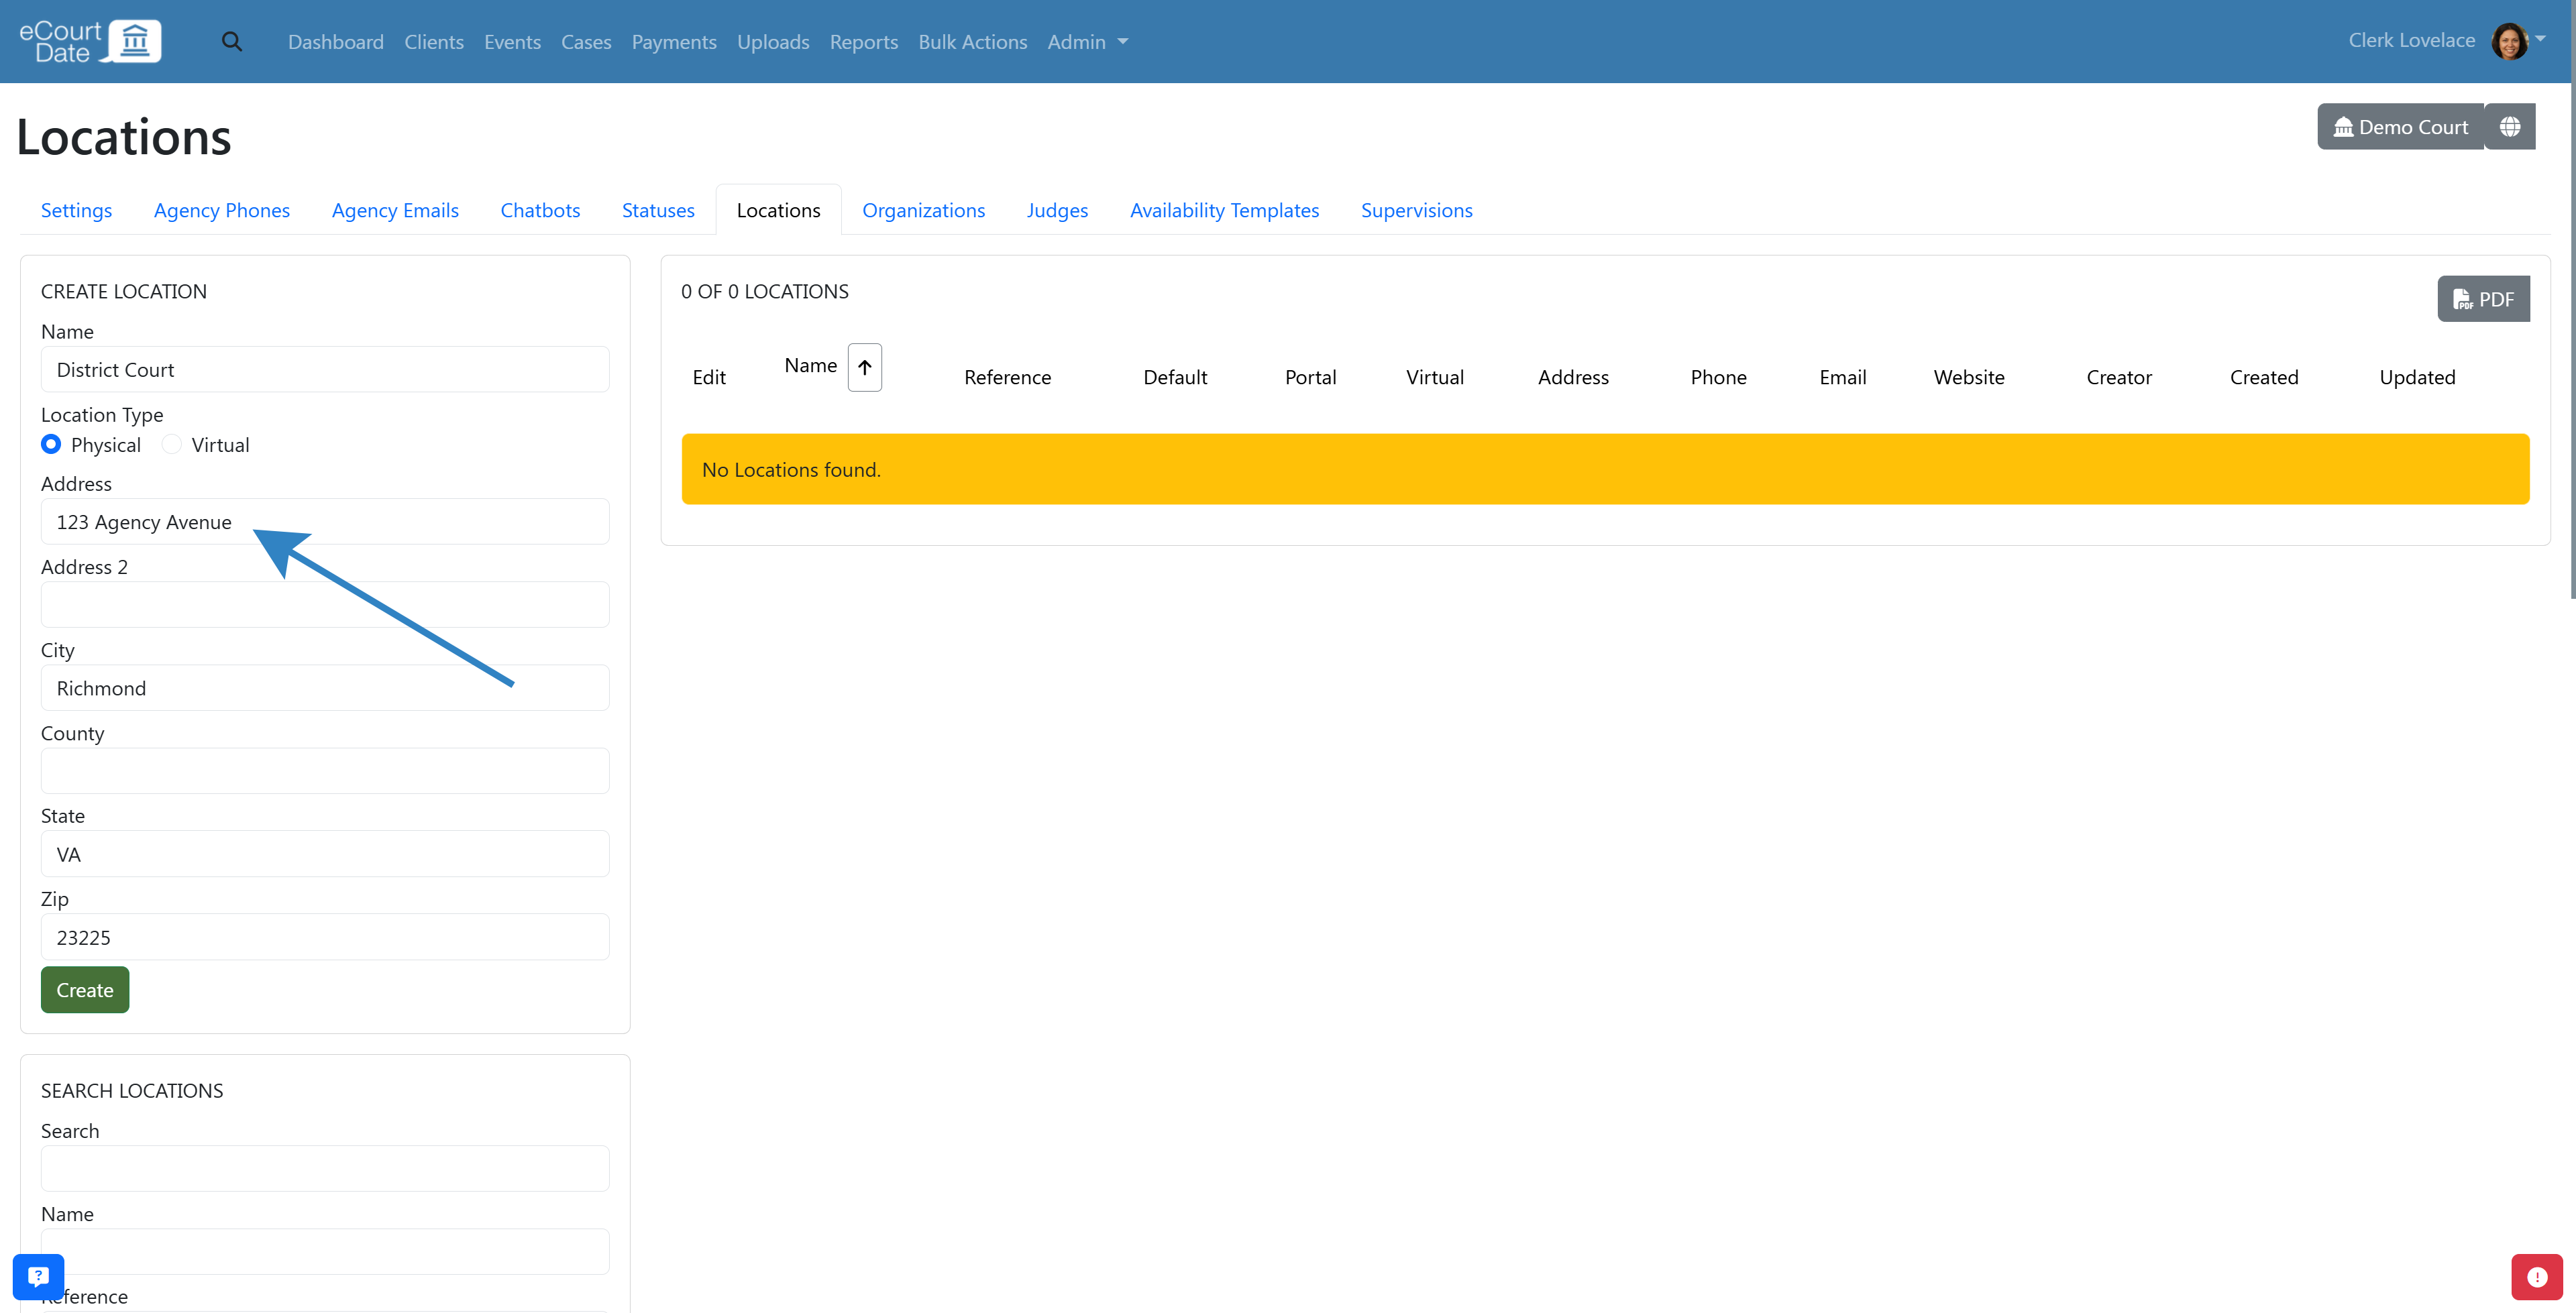
- For a virtual location, select the Virtual option.
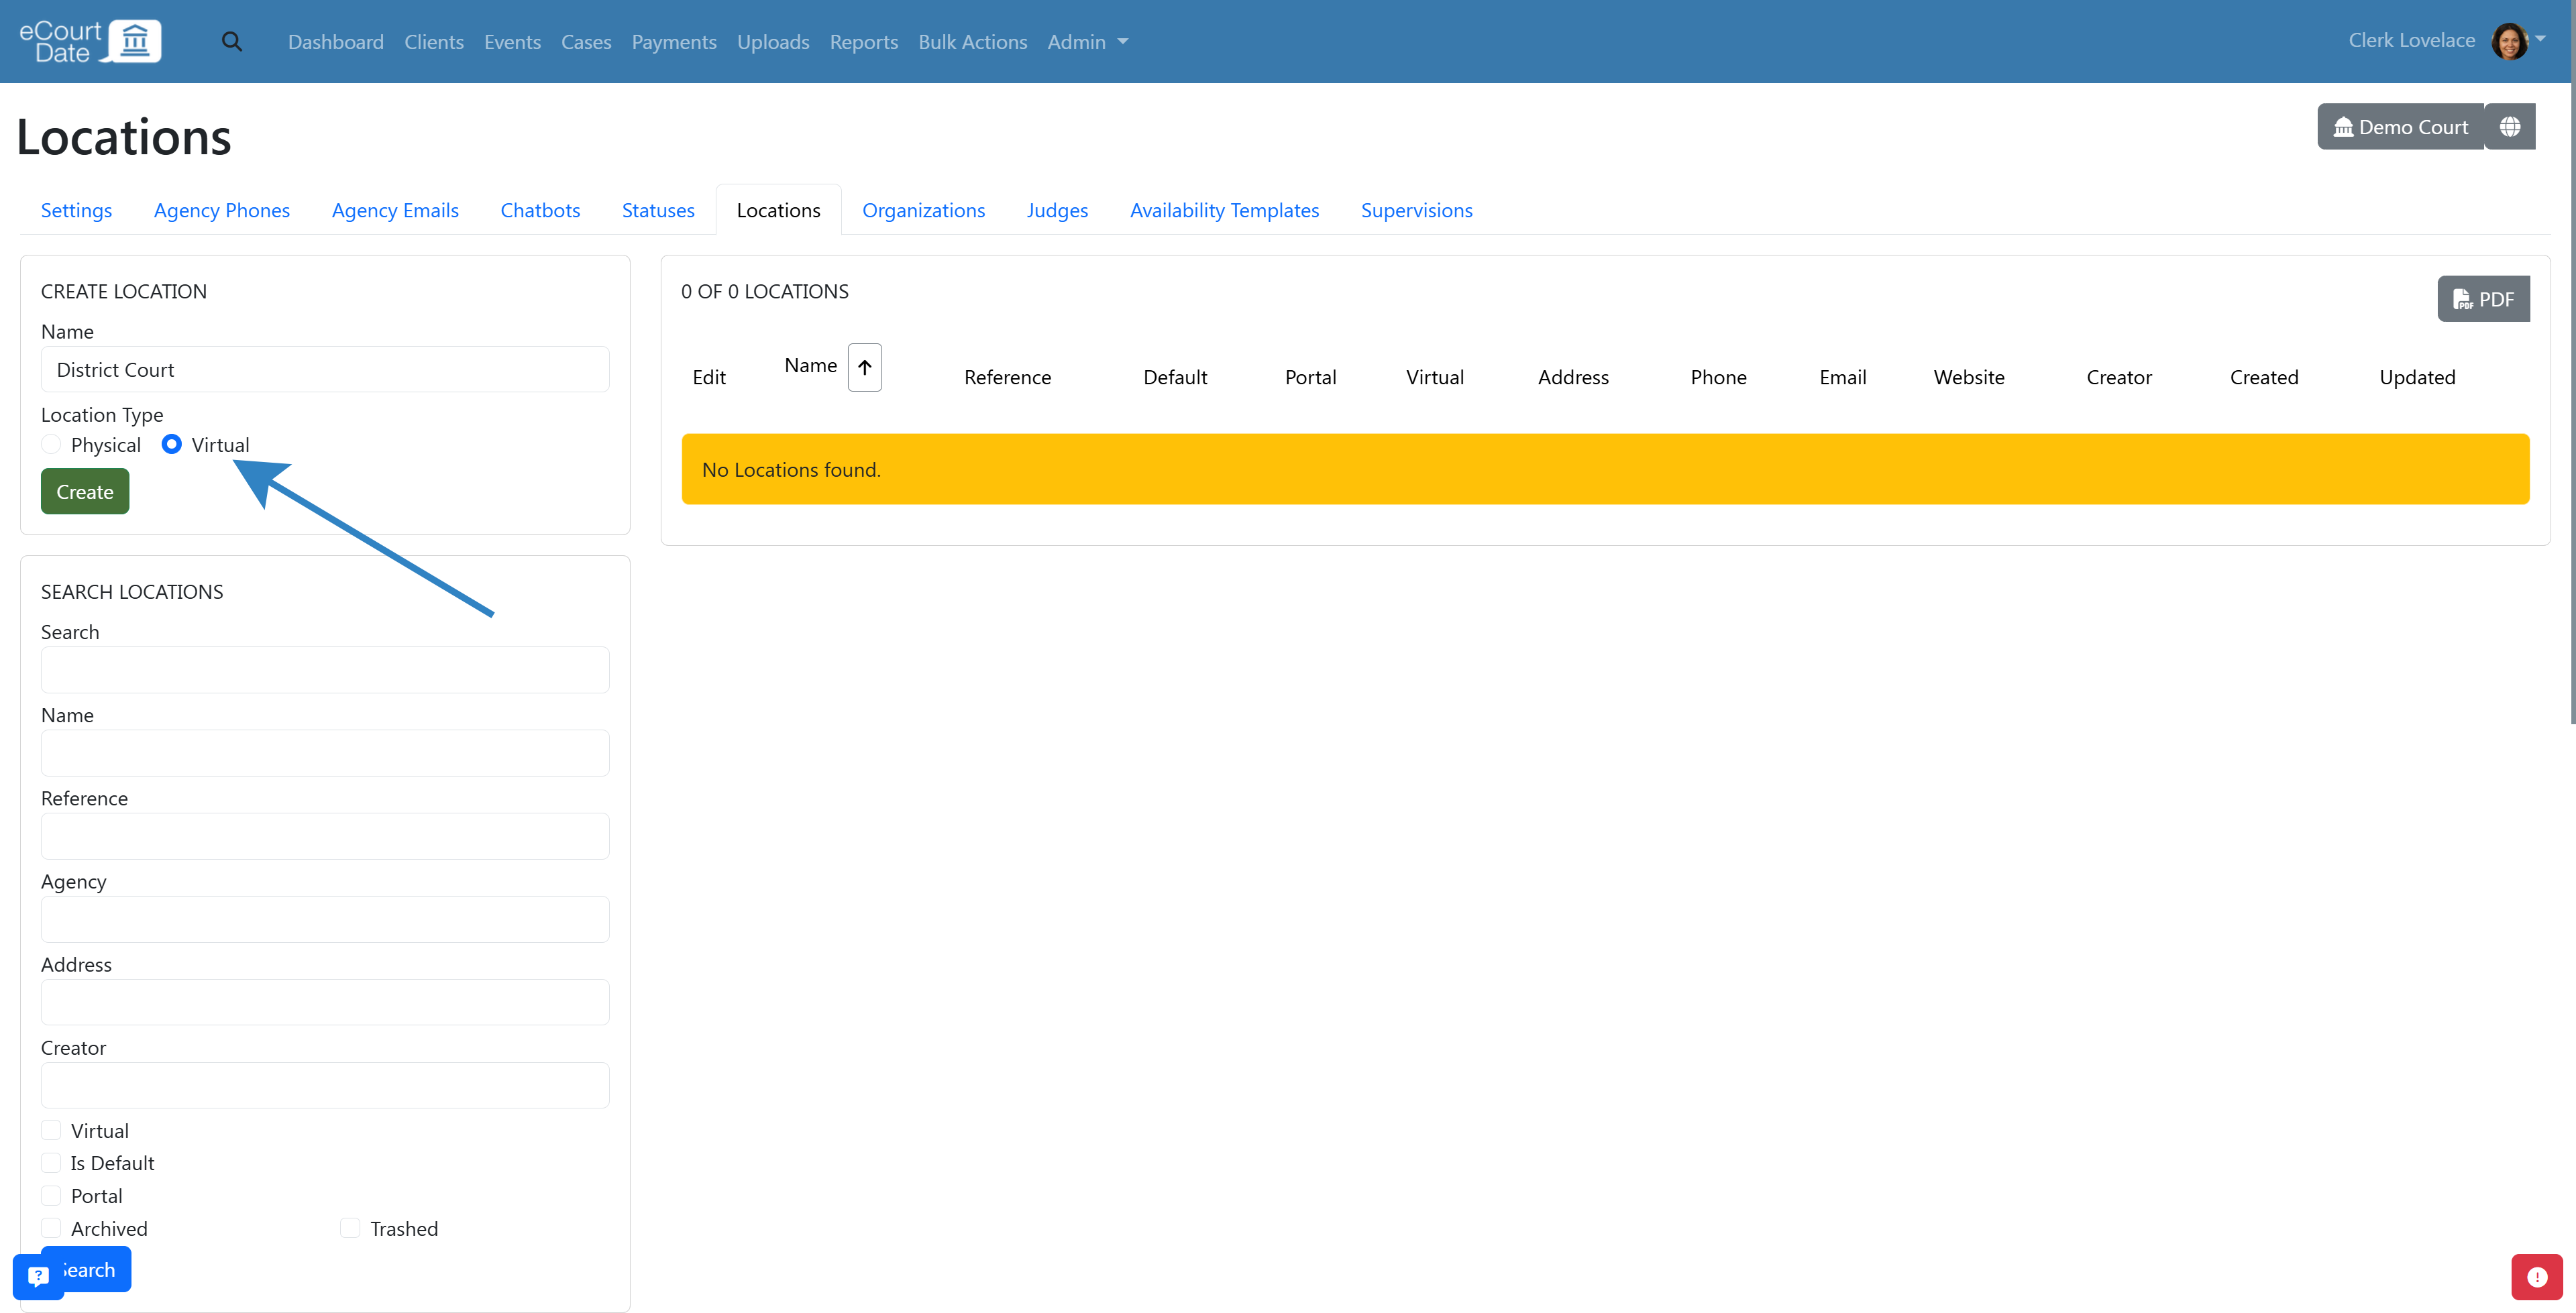
- Click the Create button.
- Review the newly created Location page.
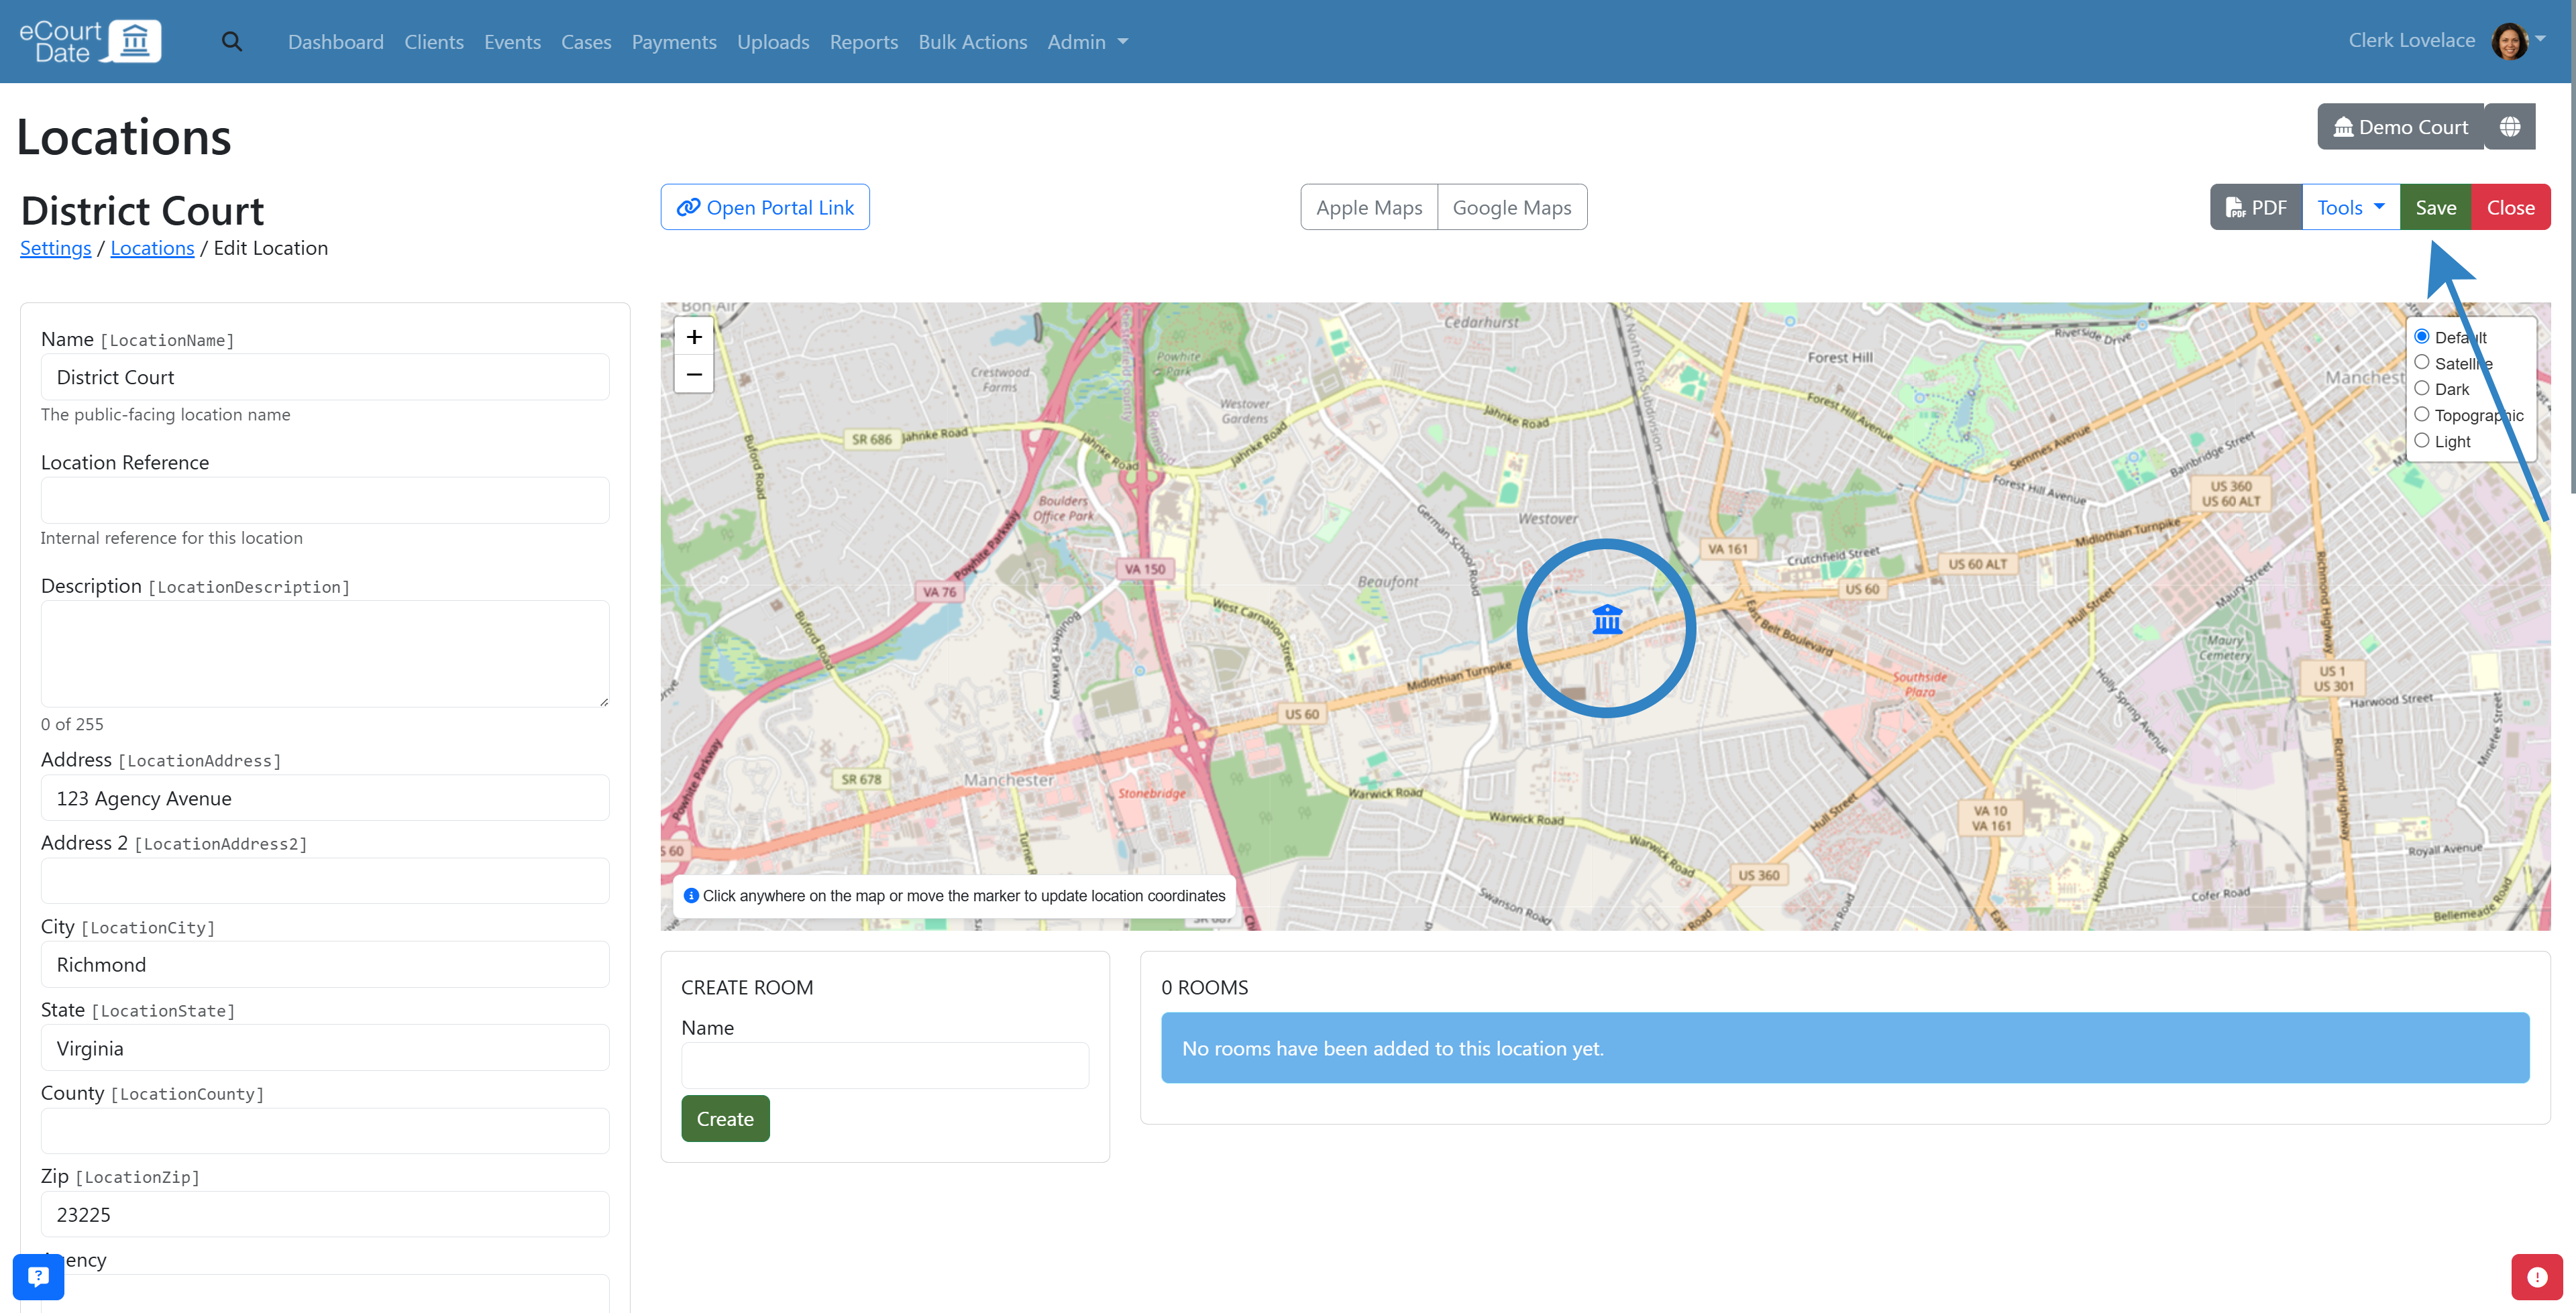
Step 3: Configure a Physical Location
- Verify that a map displays for the location.
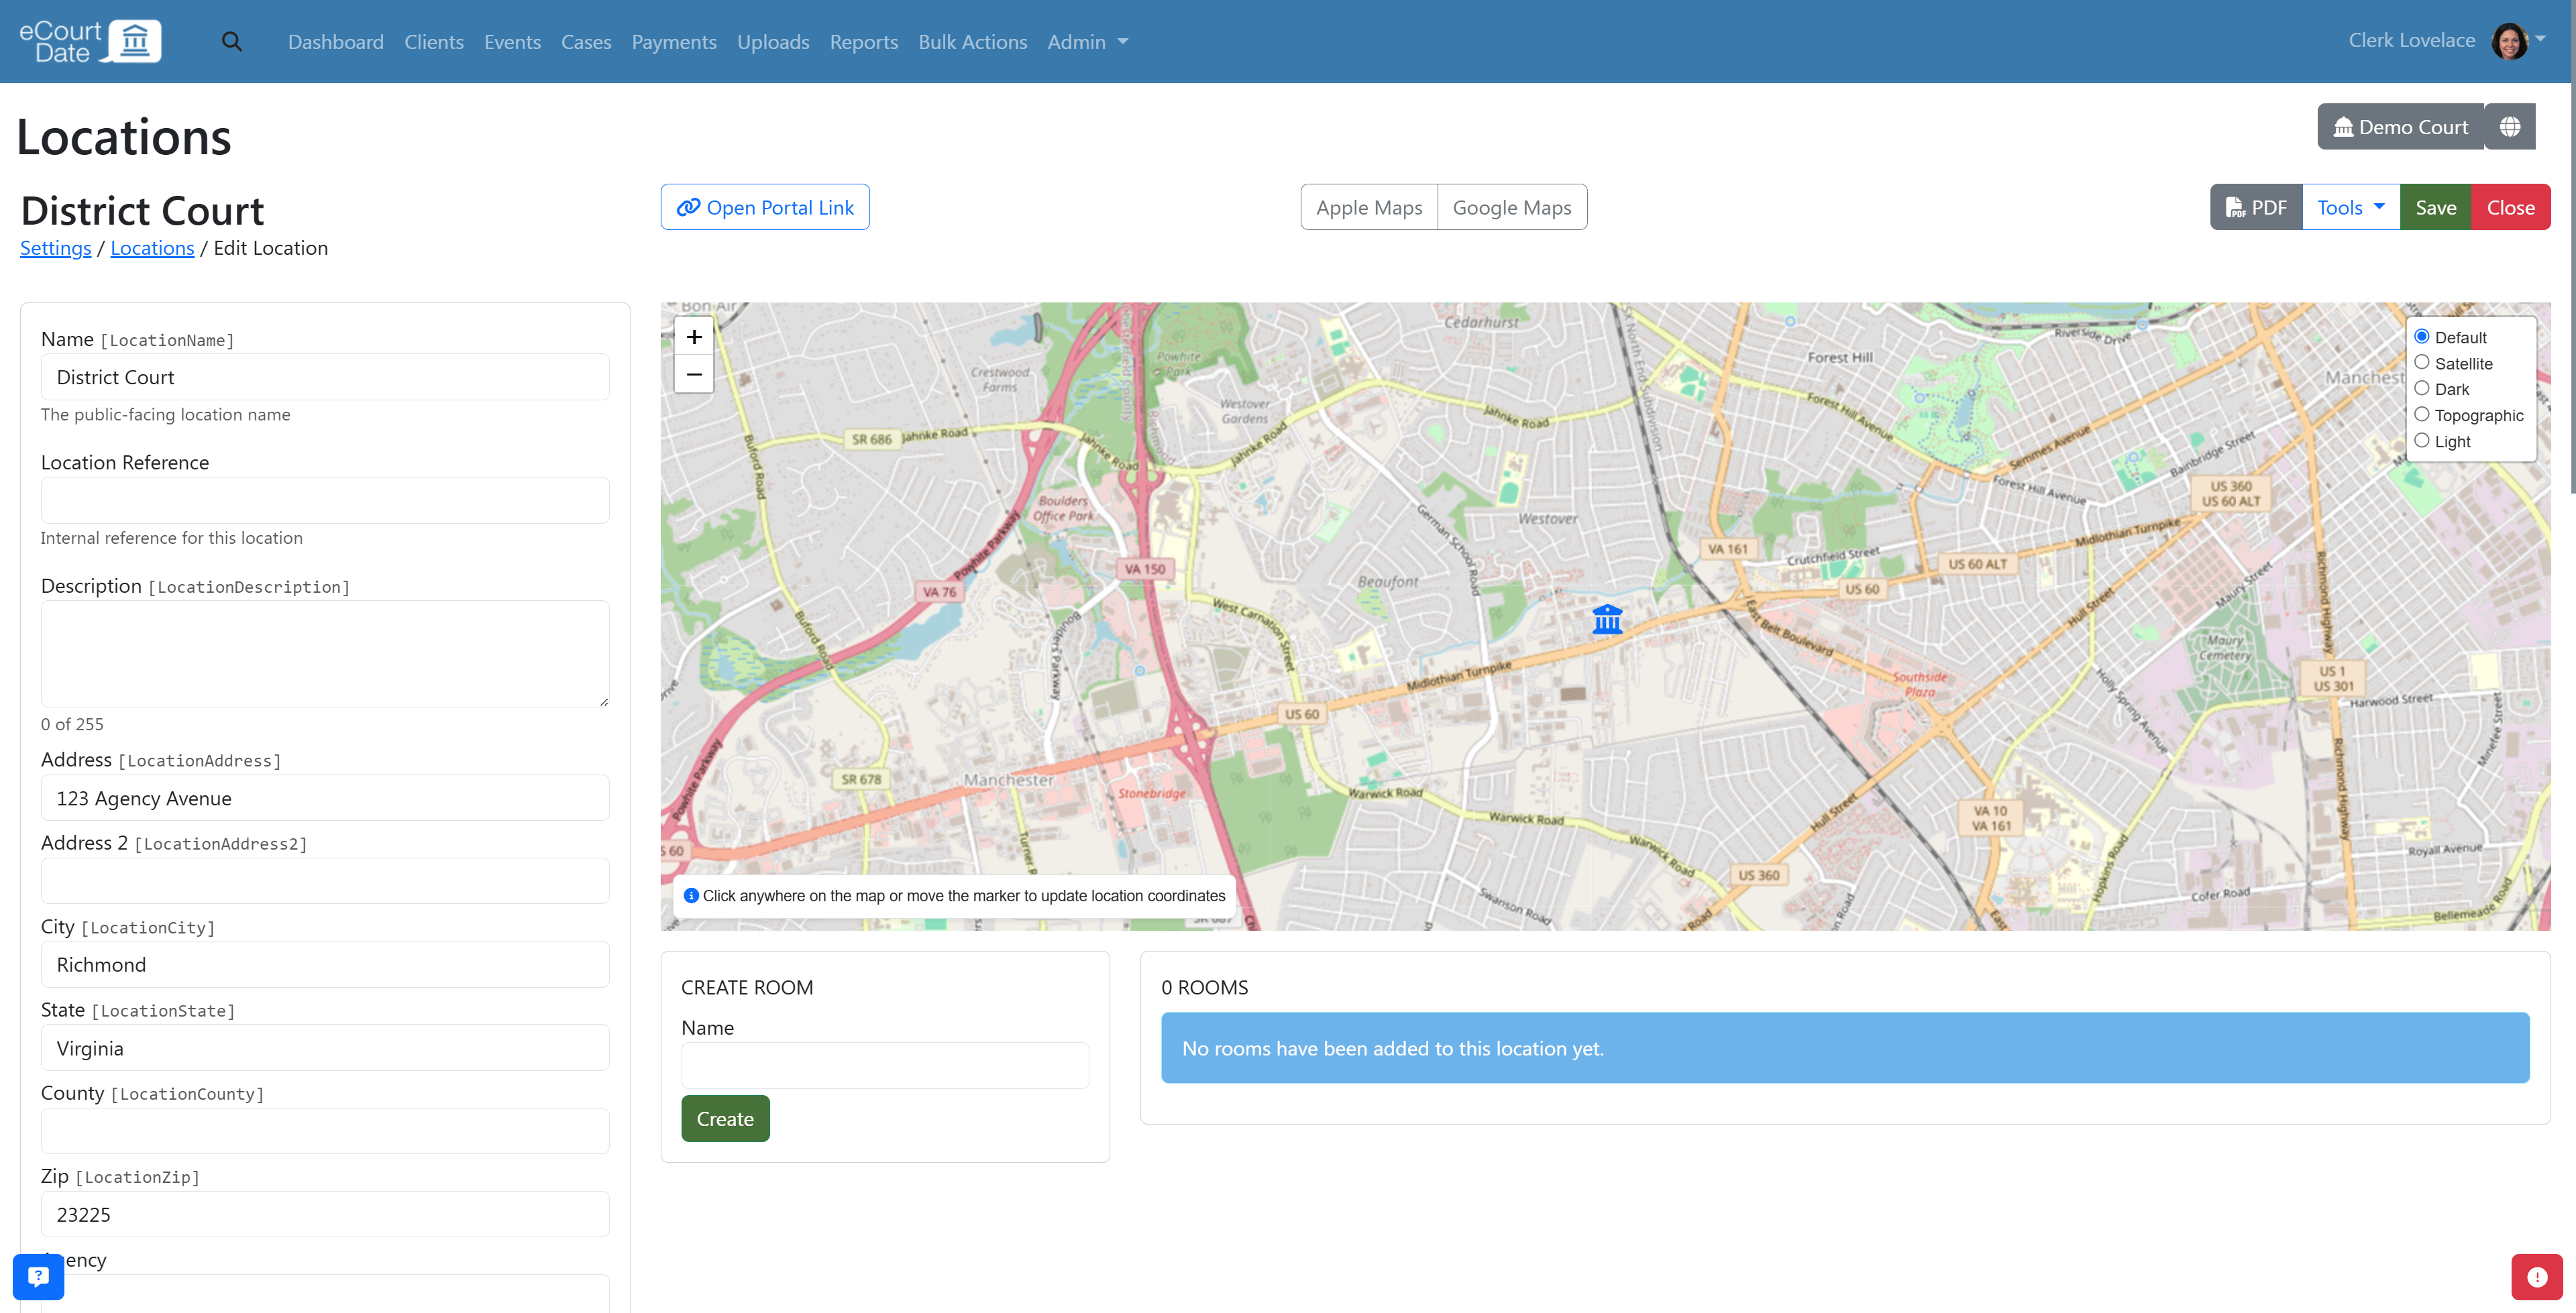
- If no map appears, update the Address field with the correct address.
- Click Save.
Step 4: Configure a Virtual Location
- Enter the meeting URL in the Virtual Link field.
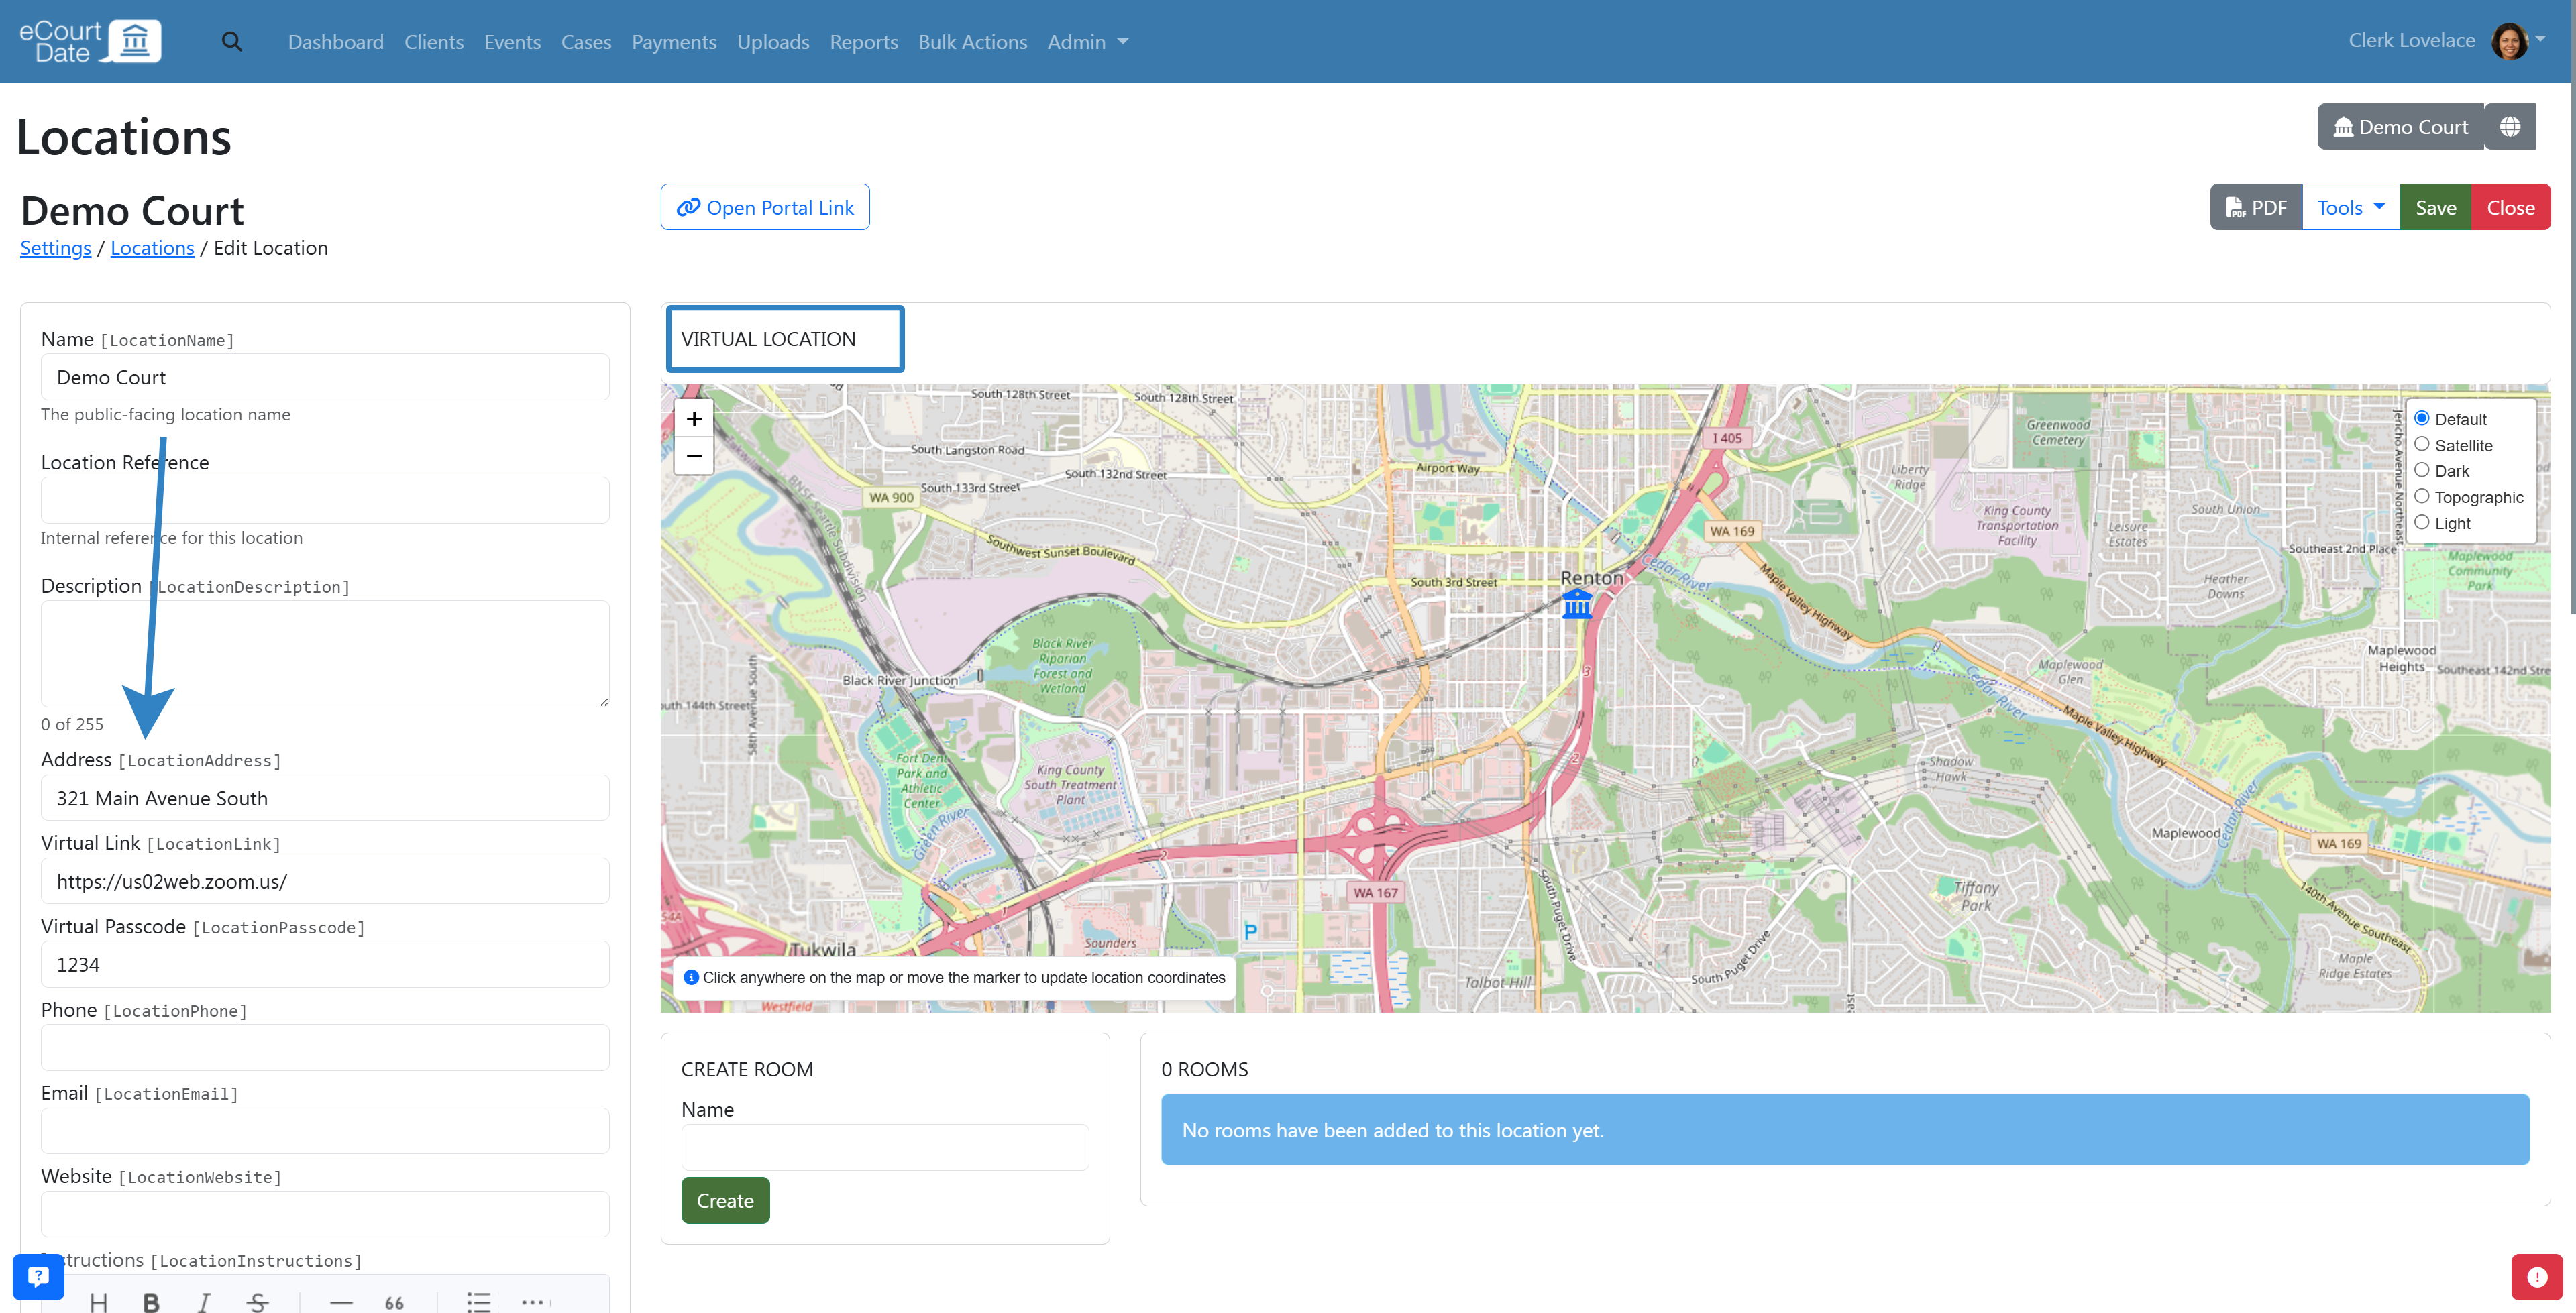
- Click Save.

- Verify that a button appears to enter the virtual location.

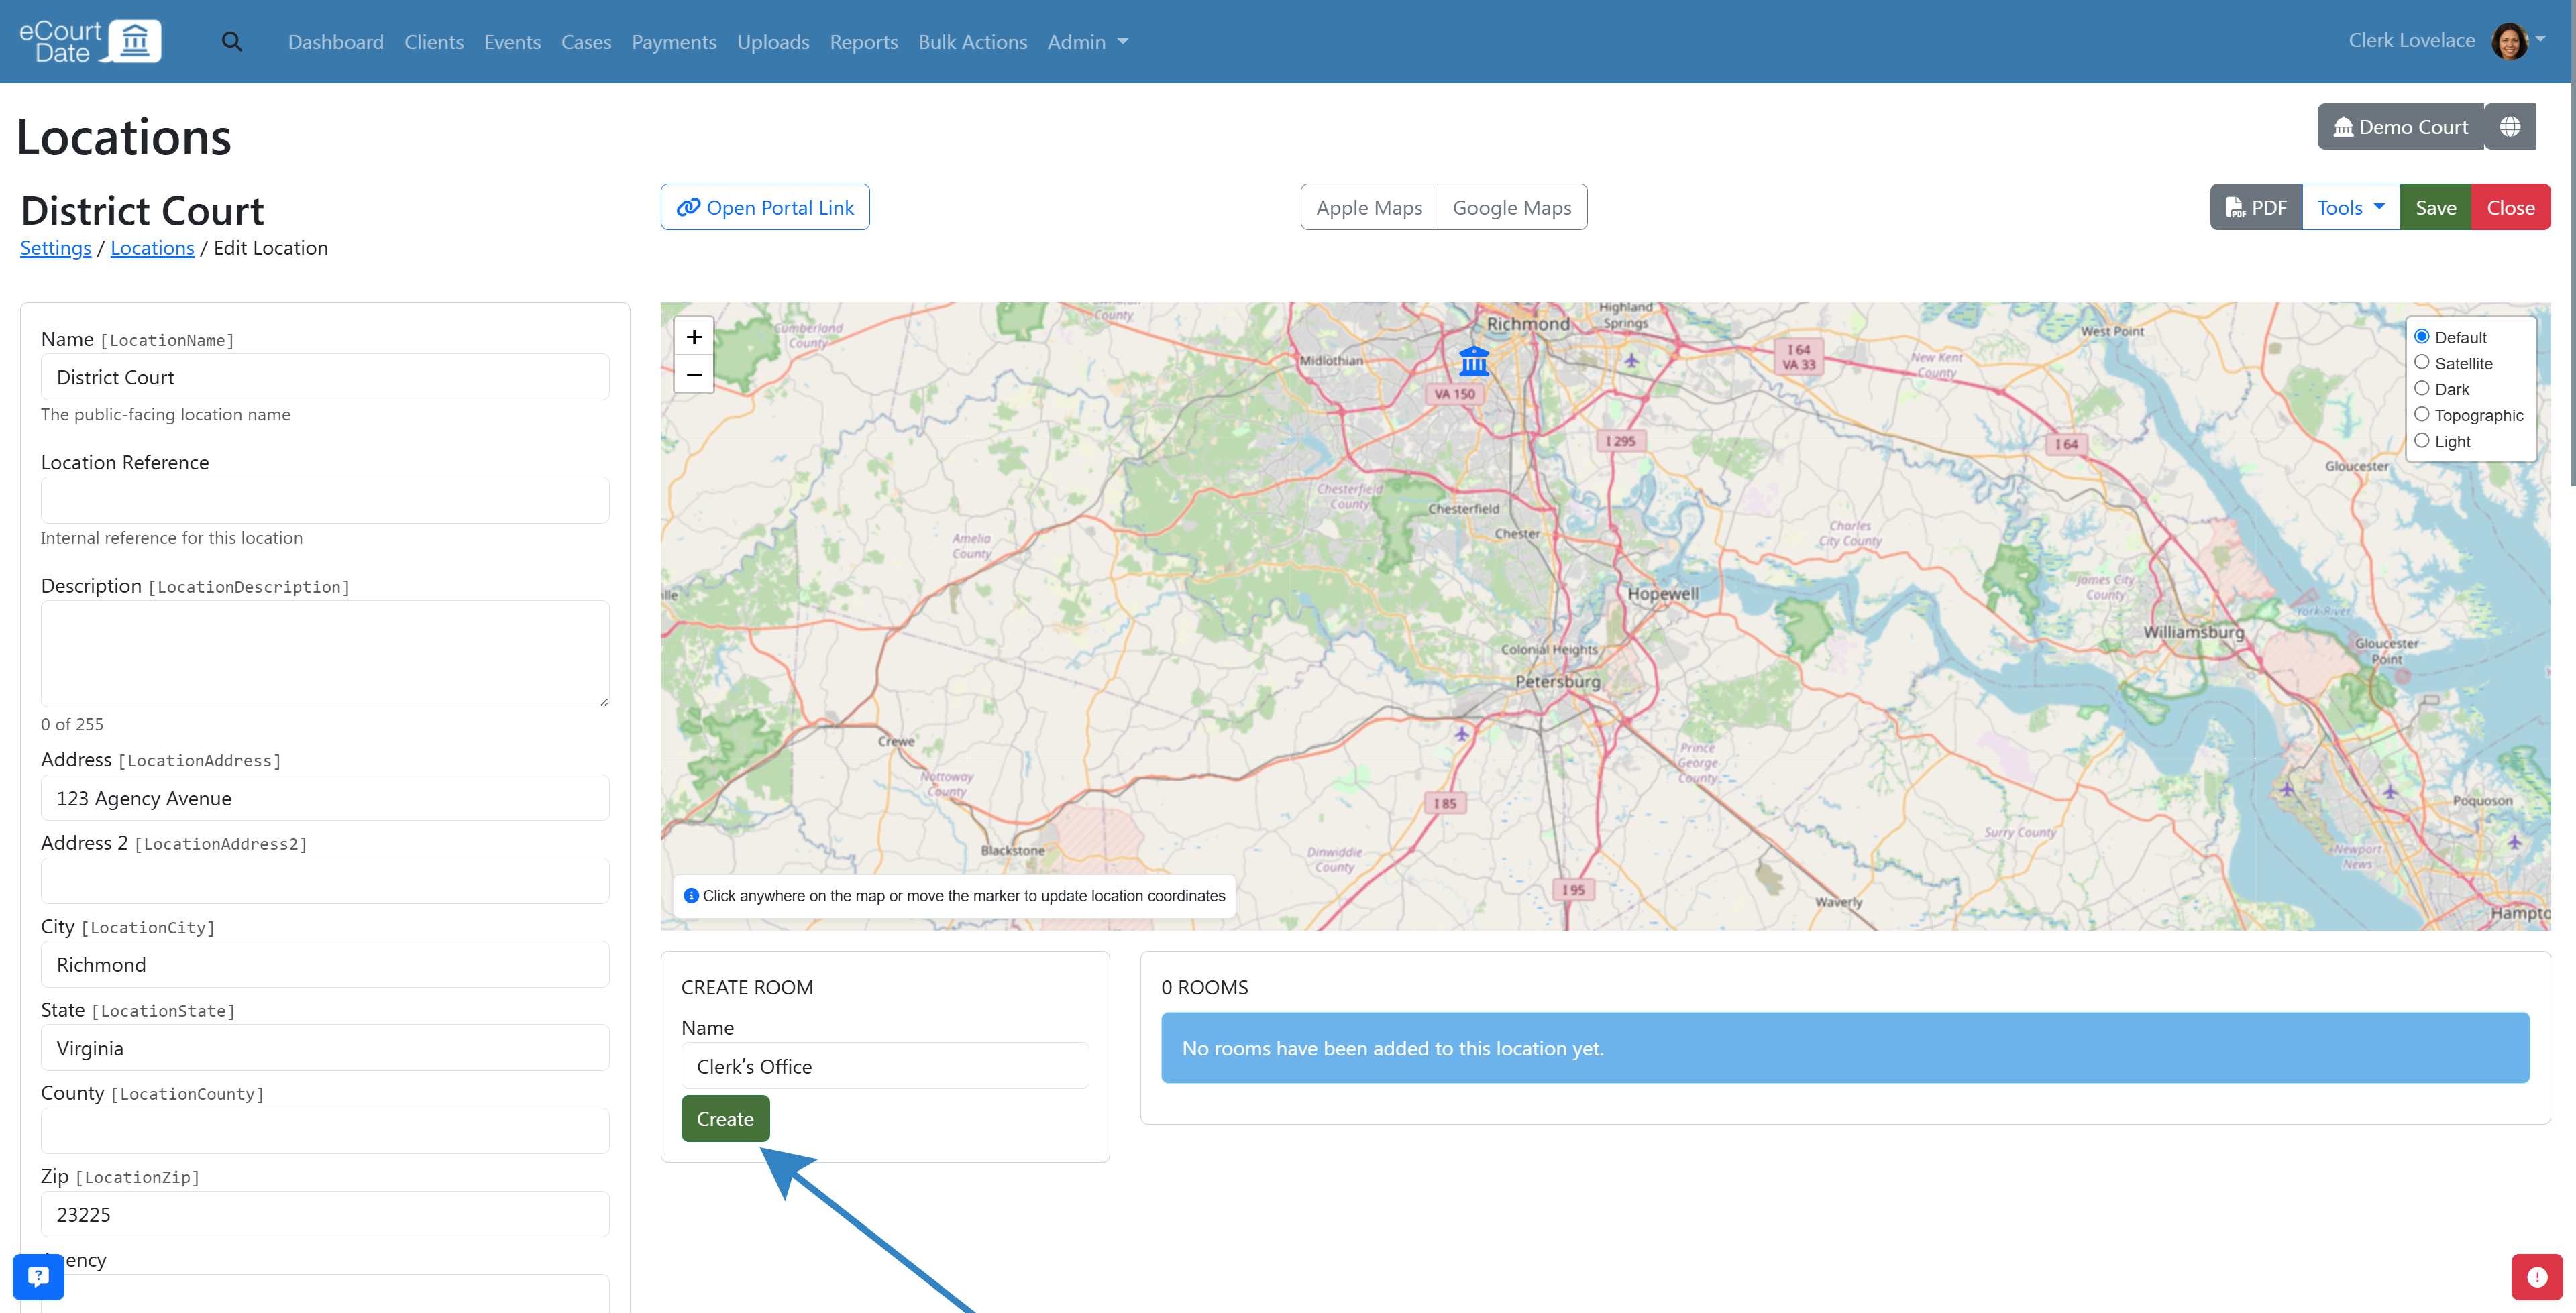
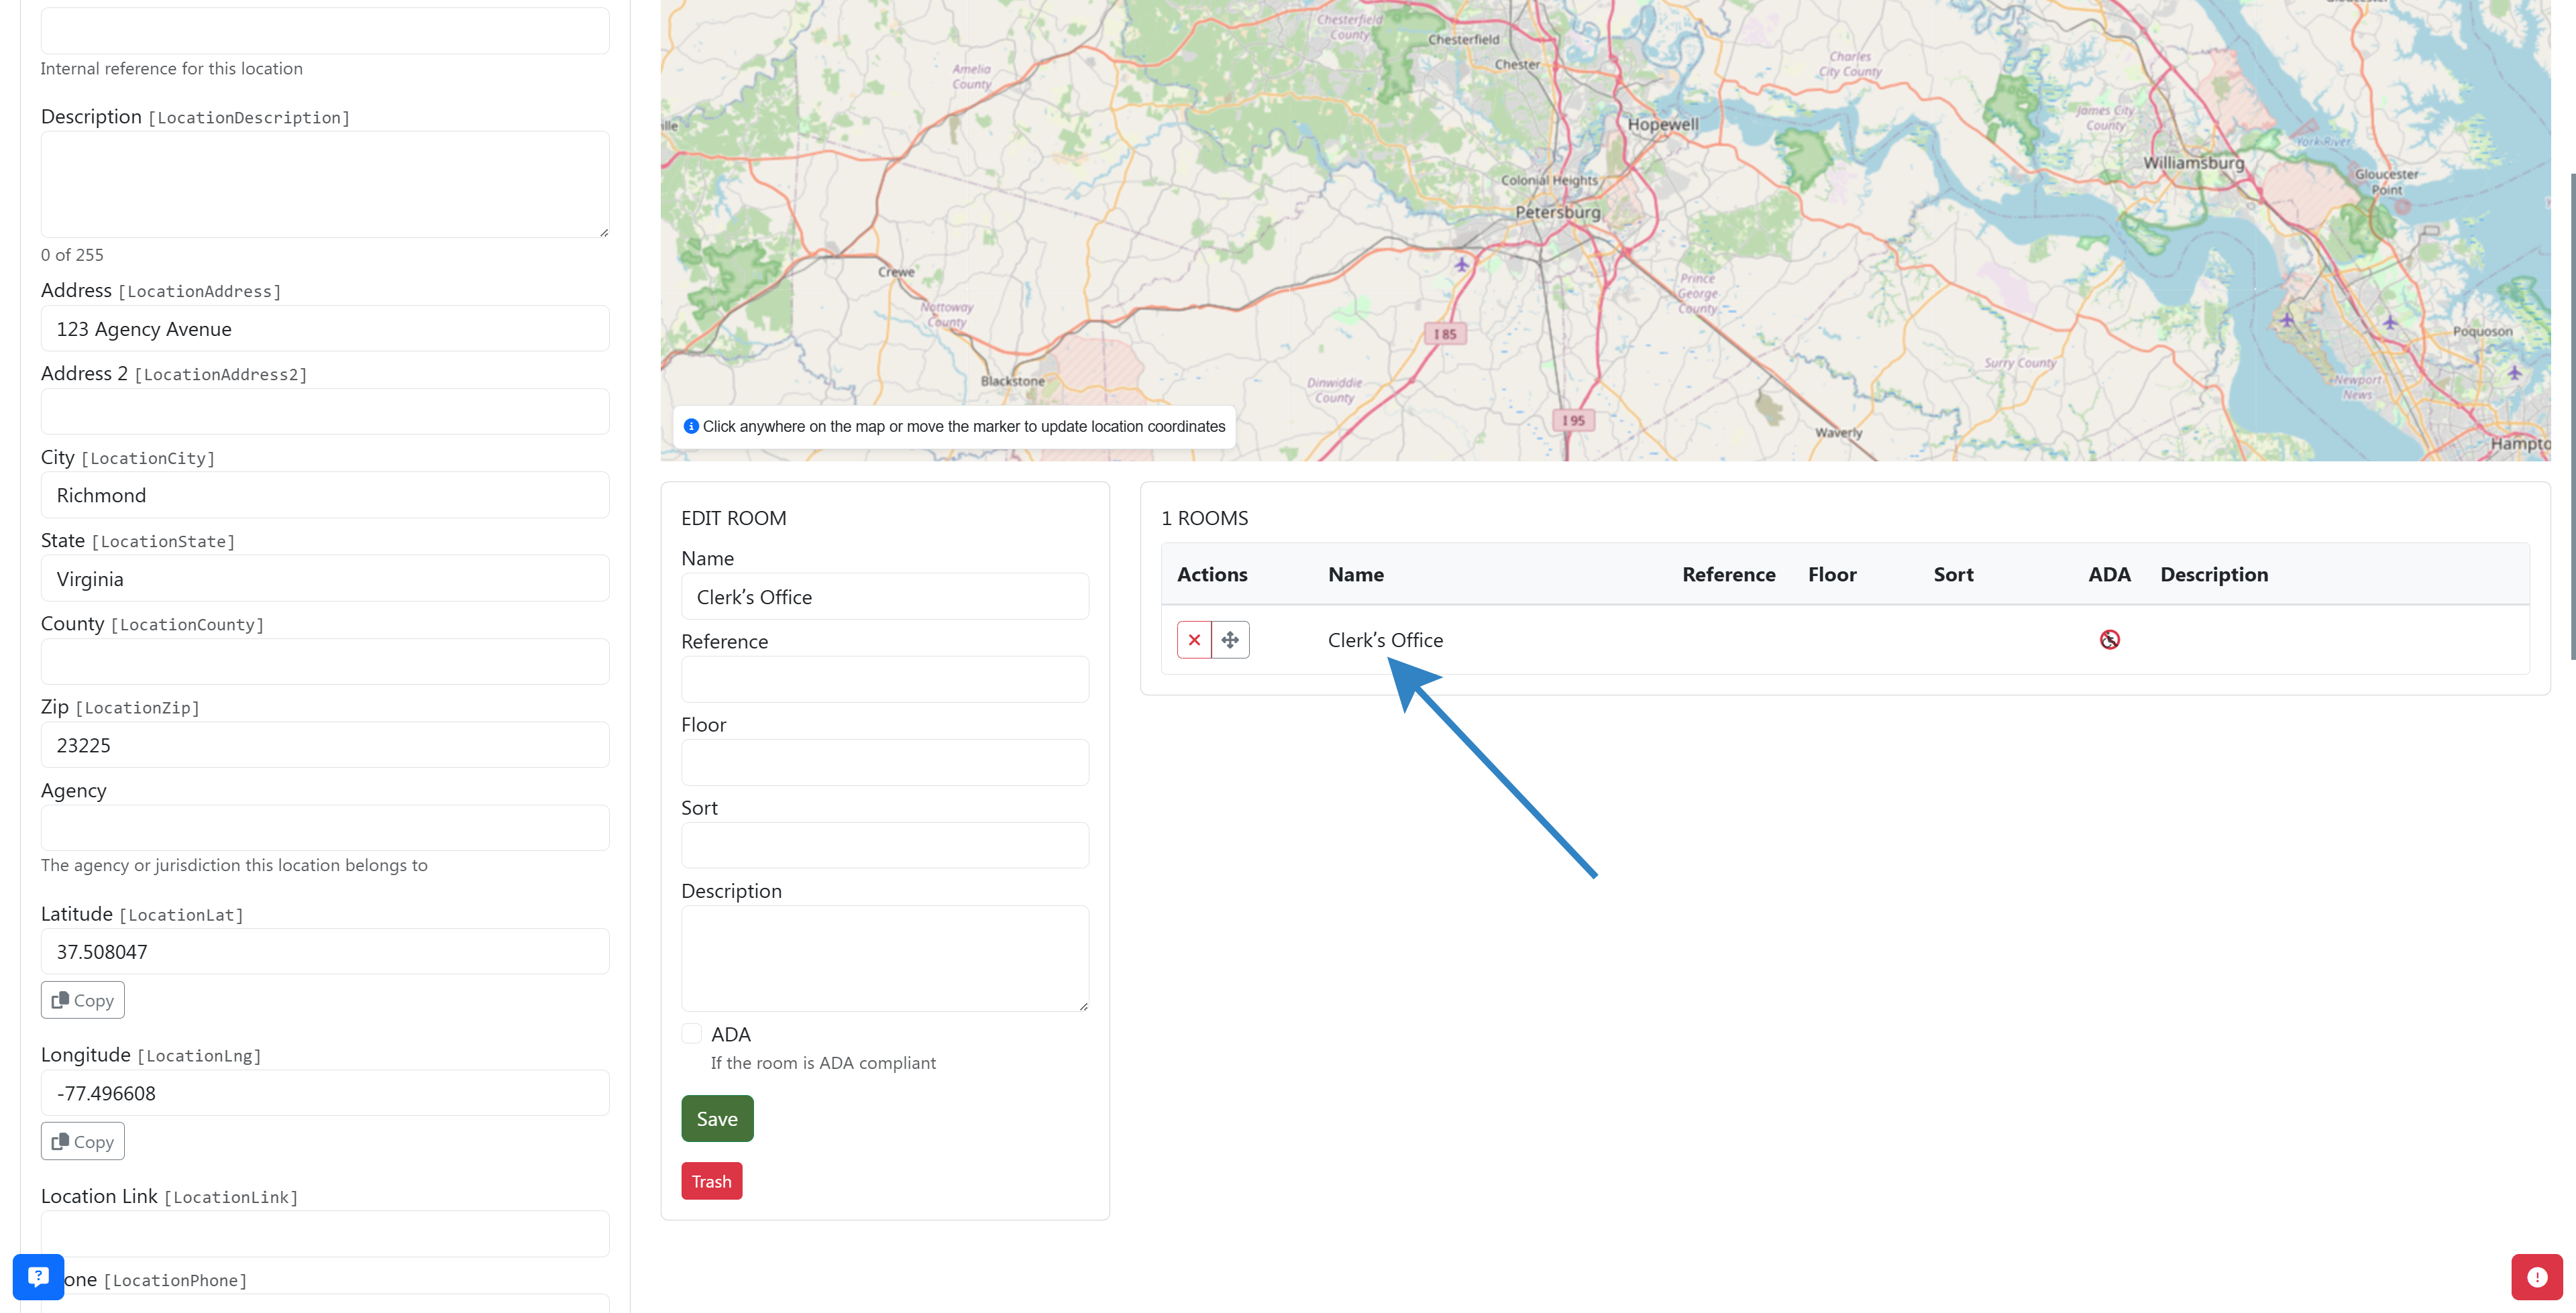
Step 5: Create Rooms
Each location can have multiple rooms with unique settings, including business hours and a default judge.
- Open the location you want to edit.
- Fill in the Create Room form.
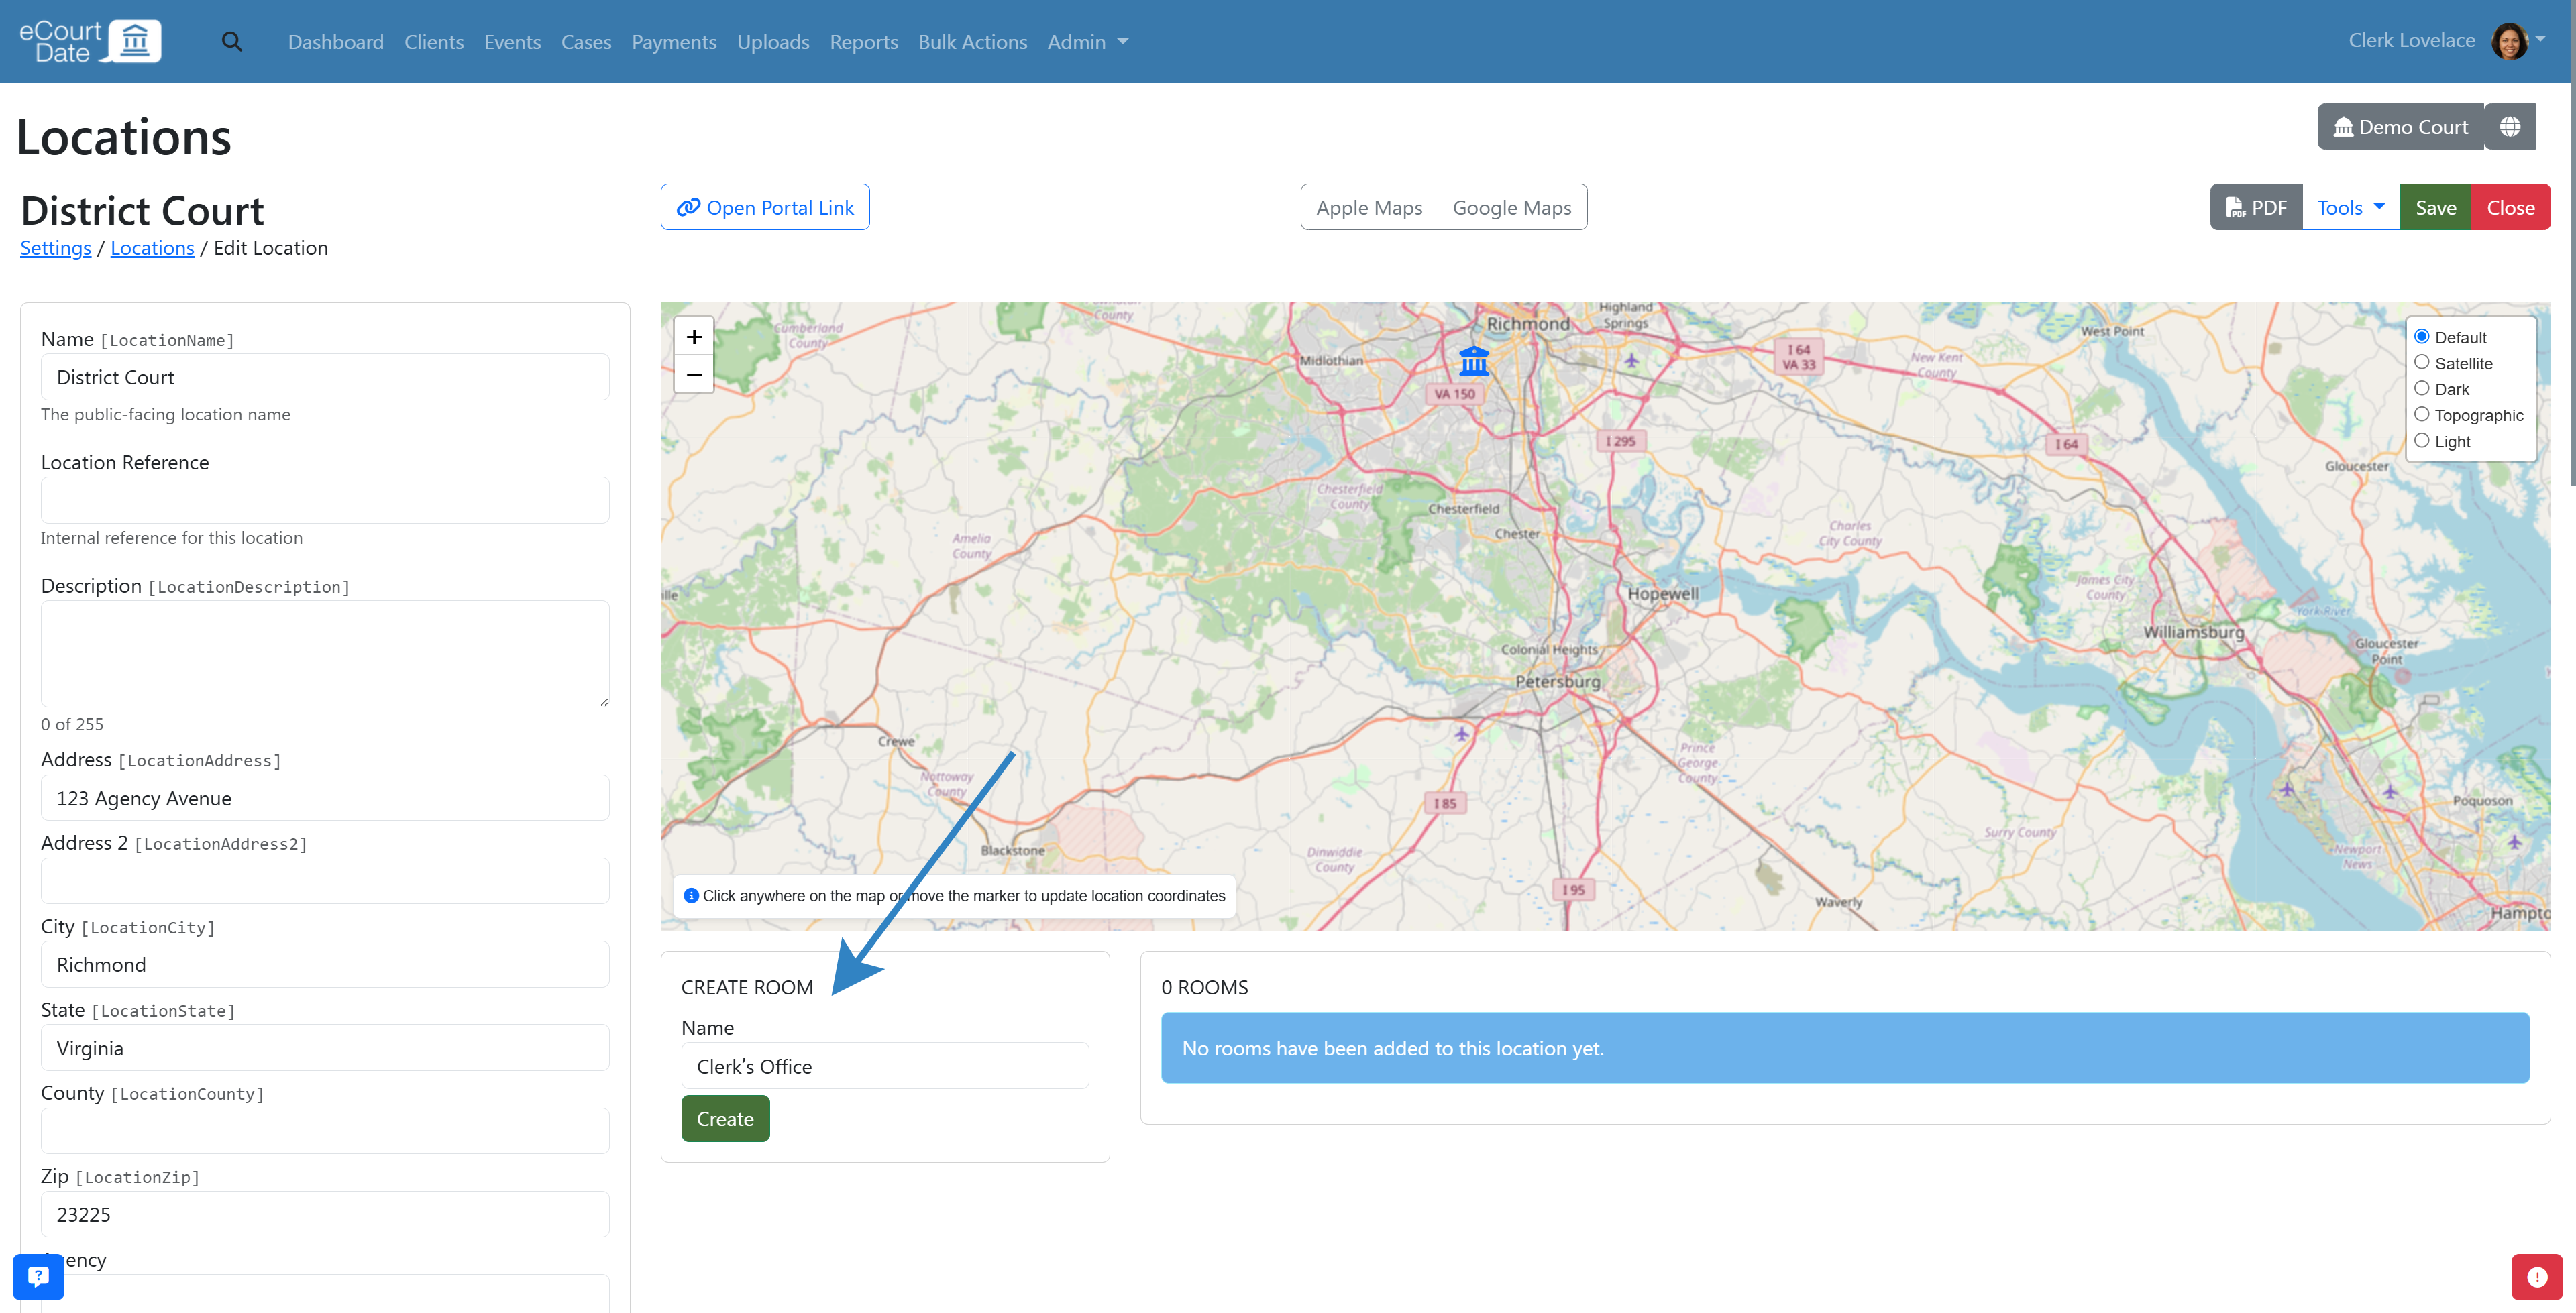
- Click the Create button.
- Review the room in the list of rooms.
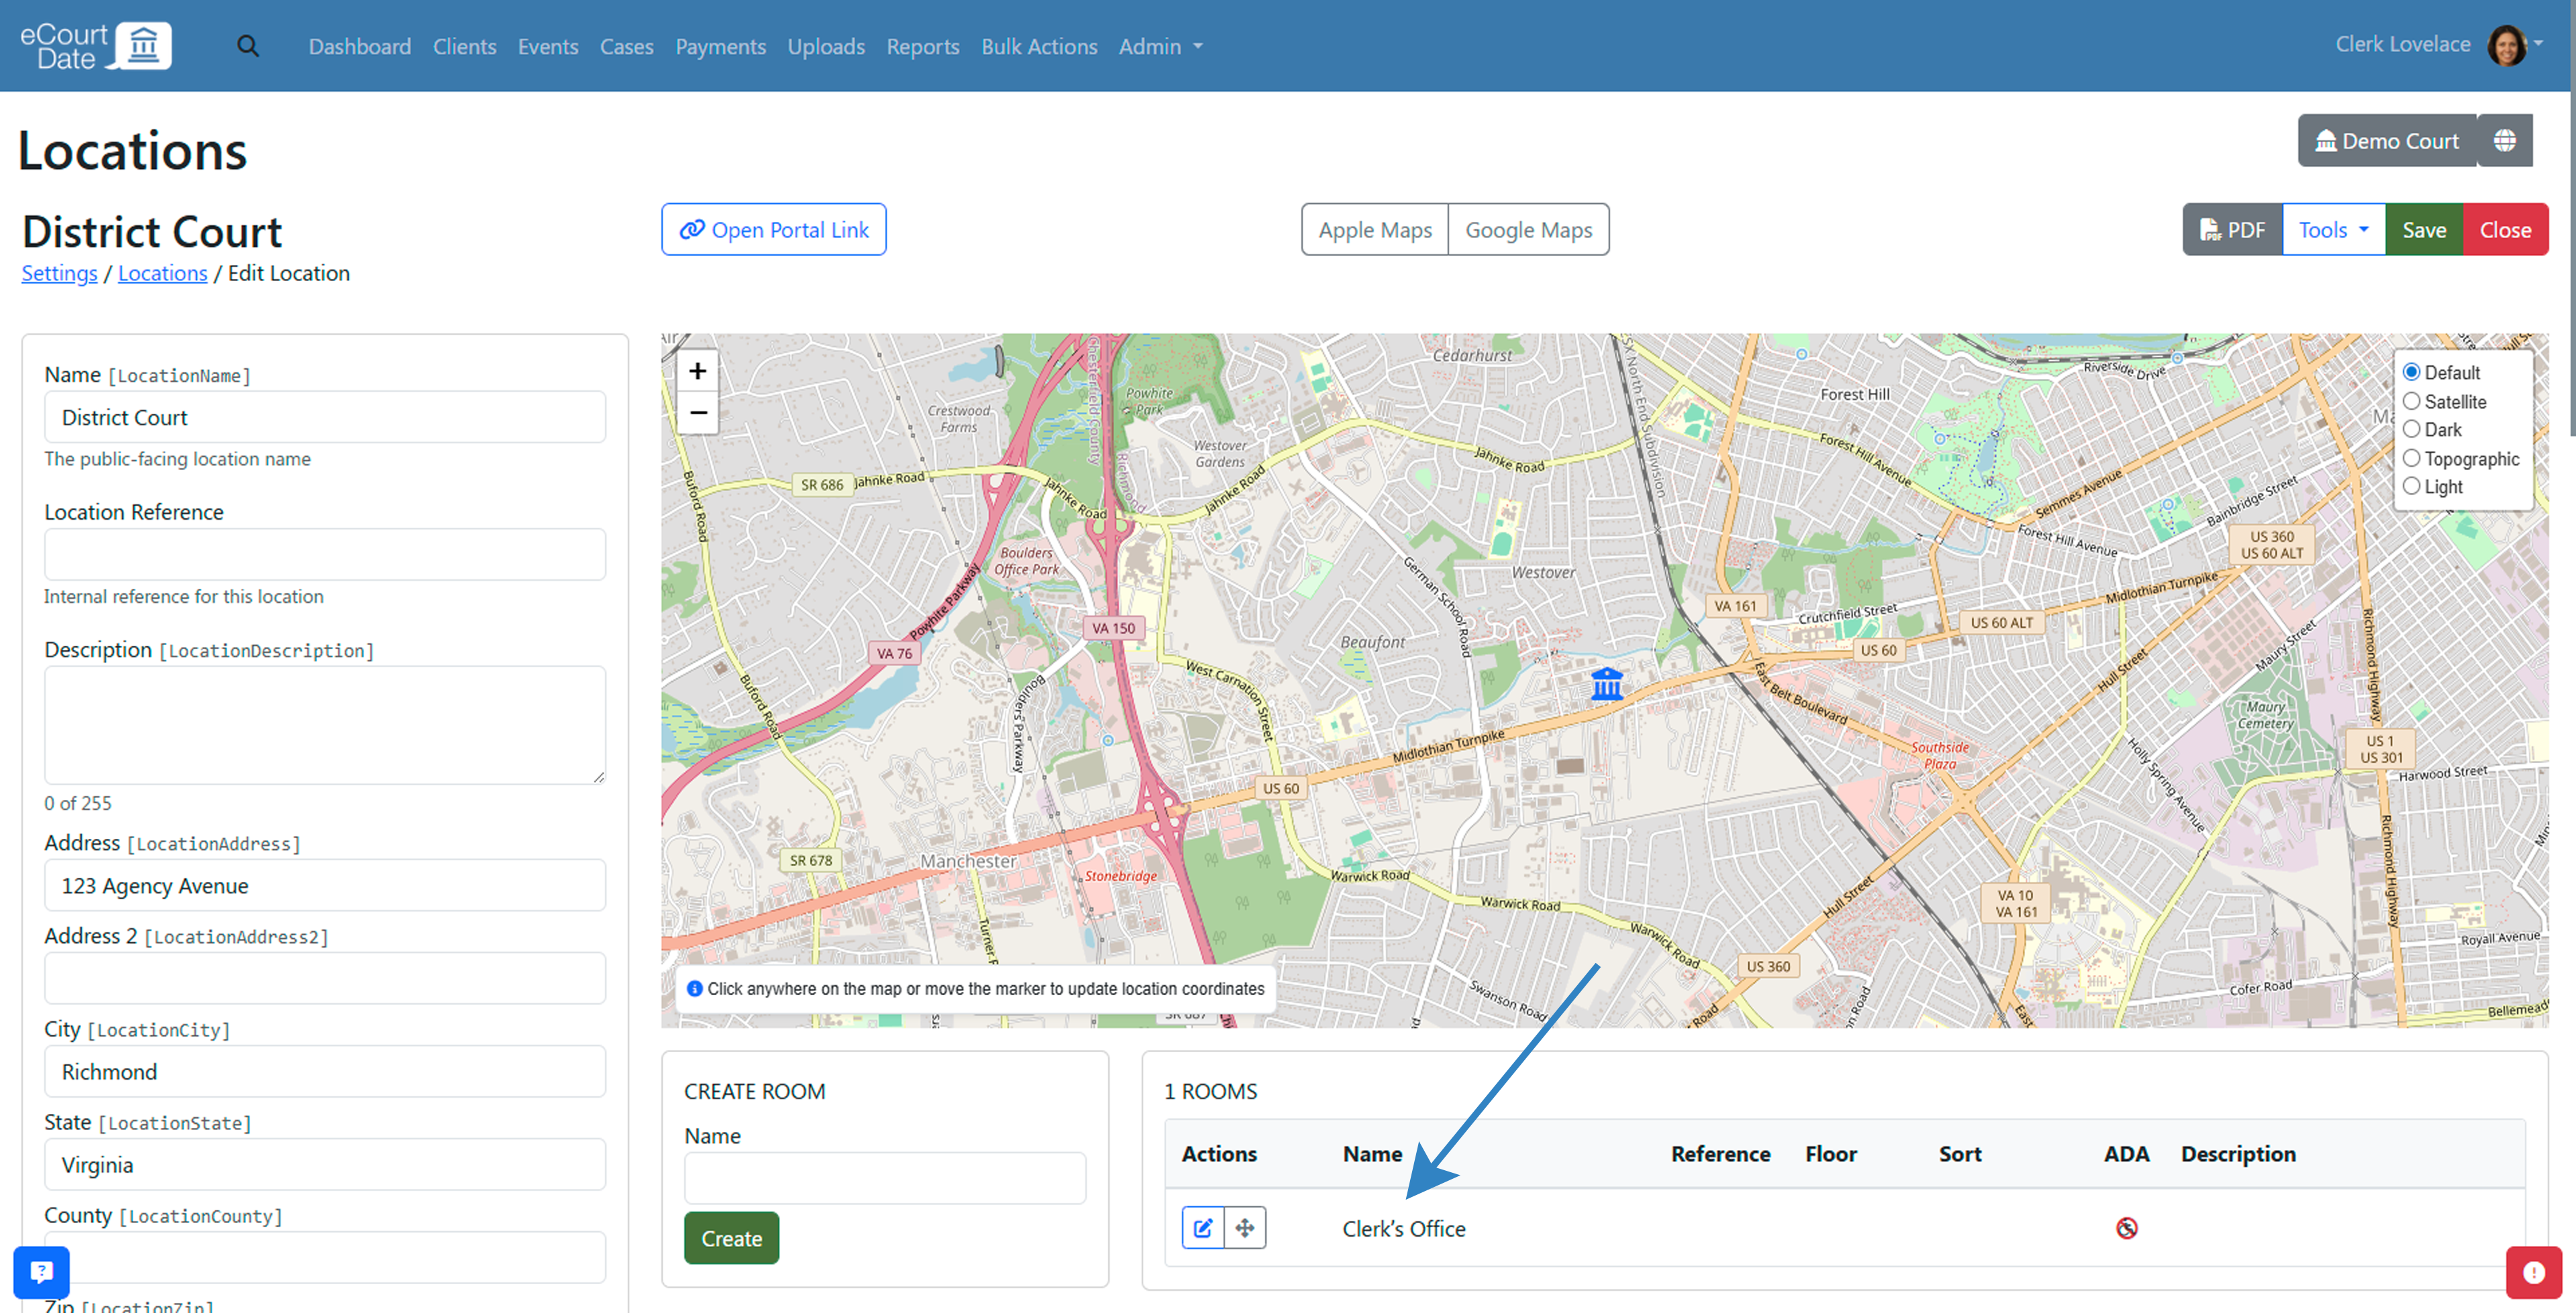
- Click Edit to modify room settings.
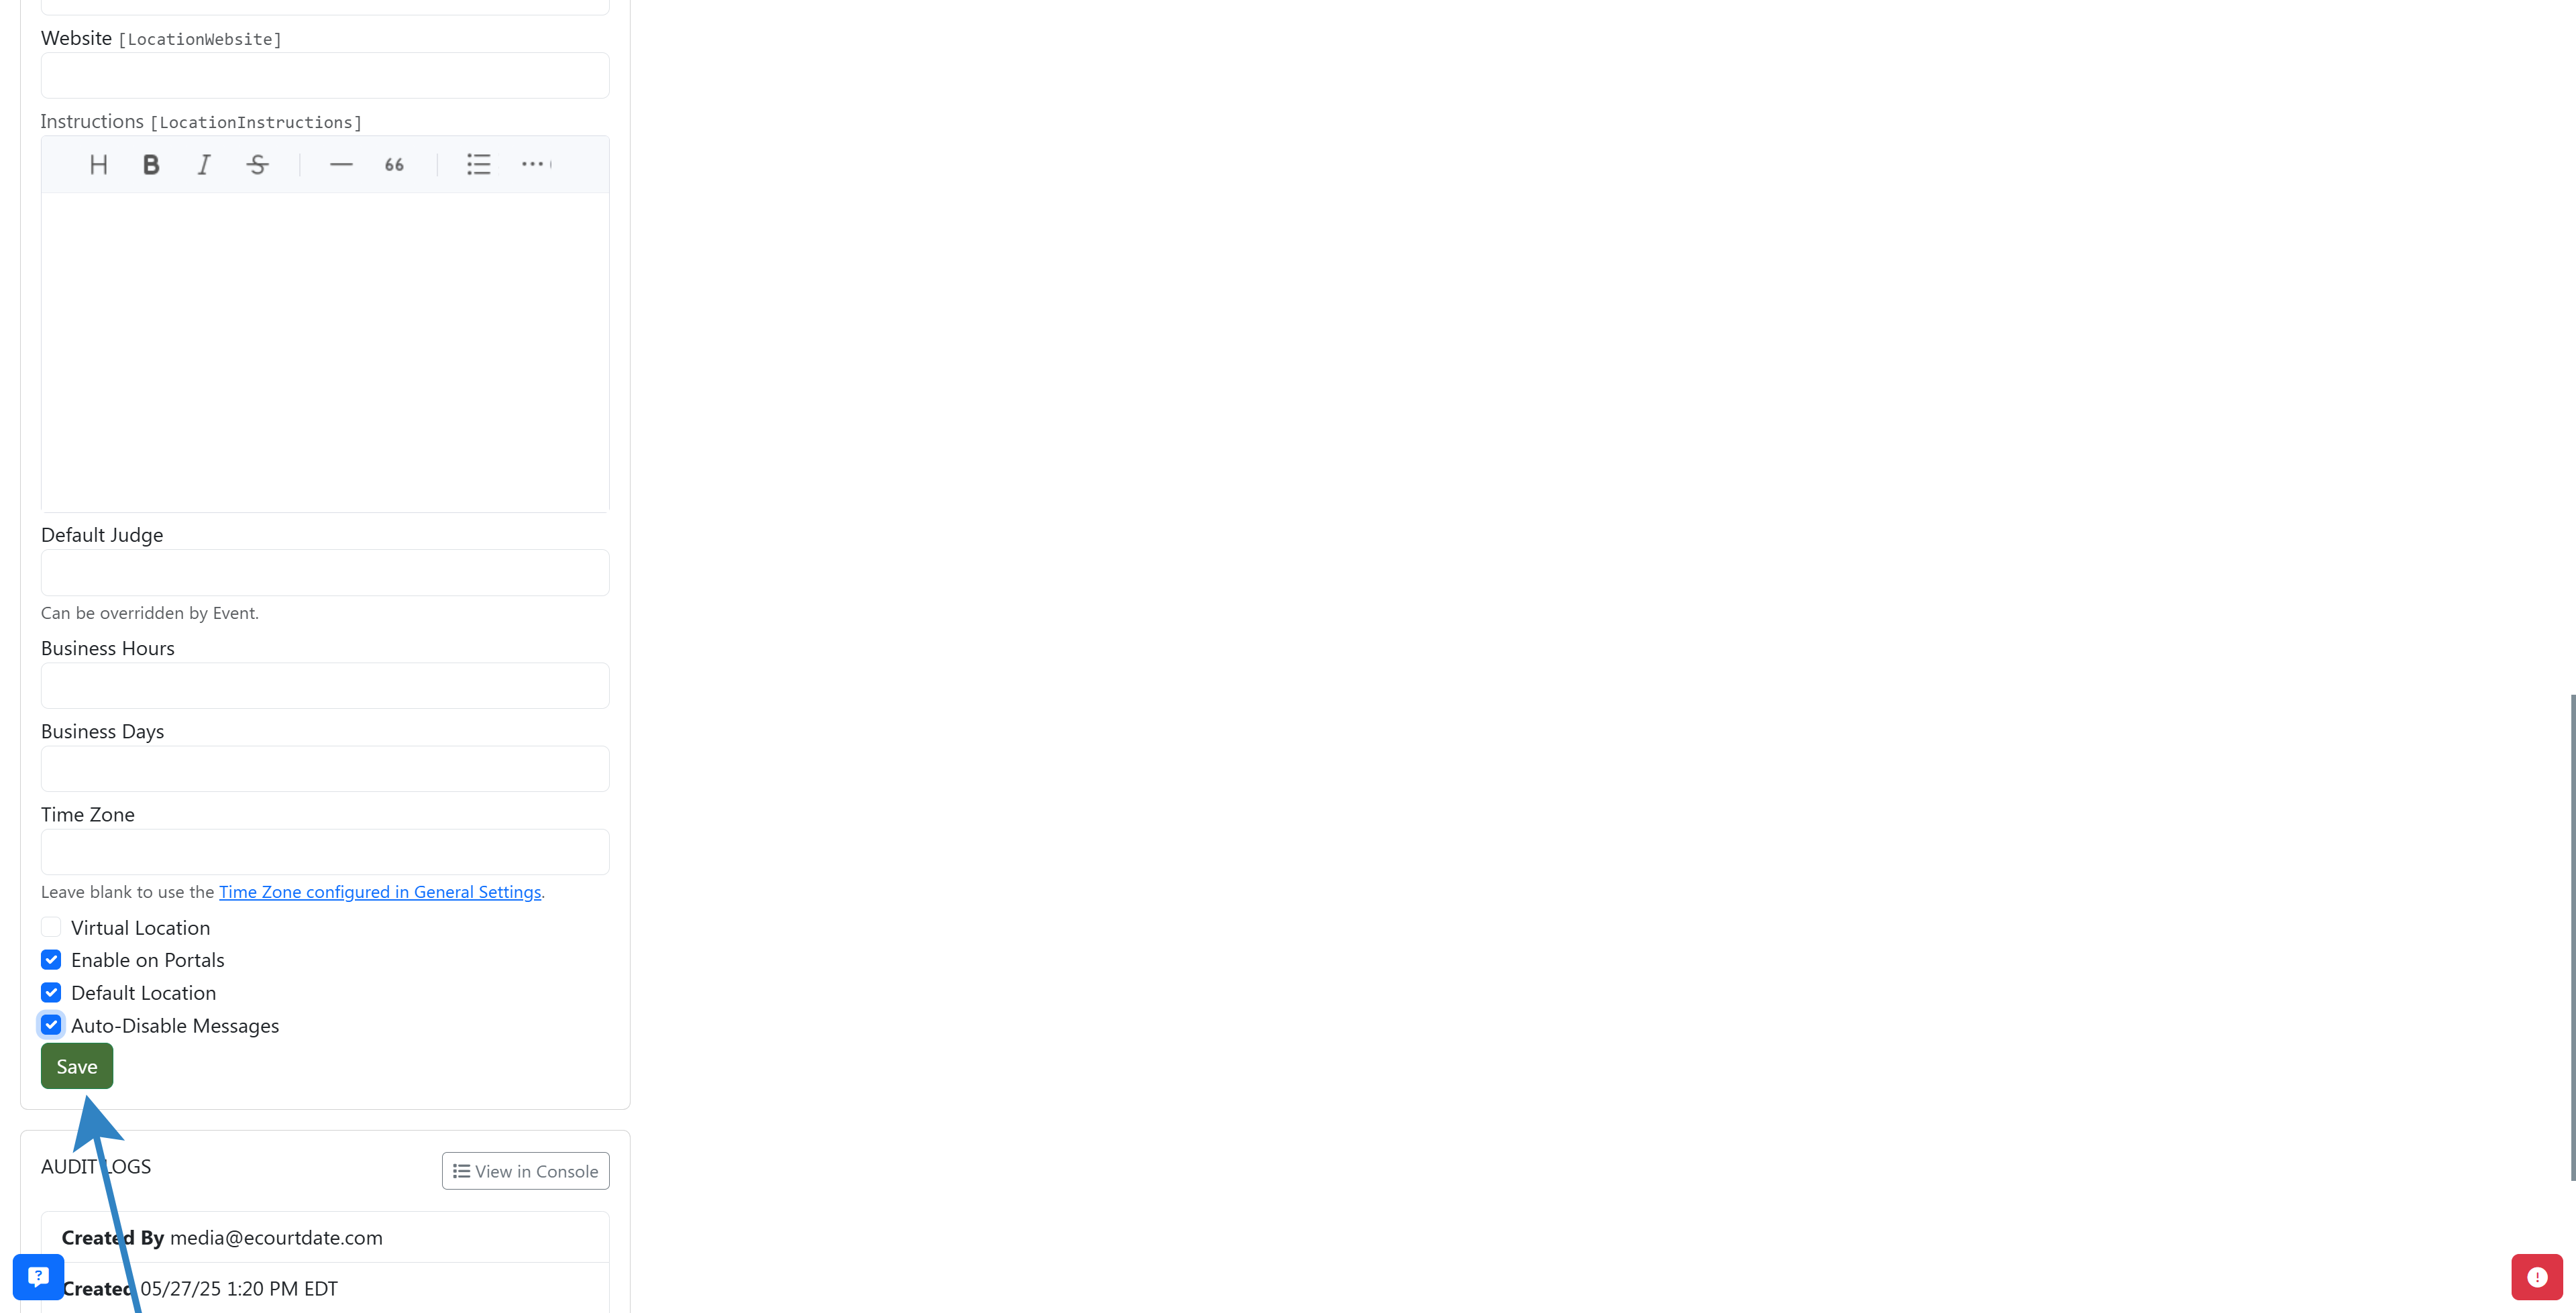
Step 6: Set a Default Location
Your agency can have one default location that is automatically assigned to new records.
- Navigate to Admin > Settings > Locations.
- Click Edit on the location you want to set as the default.
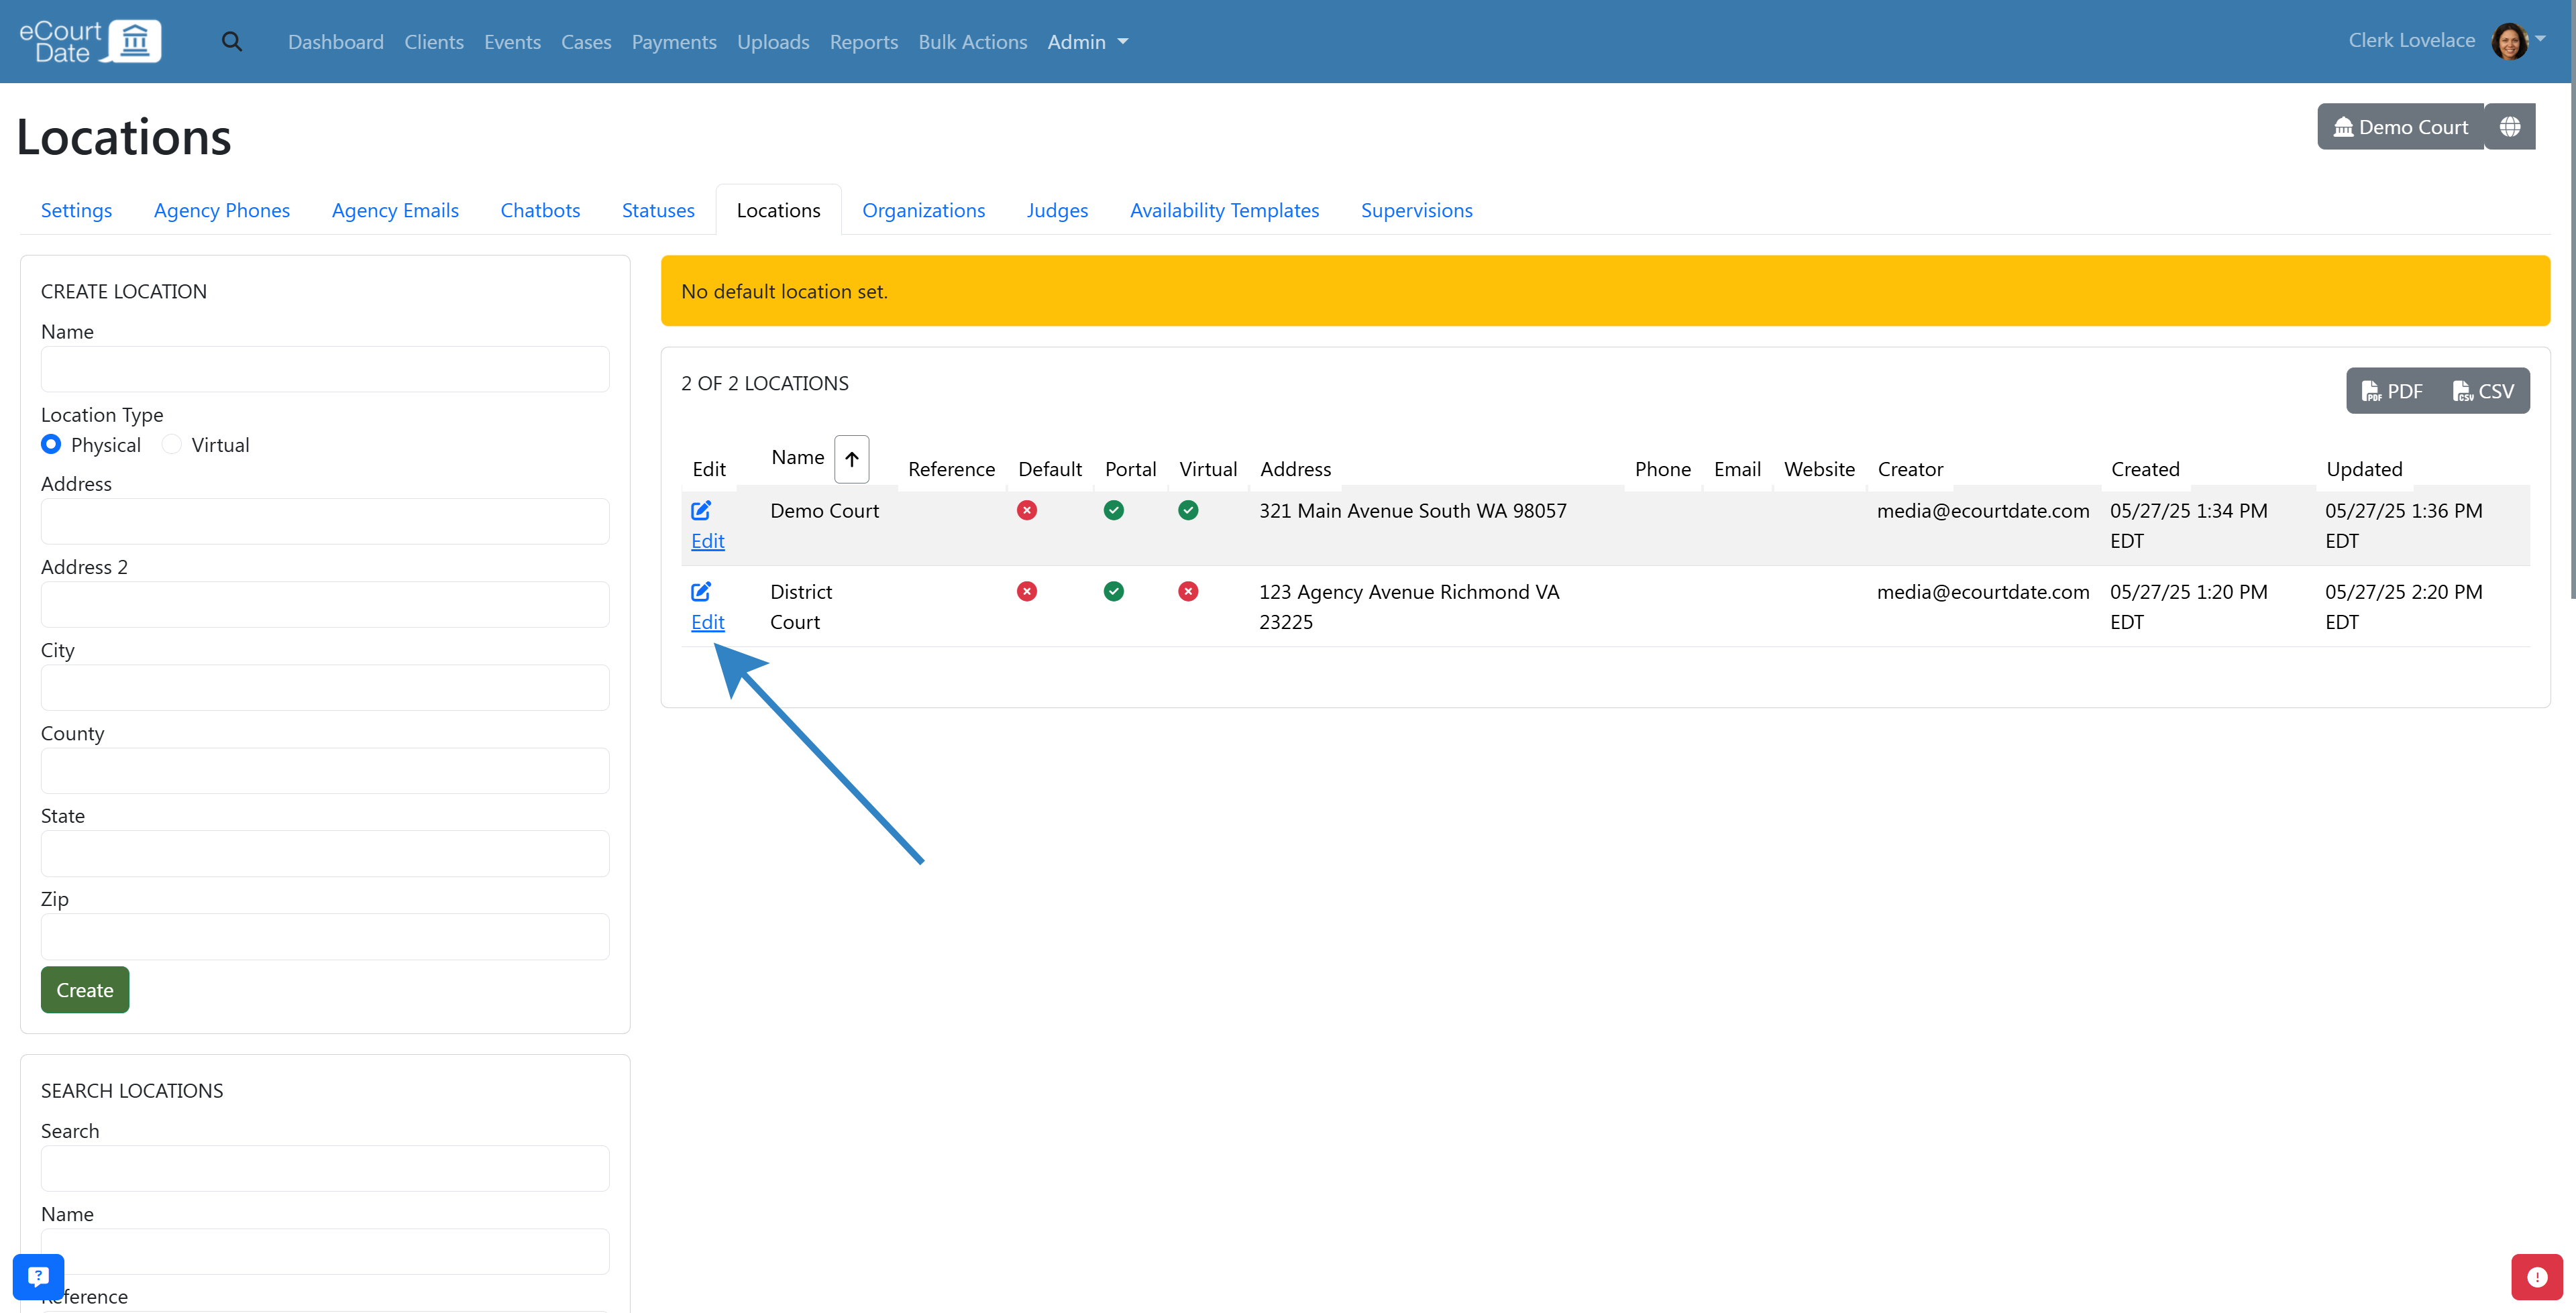
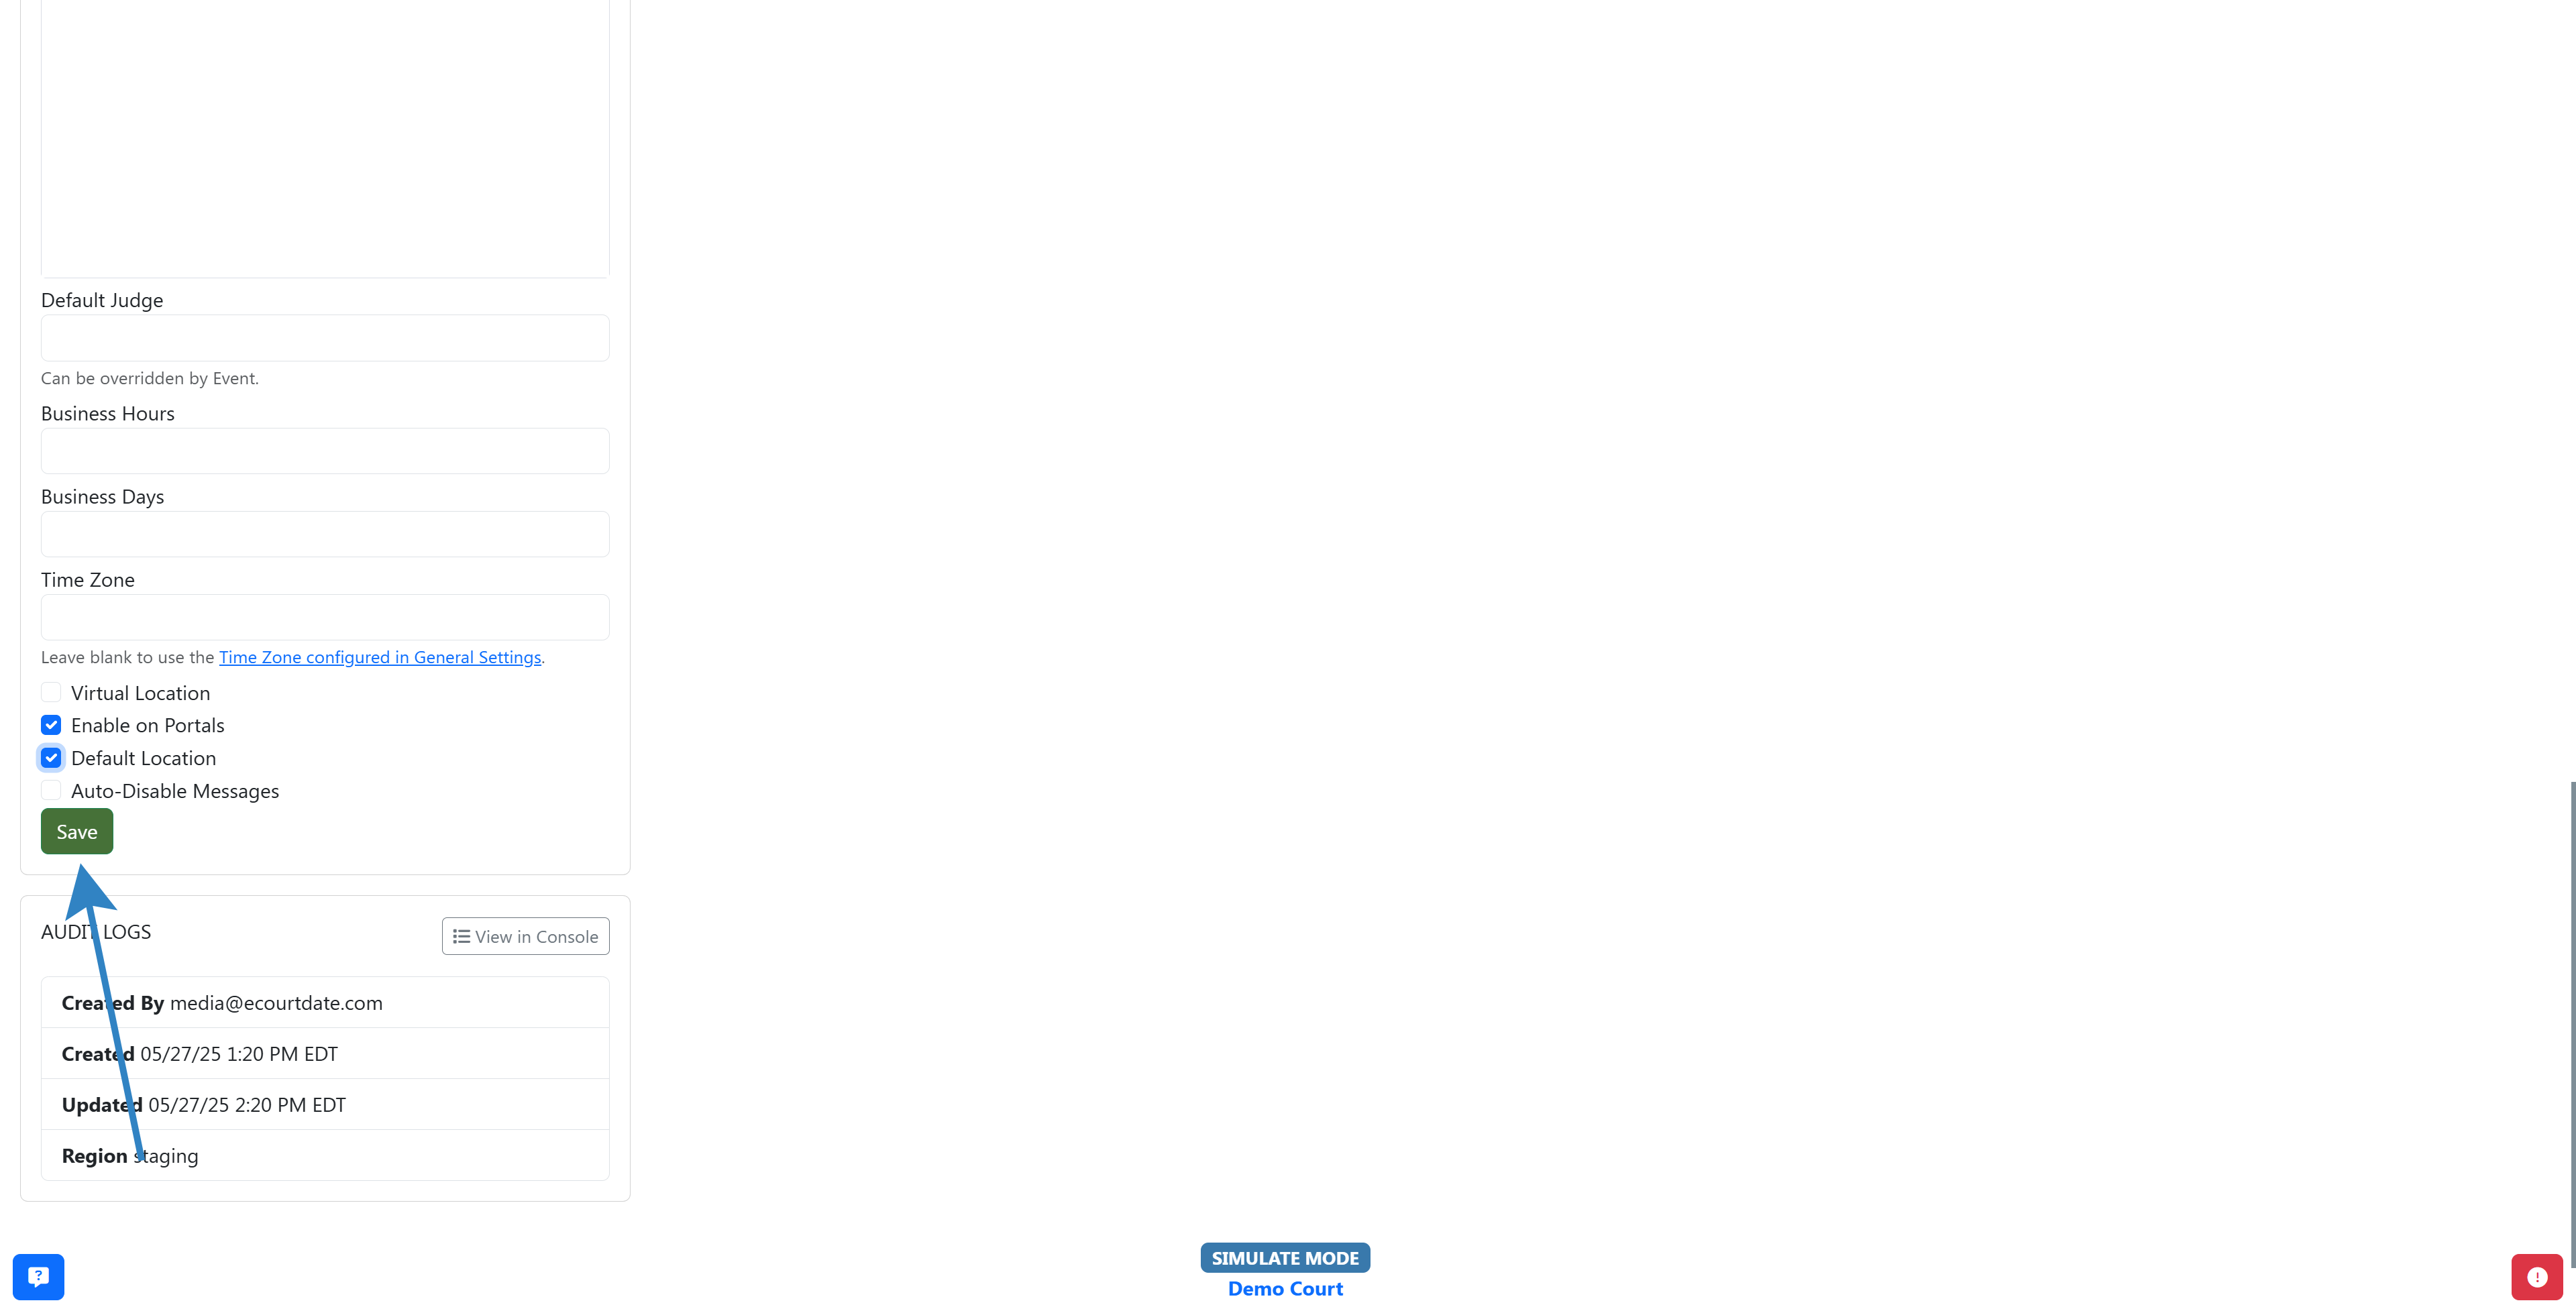
- Enable the Default Location checkbox.
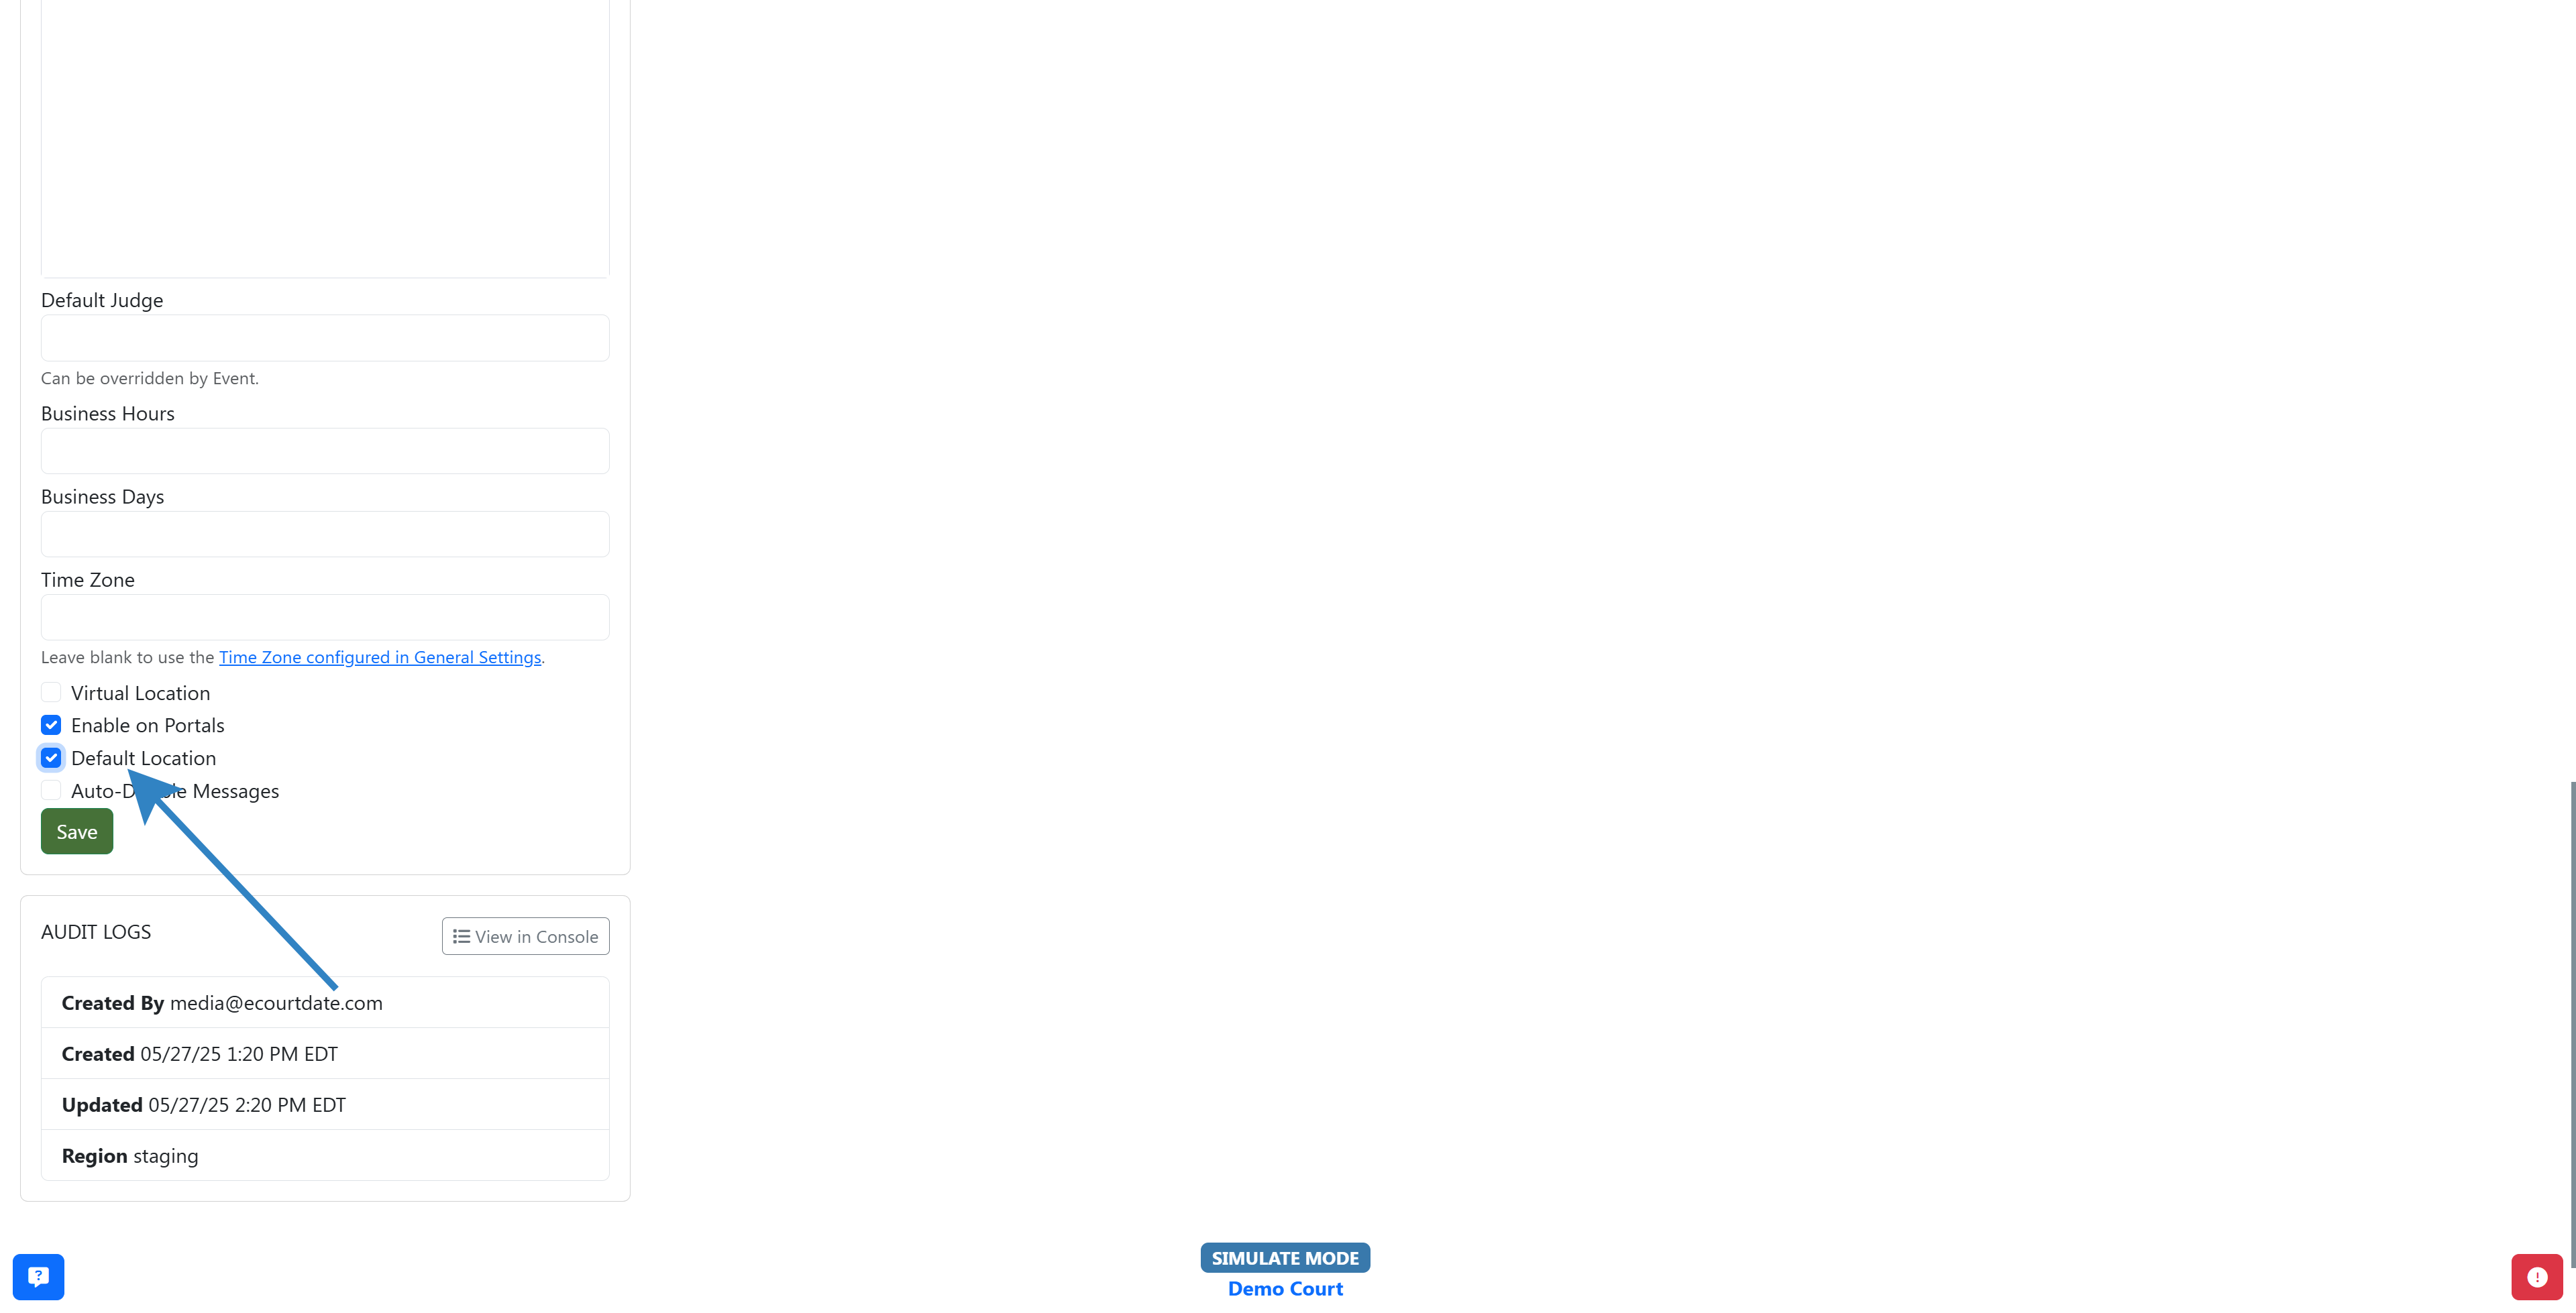
- Click Save.
Note: Only one location can be the default at a time. Remove the default setting from any other location before assigning a new one.
Step 7: Disable Messages for a Location
- Navigate to Admin > Settings > Locations.
- Click Edit on the location you want to disable messages for.
- Enable the Disable Messages checkbox.
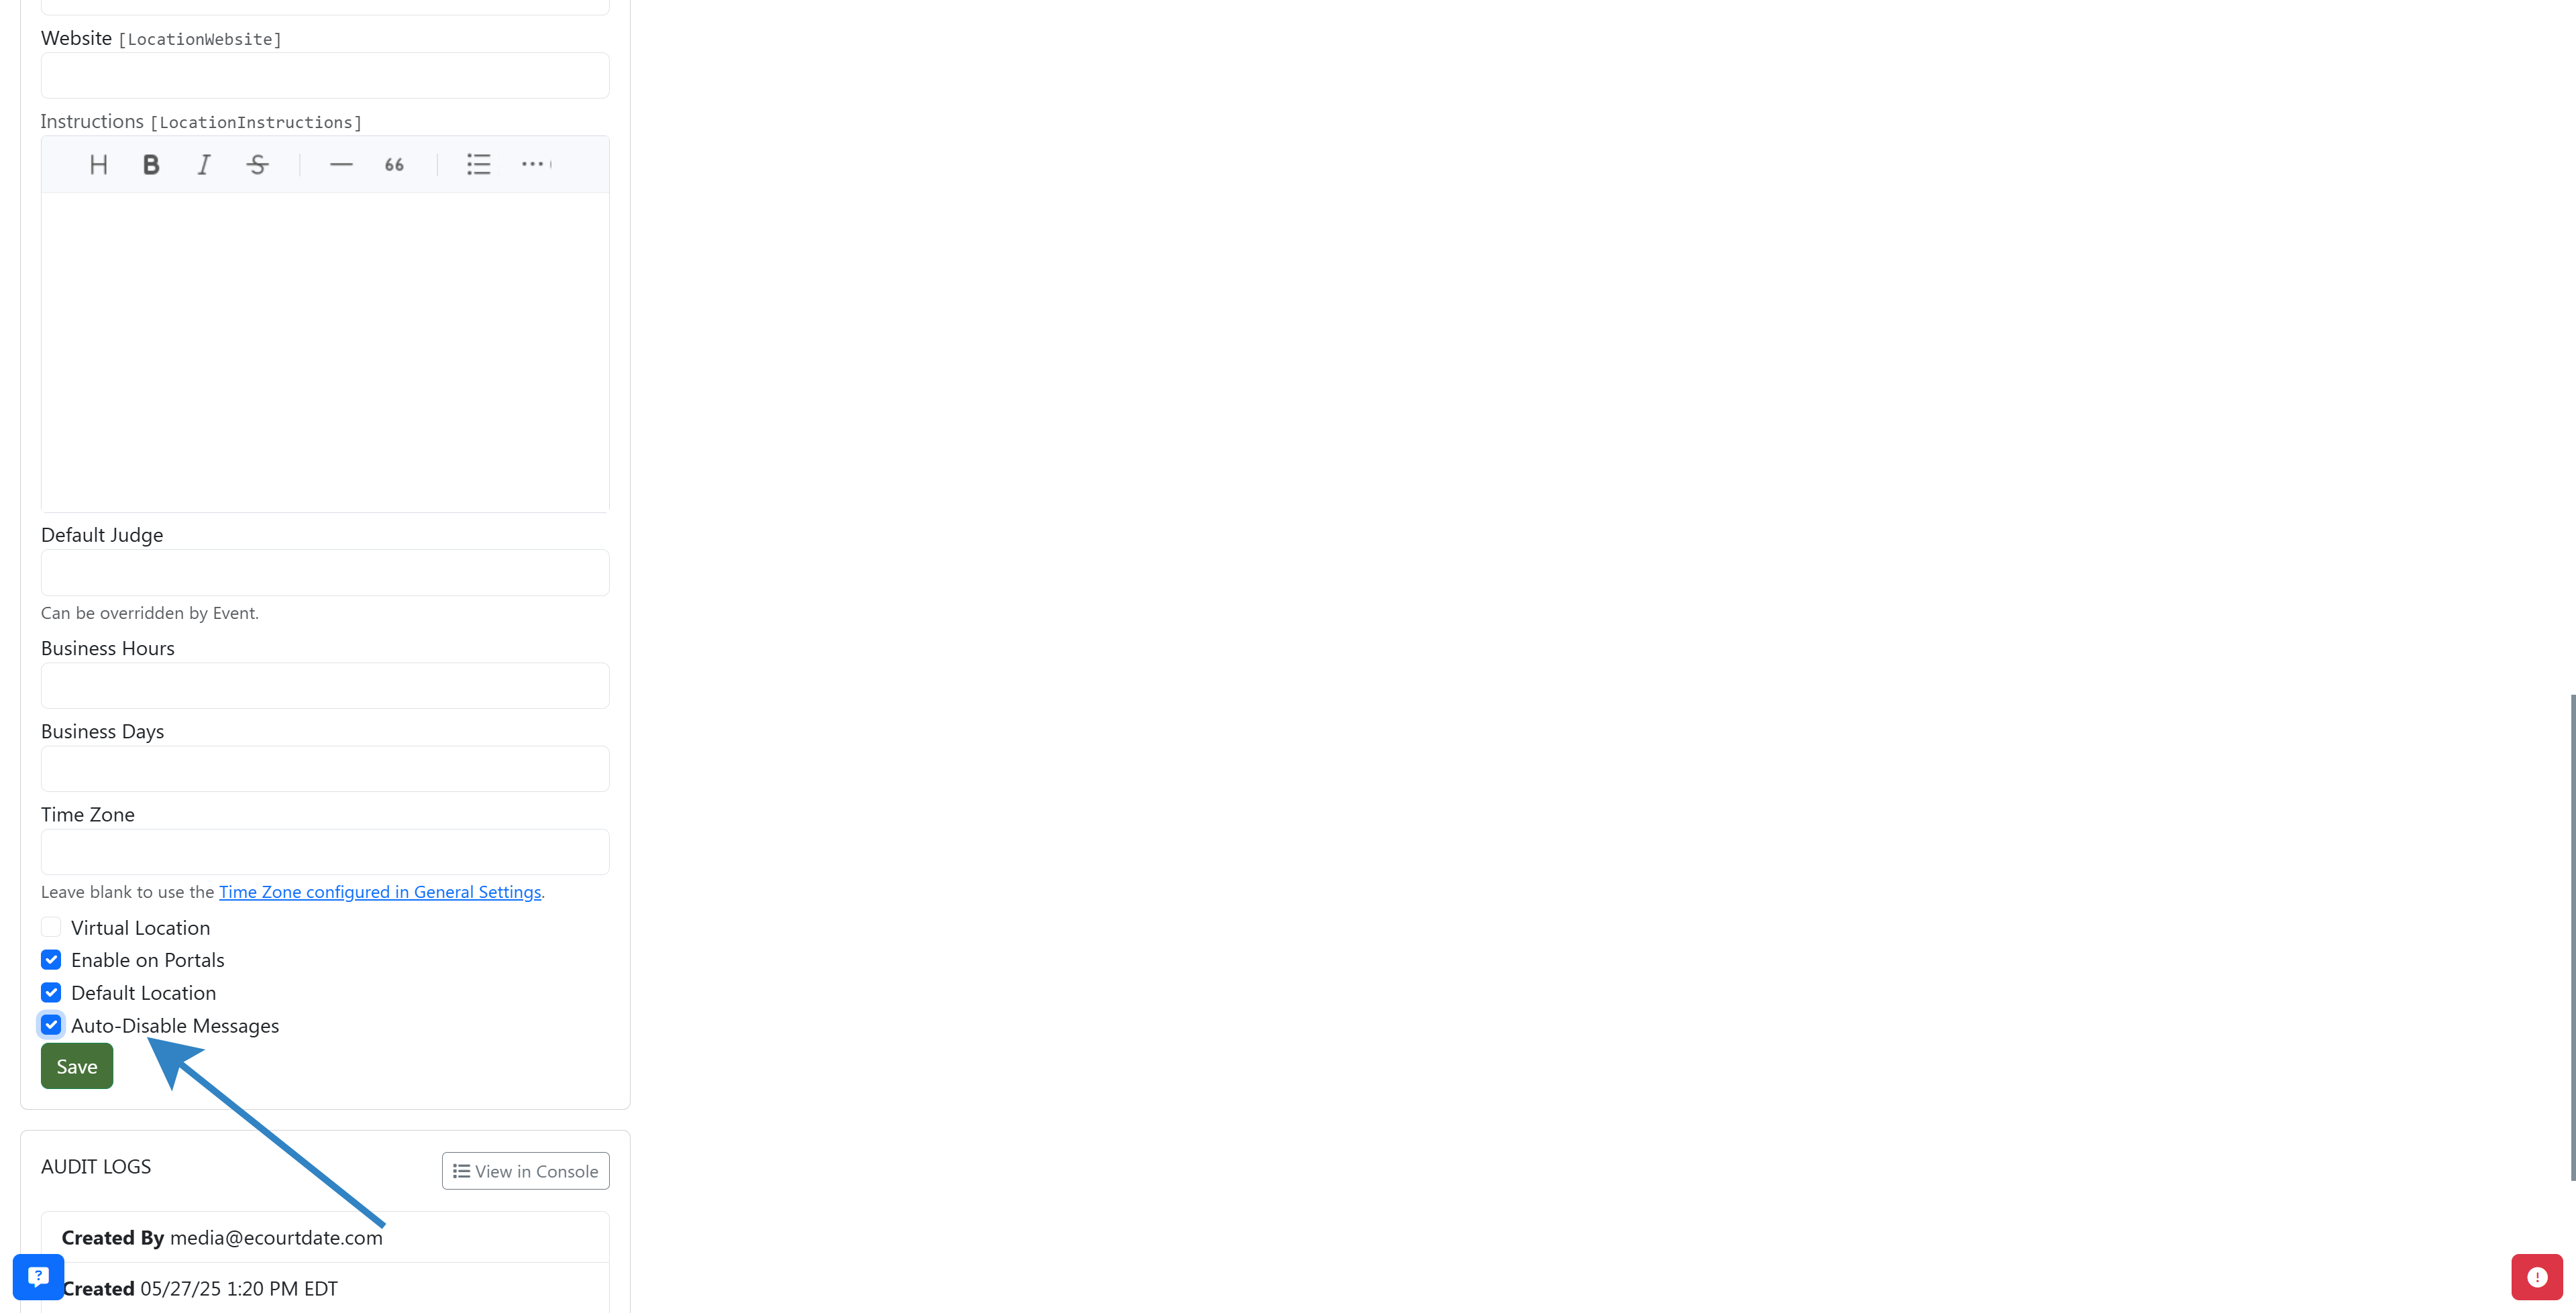
- Click Save.
Note: This prevents new messages from being sent for records assigned to this location. Previously scheduled messages are not affected.
Step 8: Bulk Upload Locations
- Navigate to the Locations page.
- Click the Sample File button to download a CSV template.
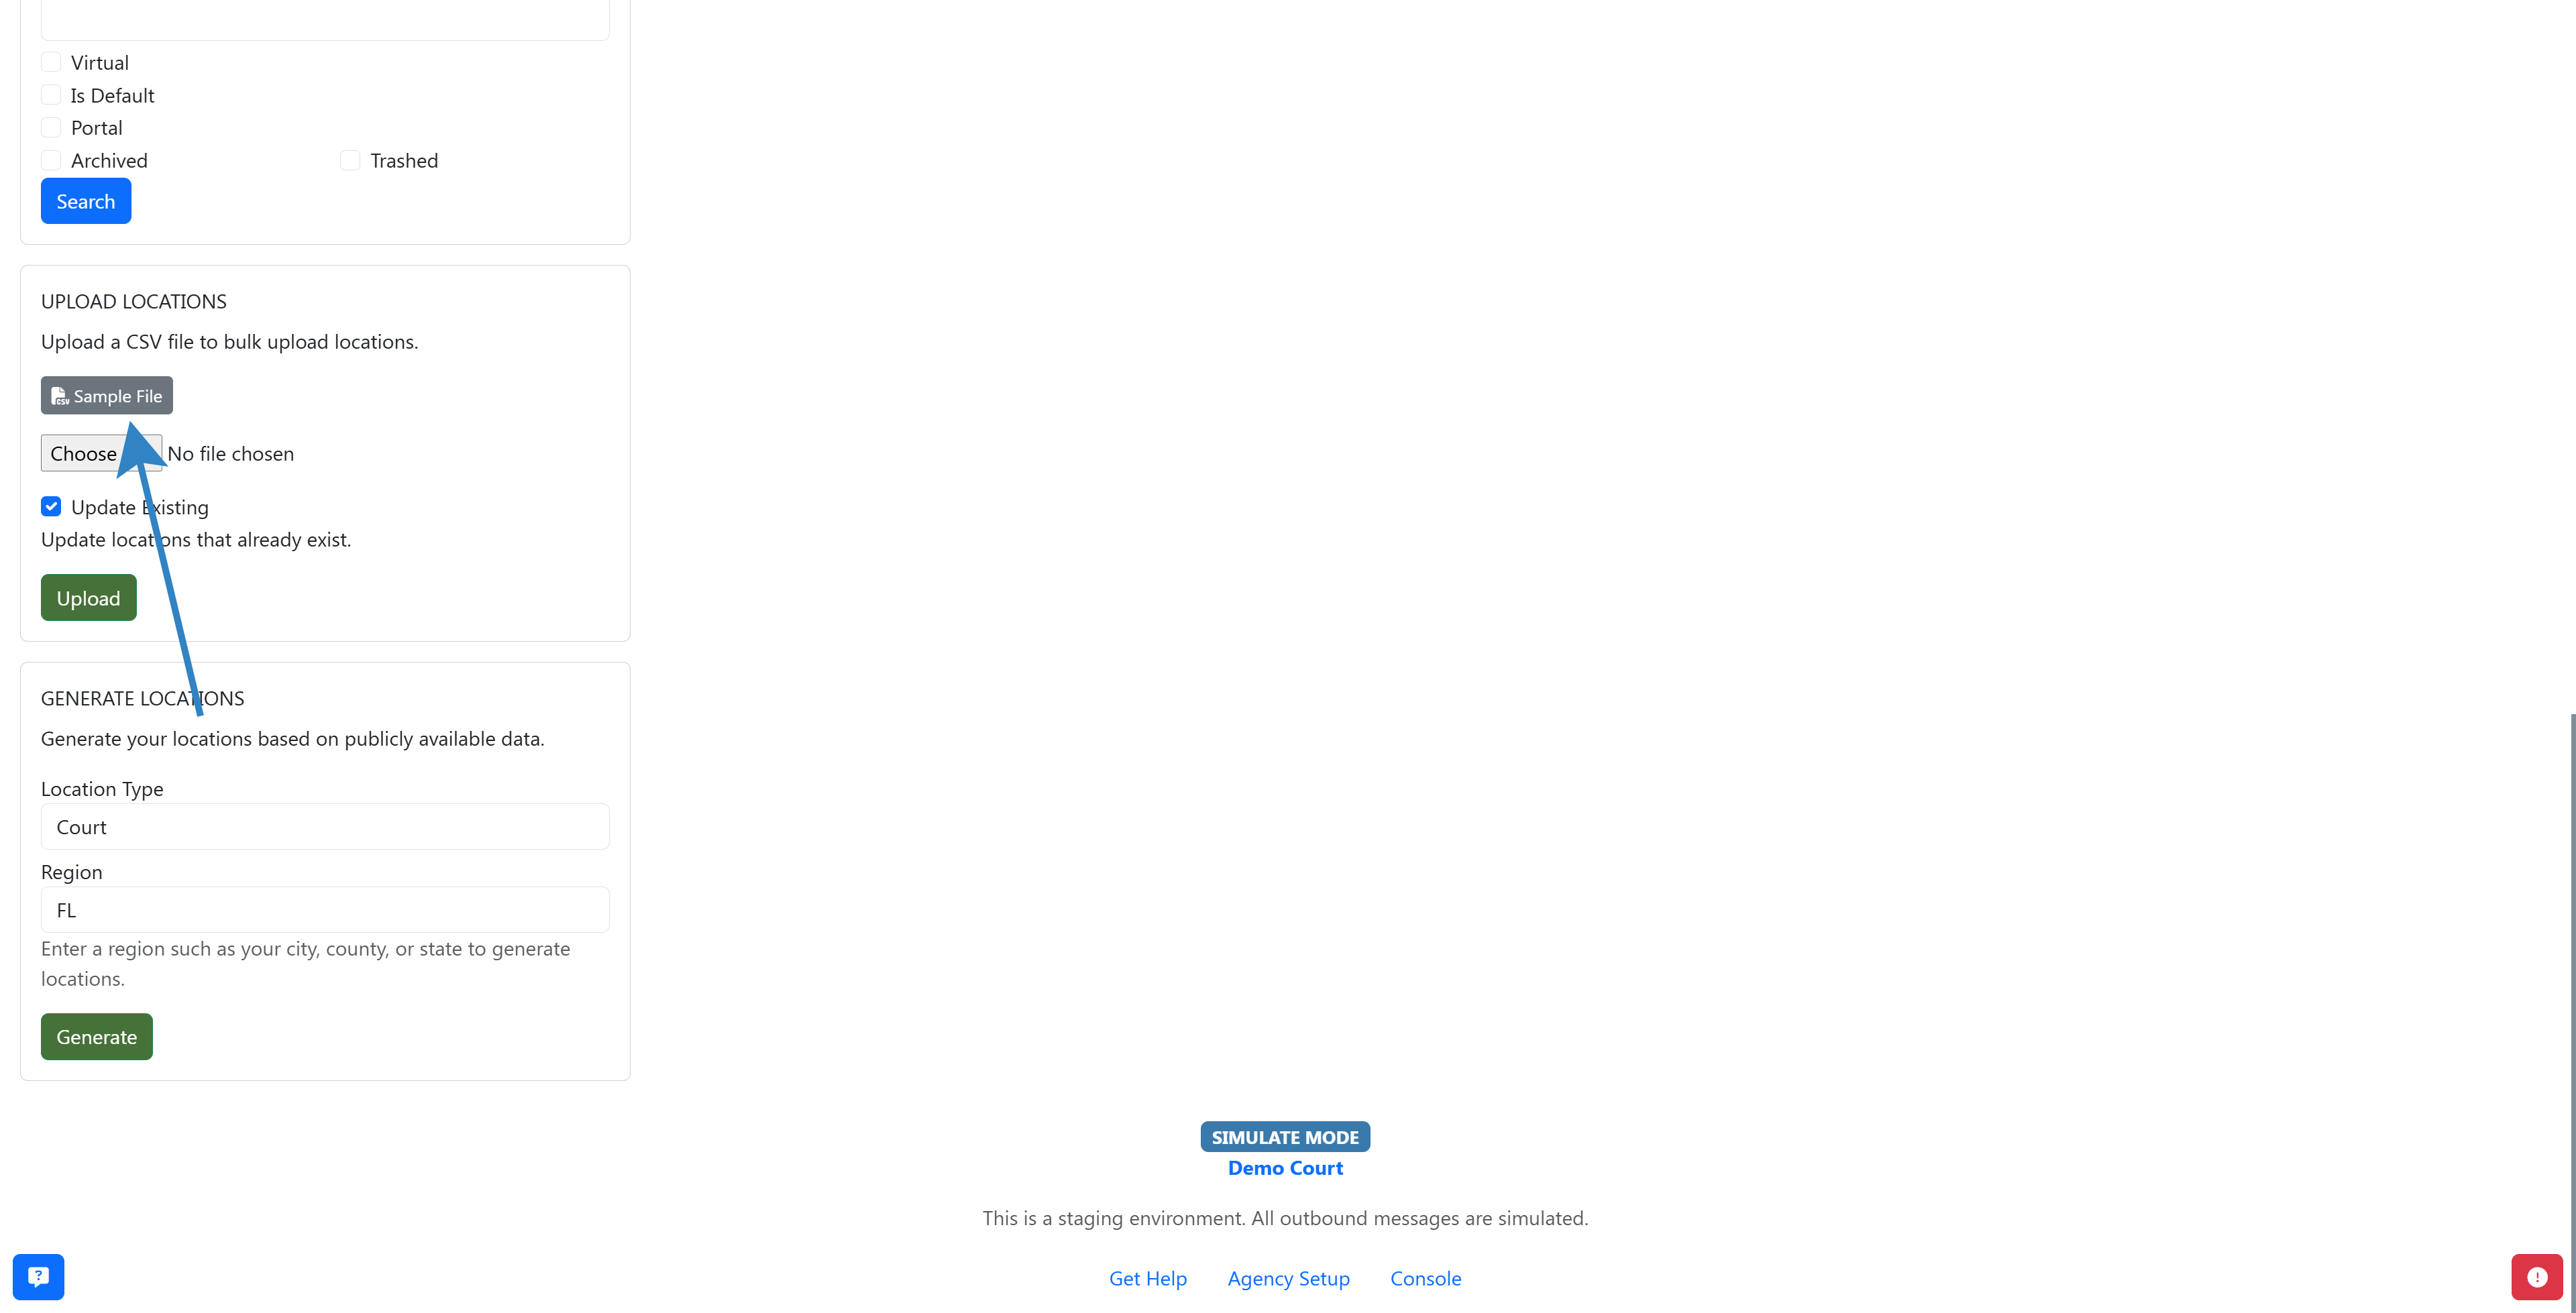
- Populate the CSV file with your location data. Ensure at least the Location Name field is filled in.
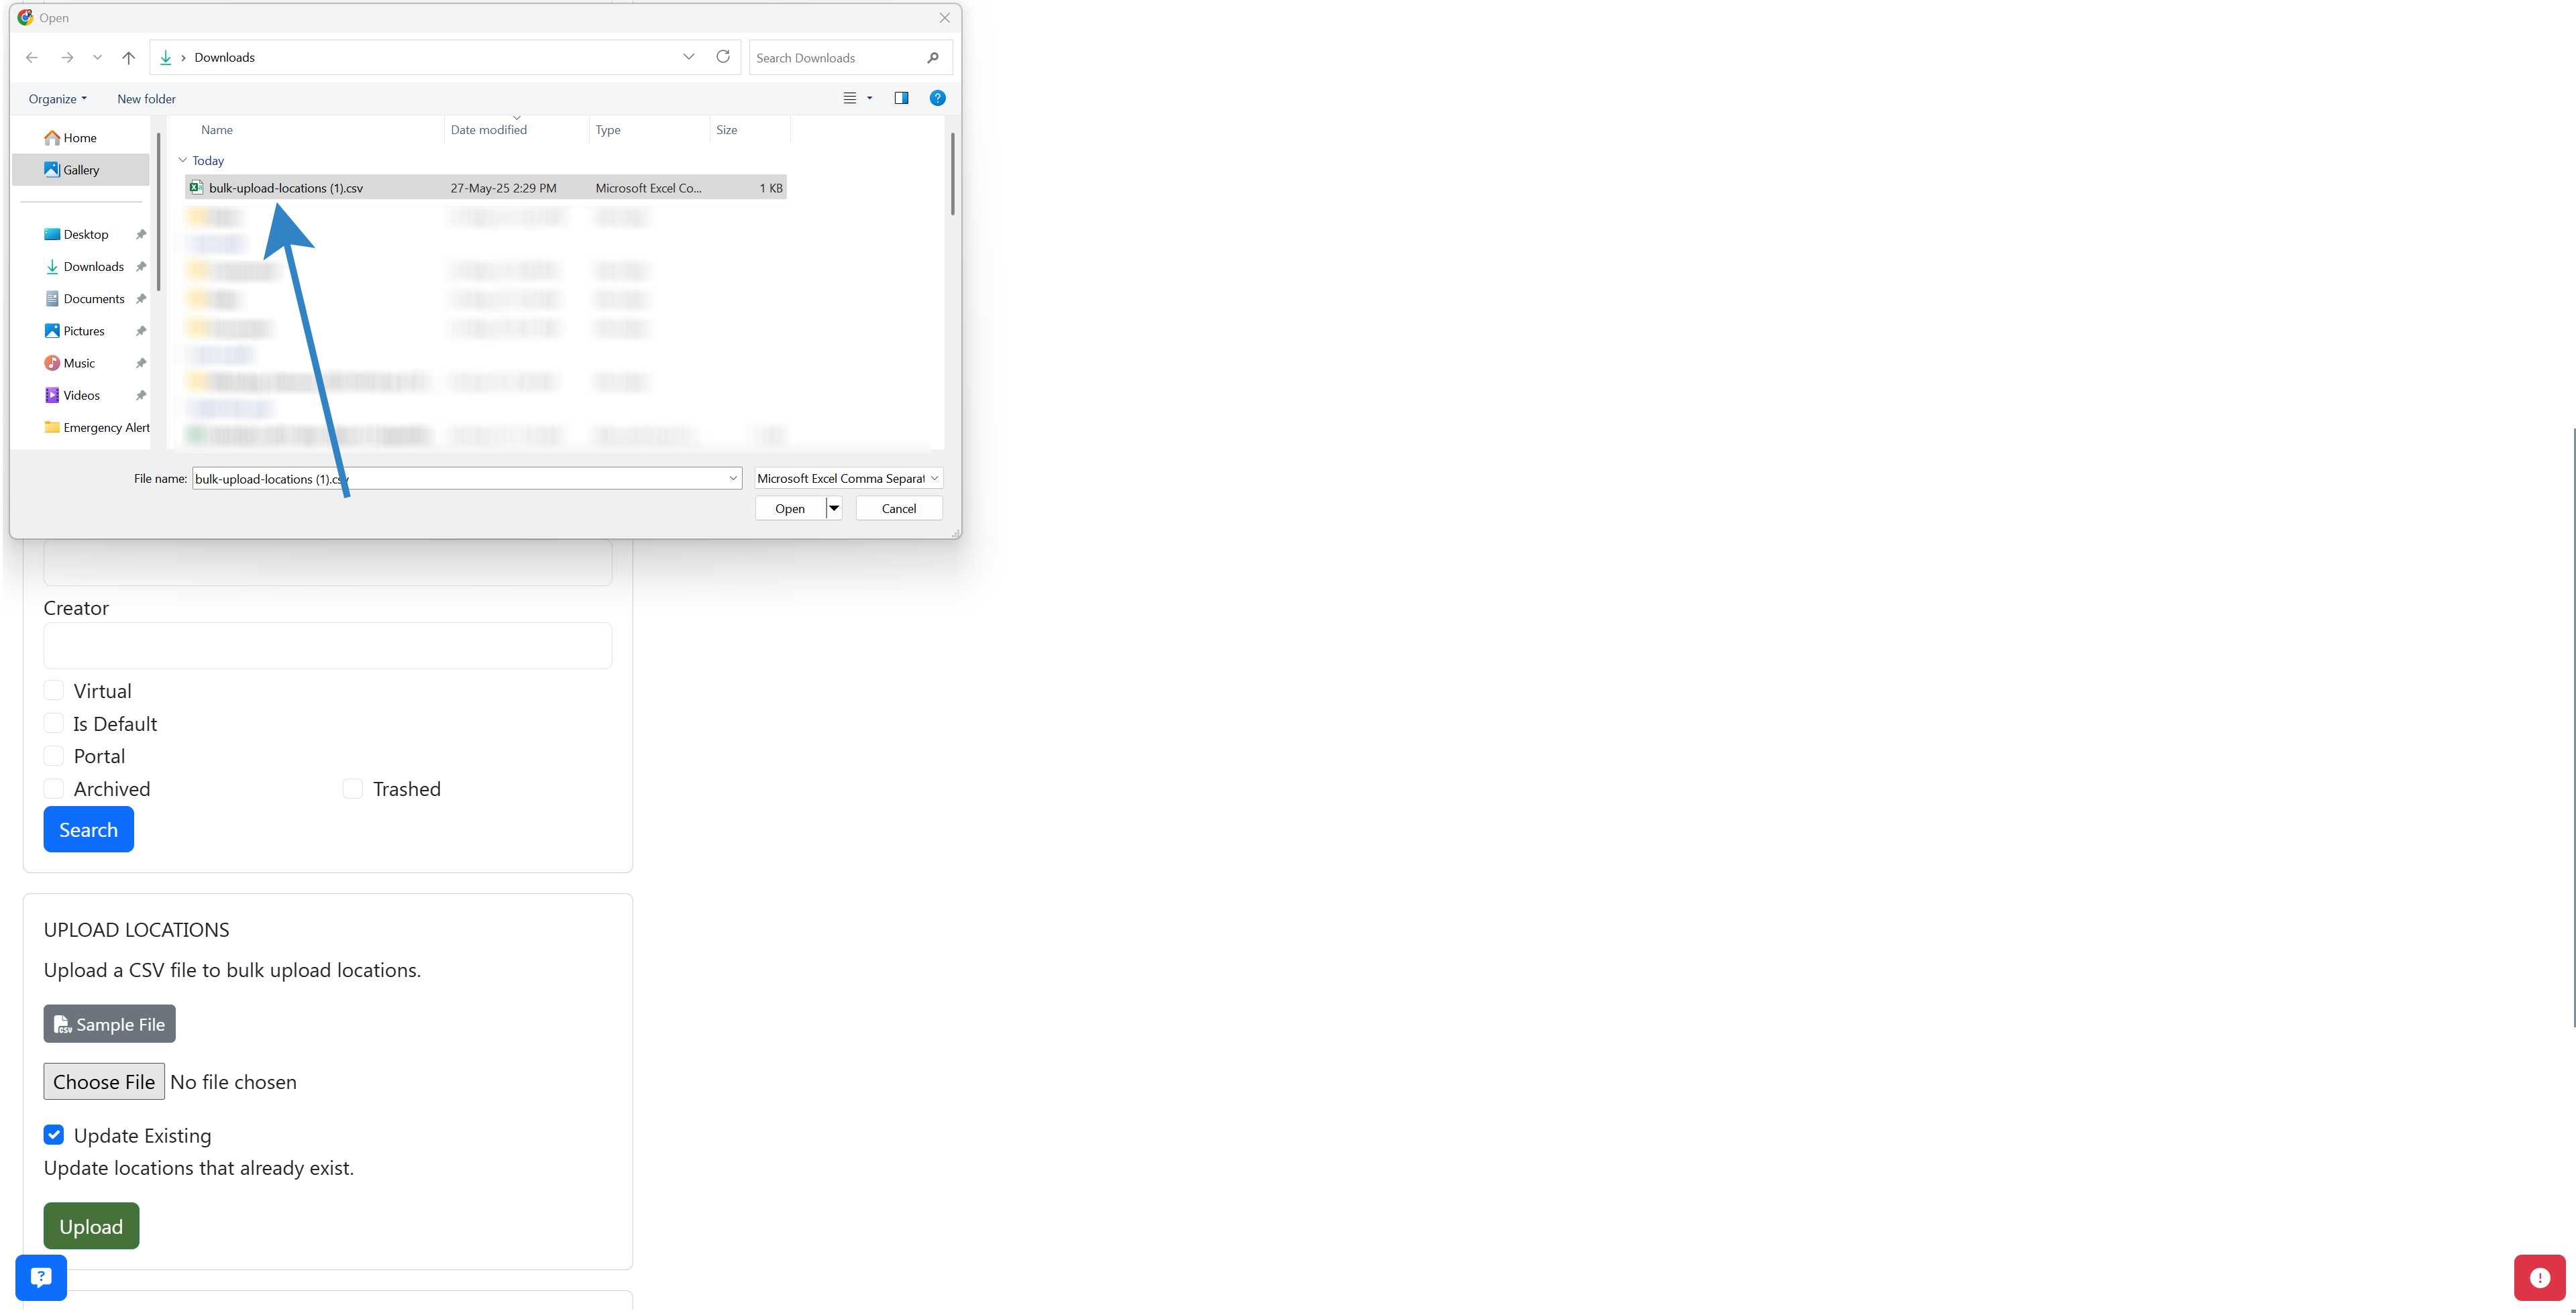
- Upload the completed CSV file on the Locations page.
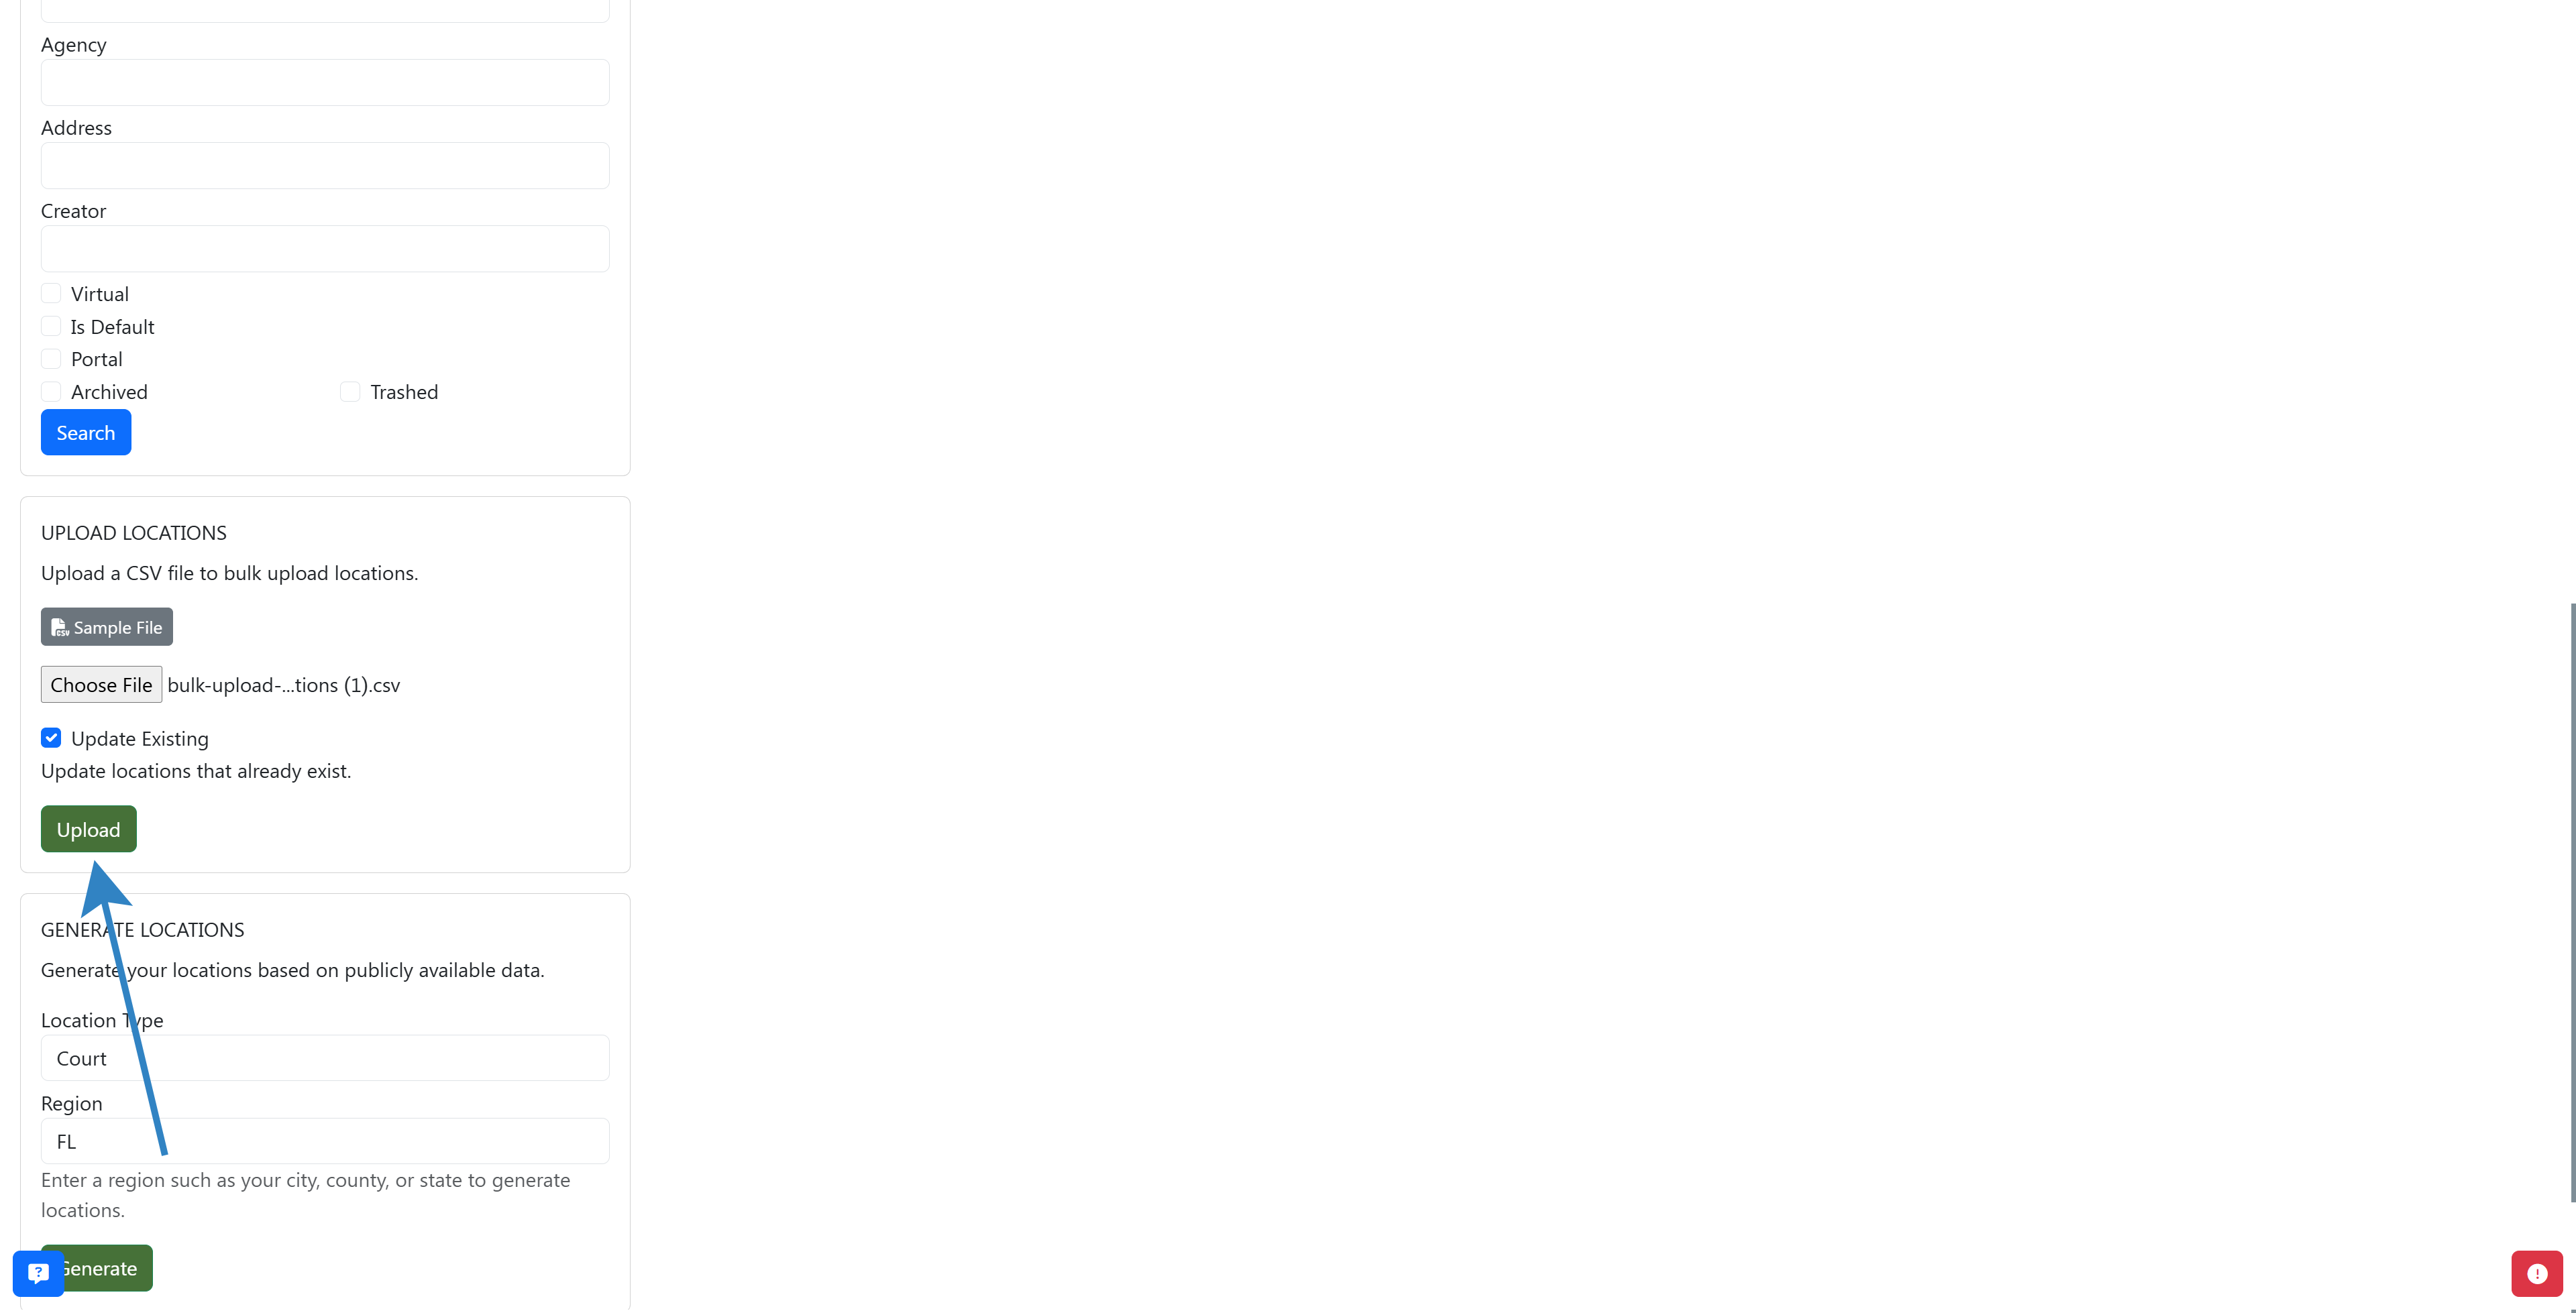
- Review the uploaded locations. Existing locations are updated with the new data, and new locations are created.
Step 9: Search and Filter Locations
- Navigate to Admin > Settings > Locations.
- Use the Search field to find locations by name or address.
- Filter by location type (physical or virtual) to narrow results.
- Click Edit next to any location to view or update its settings.
Step 10: Create a Location Directory for Portals
You can display a searchable directory of your locations on a web portal so clients can find nearby offices, courtrooms, or service centers.
- Navigate to Admin > Portals and click Edit on the portal you want to configure.
- In the portal settings, enable the Location Directory option.
- Select which locations to include in the directory (or include all).
- Click Save to apply your changes.
Clients visiting the portal can browse the directory, view addresses, and get directions to each location.
Step 11: Generate a Location-Specific Portal
Each location can have its own dedicated portal page with location-specific content, check-in forms, and event listings.
- Navigate to the location you want to configure.
- Click the Portal tab or link to view the location's portal settings.
- Configure location-specific content such as check-in forms, directions, and contact information.
- Click Save to apply your changes.
Share the location-specific portal link or QR code at physical sites so visitors can access relevant information for that location.
What to Expect
After creating a location, it becomes available for selection when creating or editing events, payments, cases, and messages. Physical locations display a map, and virtual locations display an entry button. Room-level settings override parent location settings when applicable.
Best Practices
- Verify that a location does not already exist before creating a new one to avoid duplicates
- Use the bulk upload feature when adding many locations at once to save time
- Set business hours on each location so automated messages respect scheduling windows
- Assign a default location so new records are automatically tagged with the correct courtroom or office
- Periodically review locations and disable messages for any that are no longer active
Frequently Asked Questions
Q: How many locations can my agency have?
A: Each agency can have unlimited locations. There is no cap on the number of physical or virtual locations.
Q: Can a location have sub-locations?
A: Yes. Each location supports multiple rooms. For virtual locations, each room has its own separate virtual link.
Q: What happens when I disable messages for a location?
A: New automated messages (Flows and Auto Messages) are not sent for records assigned to that location. Previously scheduled messages continue to send unless manually canceled.
Q: Can I change a location from physical to virtual?
A: Yes. Edit the location and update the type. Add a Virtual Link for virtual locations or update the Address for physical locations.
Troubleshooting
Issue: Map does not display for a physical location.
Symptoms: The location page shows no map preview after saving.
Solution:
- Edit the location and verify the Address field contains a complete, valid street address
- Click Save and refresh the page
- If the map still does not appear, try entering the address in a slightly different format
Issue: Bulk upload did not create all locations.
Symptoms: Some rows from the CSV file were skipped or produced errors.
Solution:
- Verify that every row in the CSV has at least the Location Name field populated
- Check for special characters or formatting issues in the CSV
- Re-download the Sample File and compare your data against the expected format
Important: If you continue to experience issues after following these troubleshooting steps, sign in to eCourtDate and create a ticket by clicking the ticket button in the bottom right corner of the screen.
Related Articles
Locations in eCourtDate represent the physical and virtual places where your agency operates, allowing you to assign unique settings like business hours and default judges to each one.
### Overview
- **What it is:** Locations are configurable records representing physical addresses or virtual meeting links used by your agency
- **Why it matters:** Assigning locations to events, payments, cases, and messages ensures accurate record-keeping and enables location-specific settings such as business hours, default judges, and message controls
- **Who uses it:** Agency administrators and staff responsible for managing courtrooms, offices, and virtual hearing rooms
- **Expected outcomes:** Each location has its own settings, rooms, and messaging controls that apply automatically when records are assigned to it
### Prerequisites
- You must have admin access or the **Create Locations** and **Update Locations** permissions
- You must be signed into your eCourtDate staging or production agency
- For physical locations, have the full street address ready
- For virtual locations, have the meeting URL ready (Zoom, Teams, etc.)
### How-To Steps
#### Step 1: Navigate to Locations
1. Click **Admin** > **Settings** in the top navigation bar.
2. Click the **Locations** tab.

#### Step 2: Create a Location
Before creating a location, verify that the location does not already exist. Edit an existing location instead of creating a duplicate.
1. Fill in the **Create Location** form with the location name.

2. For a physical location, enter the full **Address**.

3. For a virtual location, select the **Virtual** option.

4. Click the **Create** button.

5. Review the newly created **Location** page.

#### Step 3: Configure a Physical Location
1. Verify that a map displays for the location.

2. If no map appears, update the **Address** field with the correct address.
3. Click **Save**.

#### Step 4: Configure a Virtual Location
1. Enter the meeting URL in the **Virtual Link** field.

2. Click **Save**.

3. Verify that a button appears to enter the virtual location.

#### Step 5: Create Rooms
Each location can have multiple rooms with unique settings, including business hours and a default judge.
1. Open the location you want to edit.
2. Fill in the **Create Room** form.

3. Click the **Create** button.

4. Review the room in the list of rooms.

5. Click **Edit** to modify room settings.

#### Step 6: Set a Default Location
Your agency can have one default location that is automatically assigned to new records.
1. Navigate to **Admin** > **Settings** > **Locations**.

2. Click **Edit** on the location you want to set as the default.

3. Enable the **Default Location** checkbox.

4. Click **Save**.

> **Note:** Only one location can be the default at a time. Remove the default setting from any other location before assigning a new one.
#### Step 7: Disable Messages for a Location
1. Navigate to **Admin** > **Settings** > **Locations**.

2. Click **Edit** on the location you want to disable messages for.

3. Enable the **Disable Messages** checkbox.

4. Click **Save**.

> **Note:** This prevents new messages from being sent for records assigned to this location. Previously scheduled messages are not affected.
#### Step 8: Bulk Upload Locations
1. Navigate to the **Locations** page.
2. Click the **Sample File** button to download a CSV template.

3. Populate the CSV file with your location data. Ensure at least the **Location Name** field is filled in.

4. Upload the completed CSV file on the **Locations** page.

5. Review the uploaded locations. Existing locations are updated with the new data, and new locations are created.

#### Step 9: Search and Filter Locations
1. Navigate to **Admin** > **Settings** > **Locations**.
2. Use the **Search** field to find locations by name or address.
3. Filter by location type (physical or virtual) to narrow results.
4. Click **Edit** next to any location to view or update its settings.
#### Step 10: Create a Location Directory for Portals
You can display a searchable directory of your locations on a web portal so clients can find nearby offices, courtrooms, or service centers.
1. Navigate to **Admin** > **Portals** and click **Edit** on the portal you want to configure.
2. In the portal settings, enable the **Location Directory** option.
3. Select which locations to include in the directory (or include all).
4. Click **Save** to apply your changes.
Clients visiting the portal can browse the directory, view addresses, and get directions to each location.
#### Step 11: Generate a Location-Specific Portal
Each location can have its own dedicated portal page with location-specific content, check-in forms, and event listings.
1. Navigate to the location you want to configure.
2. Click the **Portal** tab or link to view the location's portal settings.
3. Configure location-specific content such as check-in forms, directions, and contact information.
4. Click **Save** to apply your changes.
Share the location-specific portal link or QR code at physical sites so visitors can access relevant information for that location.
### What to Expect
After creating a location, it becomes available for selection when creating or editing events, payments, cases, and messages. Physical locations display a map, and virtual locations display an entry button. Room-level settings override parent location settings when applicable.
### Best Practices
- Verify that a location does not already exist before creating a new one to avoid duplicates
- Use the bulk upload feature when adding many locations at once to save time
- Set business hours on each location so automated messages respect scheduling windows
- Assign a default location so new records are automatically tagged with the correct courtroom or office
- Periodically review locations and disable messages for any that are no longer active
### Frequently Asked Questions
**Q: How many locations can my agency have?**
A: Each agency can have unlimited locations. There is no cap on the number of physical or virtual locations.
**Q: Can a location have sub-locations?**
A: Yes. Each location supports multiple rooms. For virtual locations, each room has its own separate virtual link.
**Q: What happens when I disable messages for a location?**
A: New automated messages (Flows and Auto Messages) are not sent for records assigned to that location. Previously scheduled messages continue to send unless manually canceled.
**Q: Can I change a location from physical to virtual?**
A: Yes. Edit the location and update the type. Add a **Virtual Link** for virtual locations or update the **Address** for physical locations.
### Troubleshooting
**Issue:** Map does not display for a physical location.
**Symptoms:** The location page shows no map preview after saving.
**Solution:**
1. Edit the location and verify the **Address** field contains a complete, valid street address
2. Click **Save** and refresh the page
3. If the map still does not appear, try entering the address in a slightly different format
**Issue:** Bulk upload did not create all locations.
**Symptoms:** Some rows from the CSV file were skipped or produced errors.
**Solution:**
1. Verify that every row in the CSV has at least the **Location Name** field populated
2. Check for special characters or formatting issues in the CSV
3. Re-download the **Sample File** and compare your data against the expected format
> **Important:** If you continue to experience issues after following these troubleshooting steps, sign in to eCourtDate and create a ticket by clicking the ticket button in the bottom right corner of the screen.
### Related Articles
- [How to Disable Messages based on Status](/how-to-disable-messages-based-on-status)
- [How to Create an Auto Message](/how-to-create-an-auto-message)
- [How to Create a Flow](/how-to-create-a-flow)
- [How to Send a Mass Message using Bulk Actions](/how-to-send-a-mass-message-using-bulk-actions)
- [Troubleshooting Automated Messages](/troubleshooting-automated-messages)