Portals
How to Create Web Portals
5 min read
Updated Feb 15, 2026
Learn how to create and customize web portals for your clients on the eCourtDate platform.
Learn how to create and customize web portals for your clients on the eCourtDate platform.
Overview
Web portals on the eCourtDate platform are customizable and dynamic websites that allow your agency's end clients to interact with your services effectively. These portals serve as a hub where clients can register for notifications, view events, download and upload files, and sign in to change their preferences. Embedding these portals into your agency's website or sharing them through QR codes extends their accessibility. Web portals give clients the ability to find answers, track their calendar, and complete tasks on their own. This self-service approach reduces the need to contact staff, keeps communication clear, and allows agencies to focus on more complex requests.
Prerequisites
Before creating a web portal, ensure that you have:
-
Admin access to the eCourtDate platform
-
Necessary agency branding assets (e.g., logos, color schemes)
-
Details on the services and functionalities you wish to offer through the portal
-
Information regarding client access permissions and security settings
How to Steps
Follow these step-by-step instructions to create a web portal:
Step 1: Access the Portals Page
Step 2: Create a New Portal
-
In the left column, locate the Create Portal form.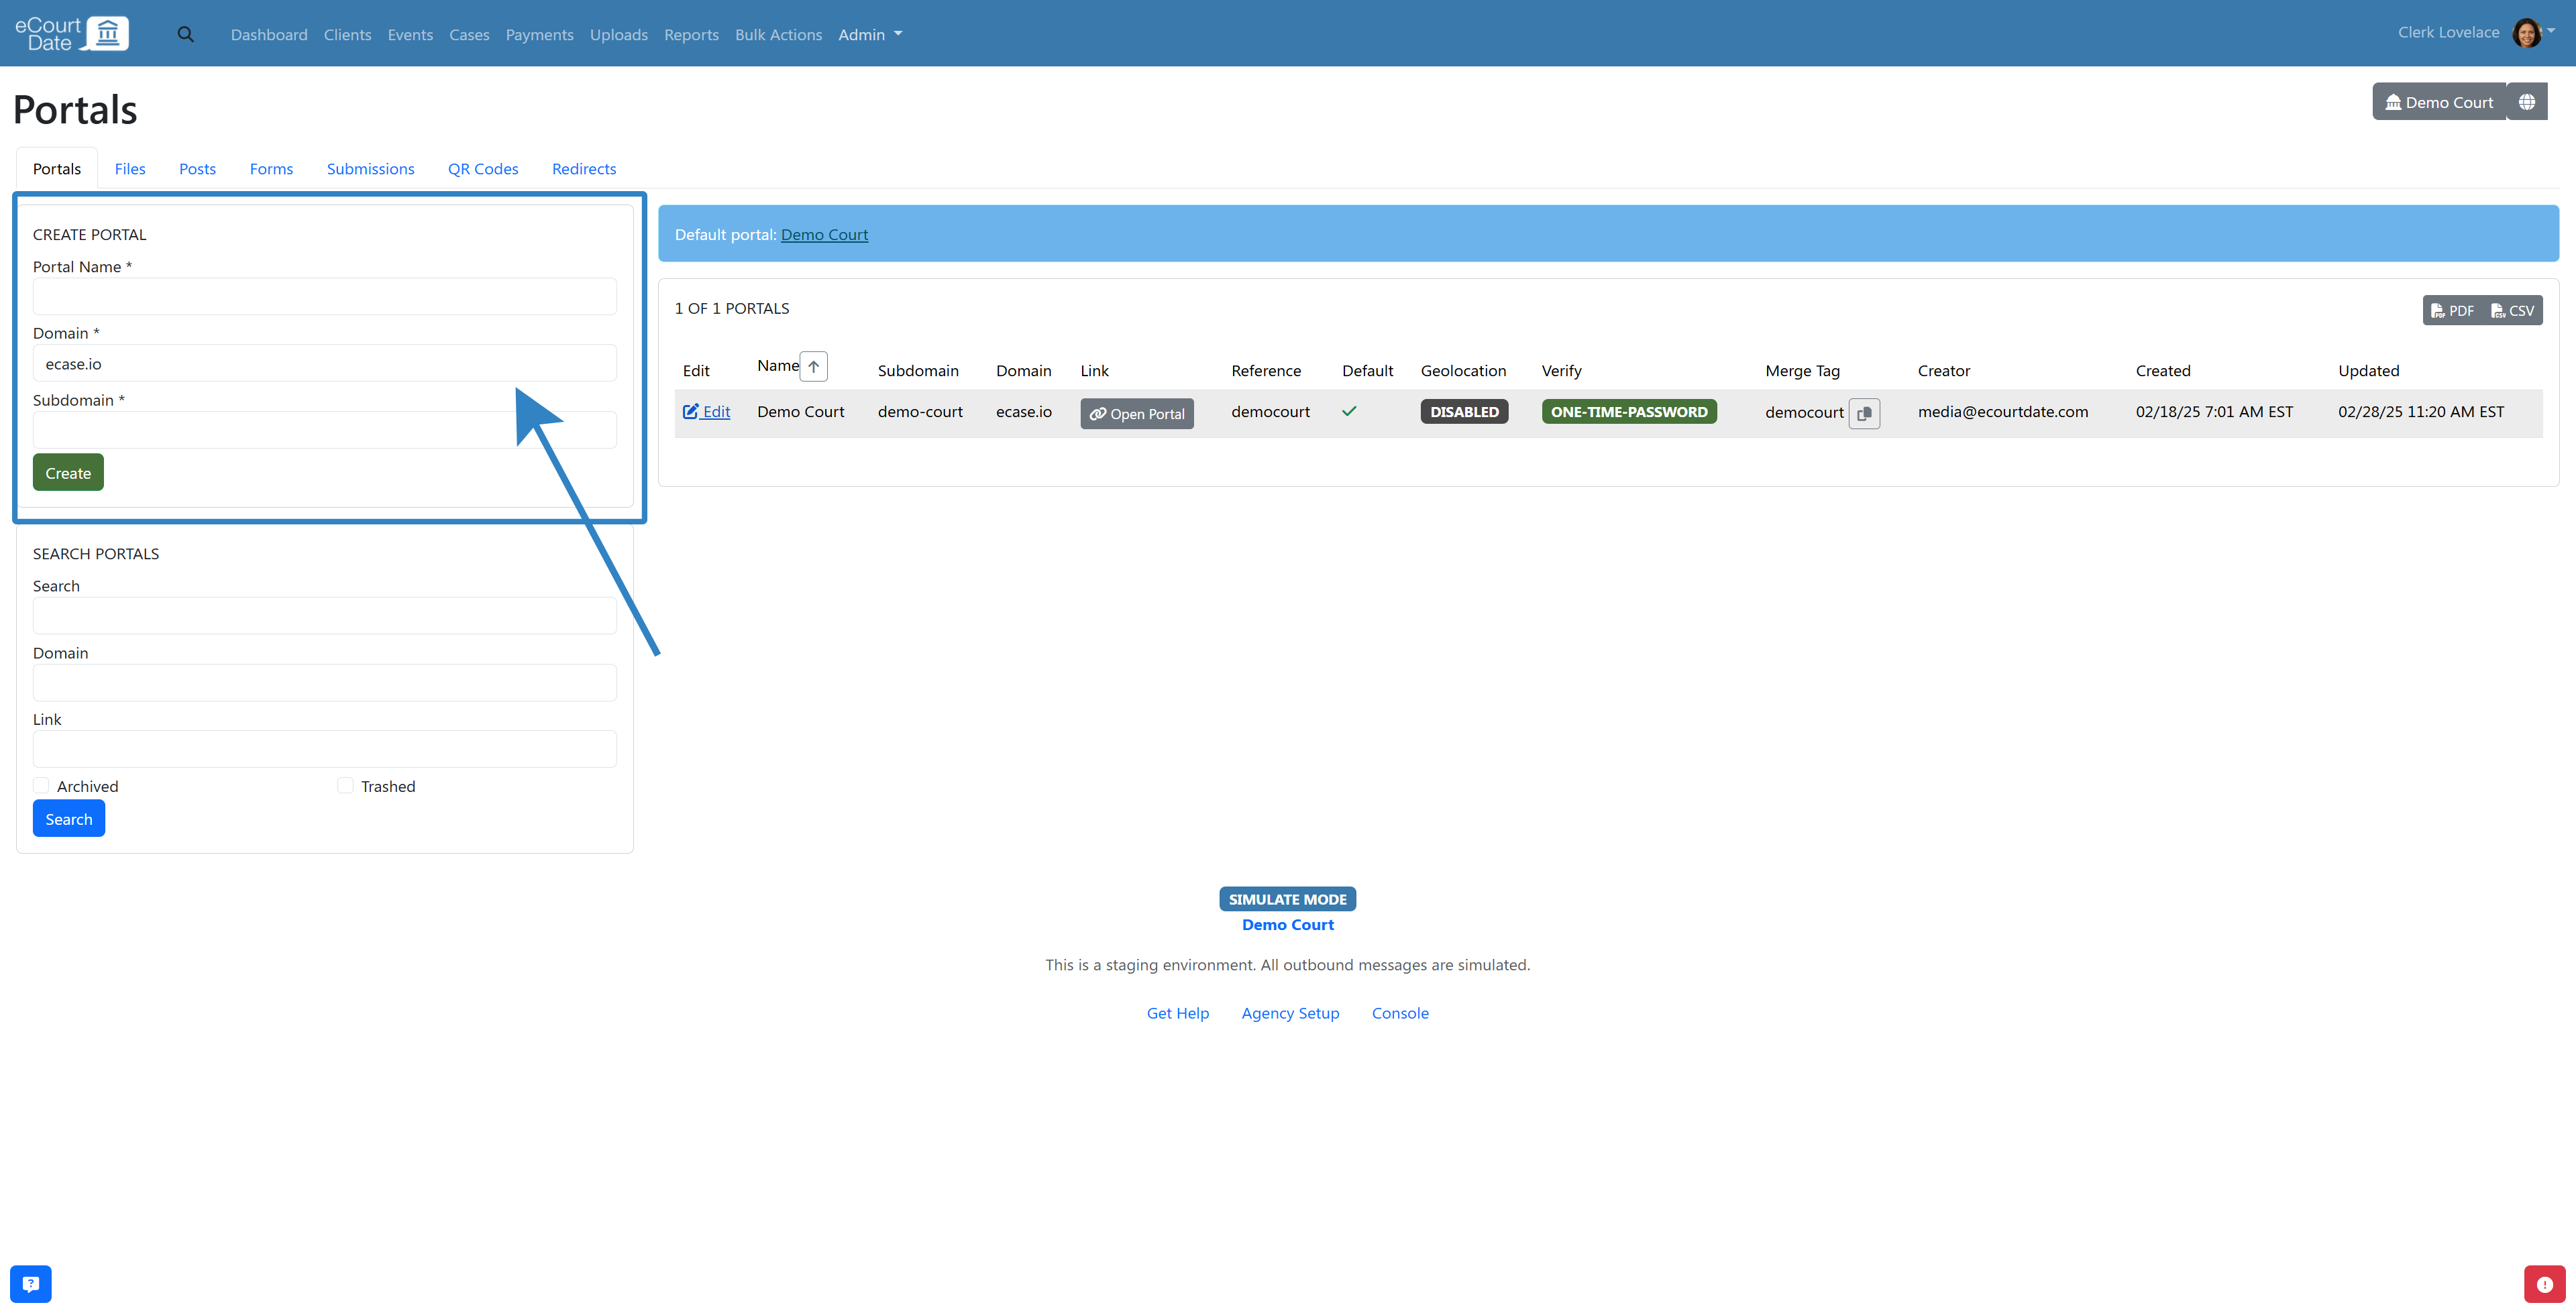
-
Enter the Portal Name, choose the Domain, and set the Subdomain.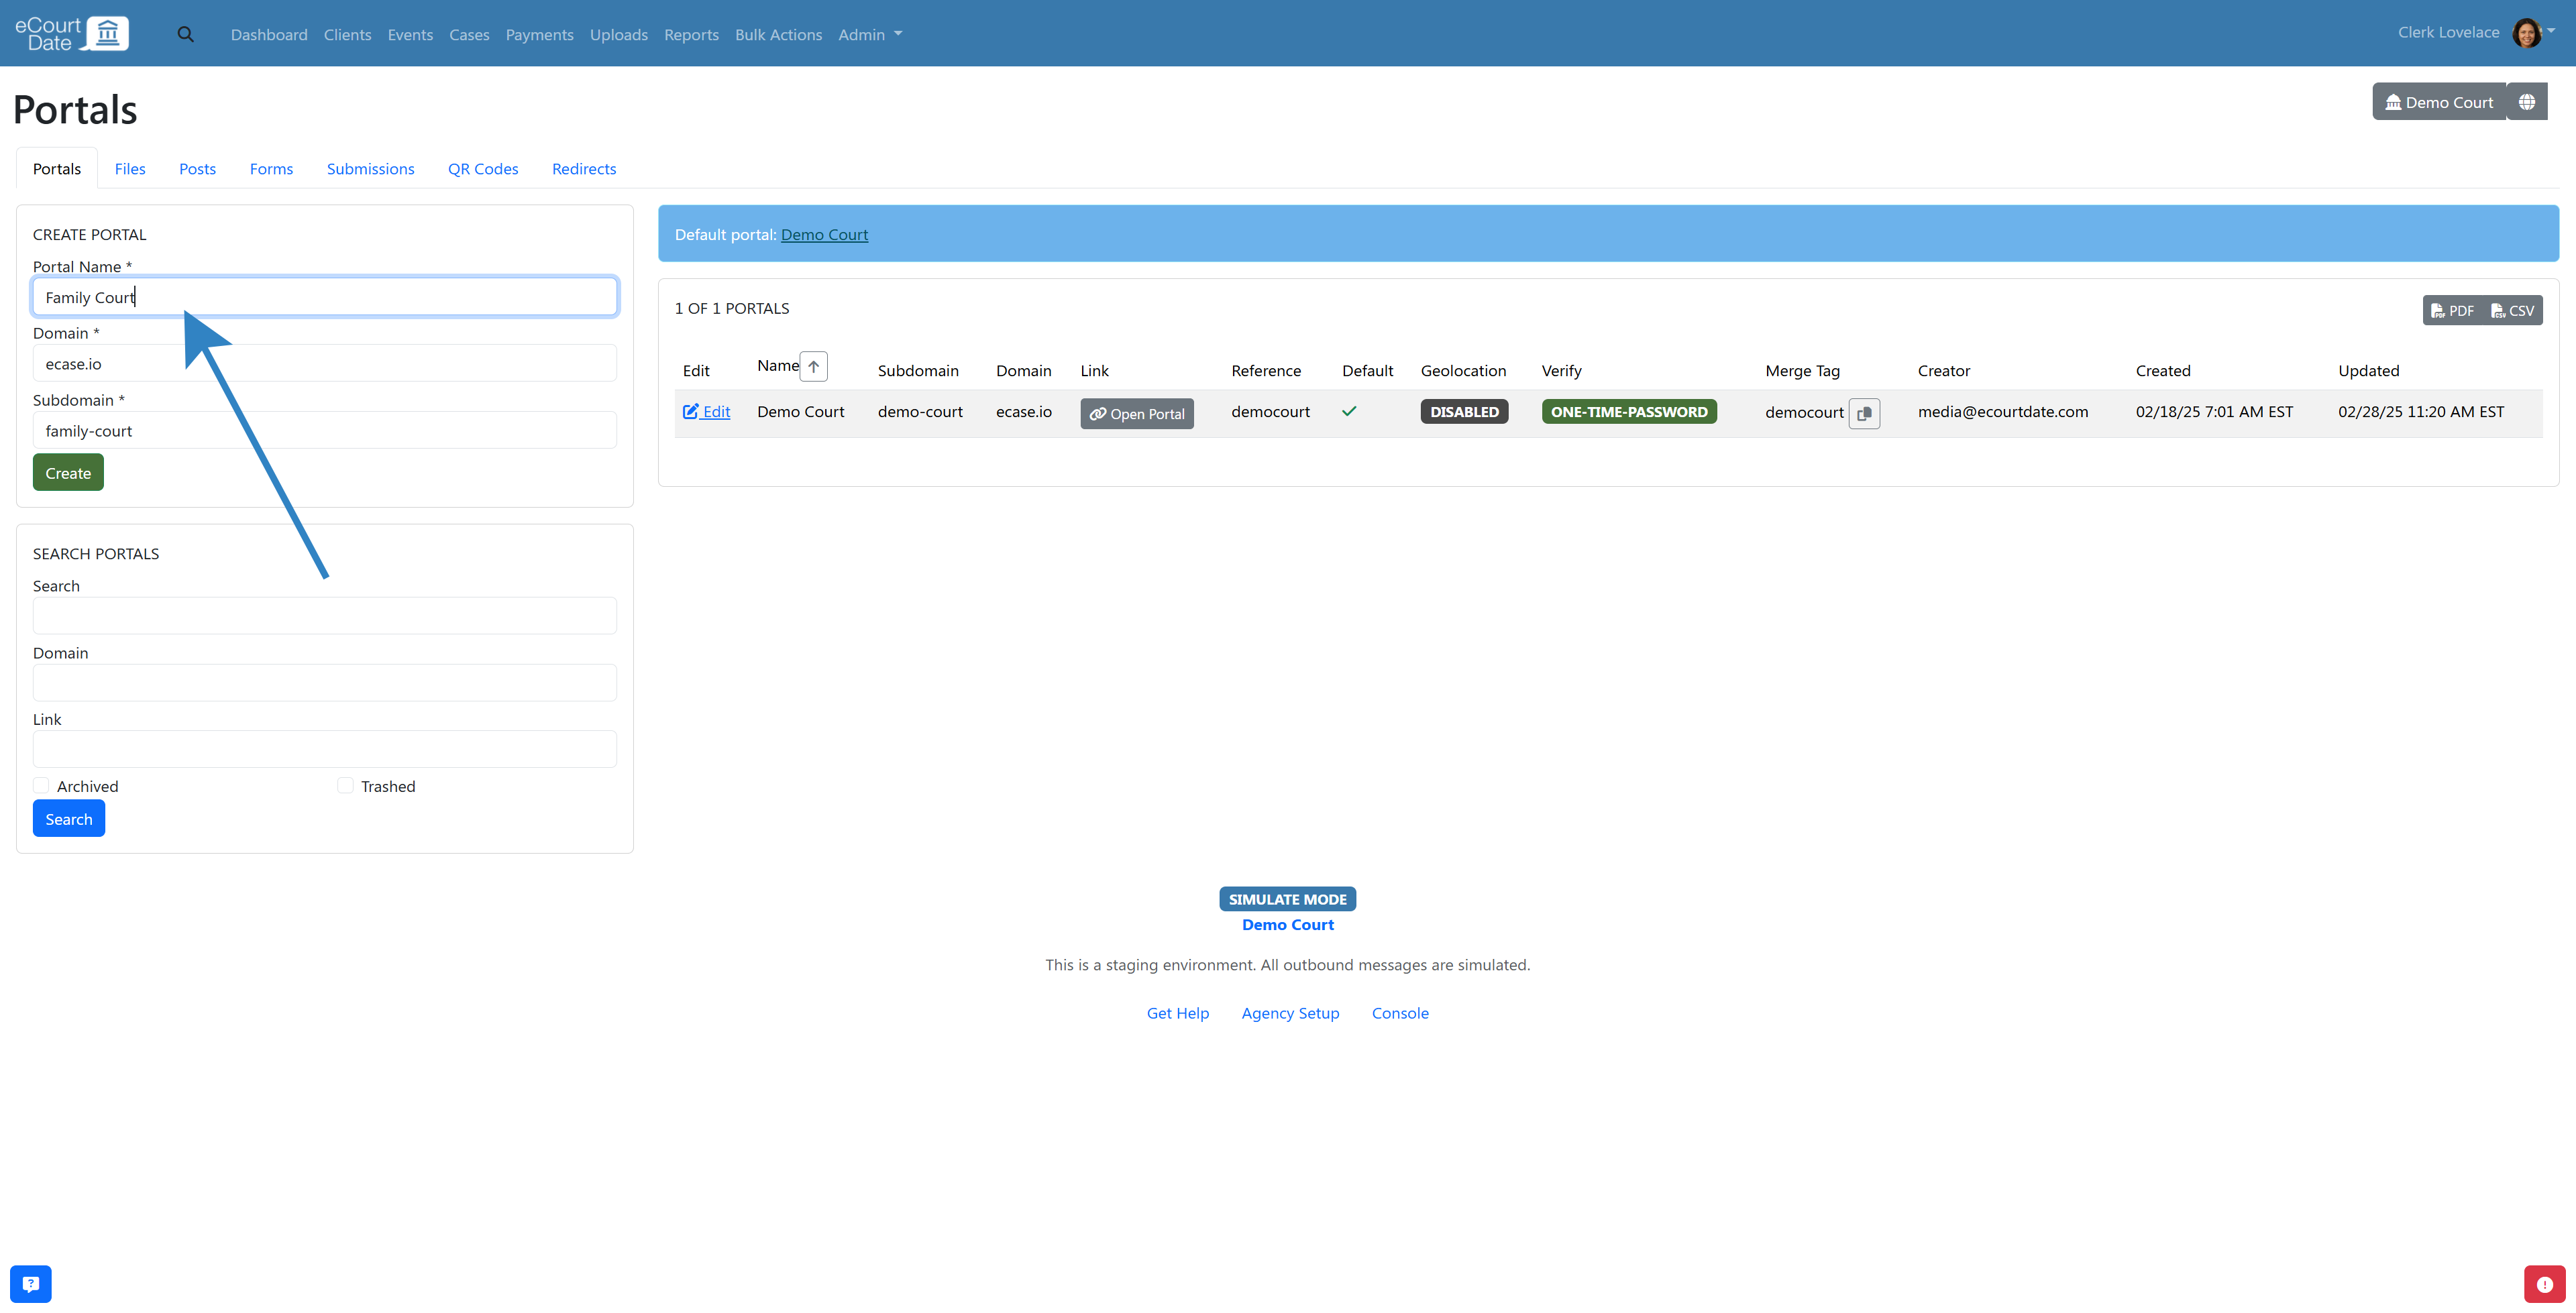
-
Click the Create button to generate the portal.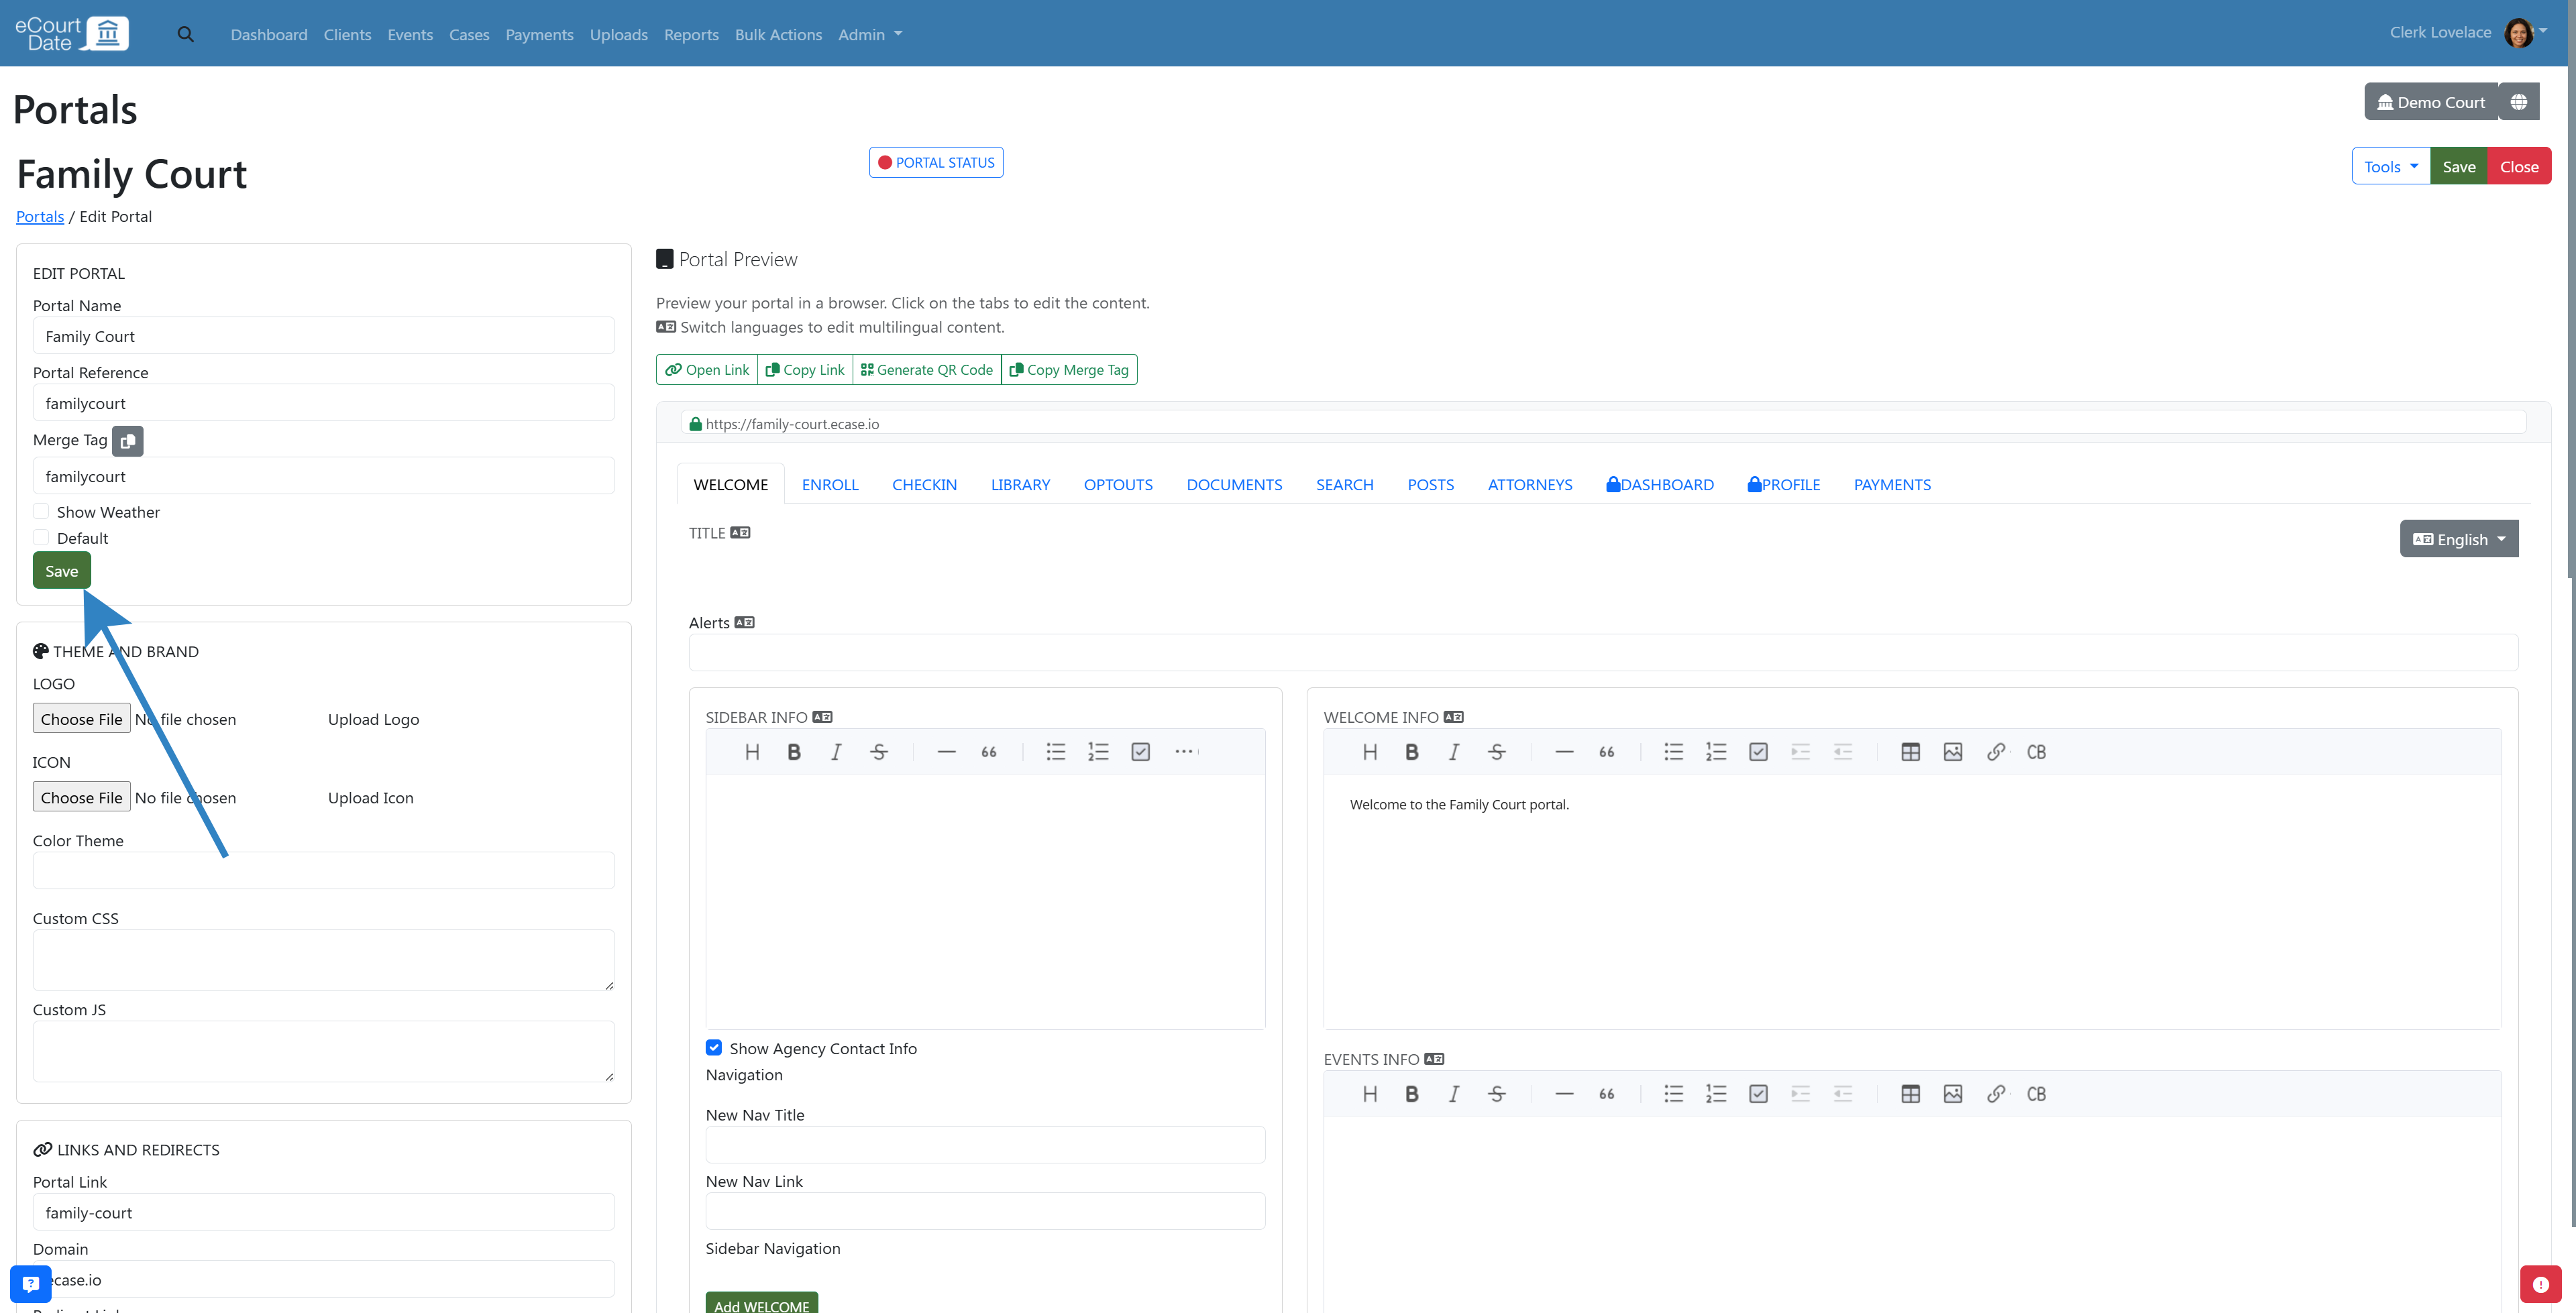
Step 3: Customize the Portal
-
After creating, you will be redirected to the new portal. Otherwise, click on the "Edit" button on the portal that you want to make changes to.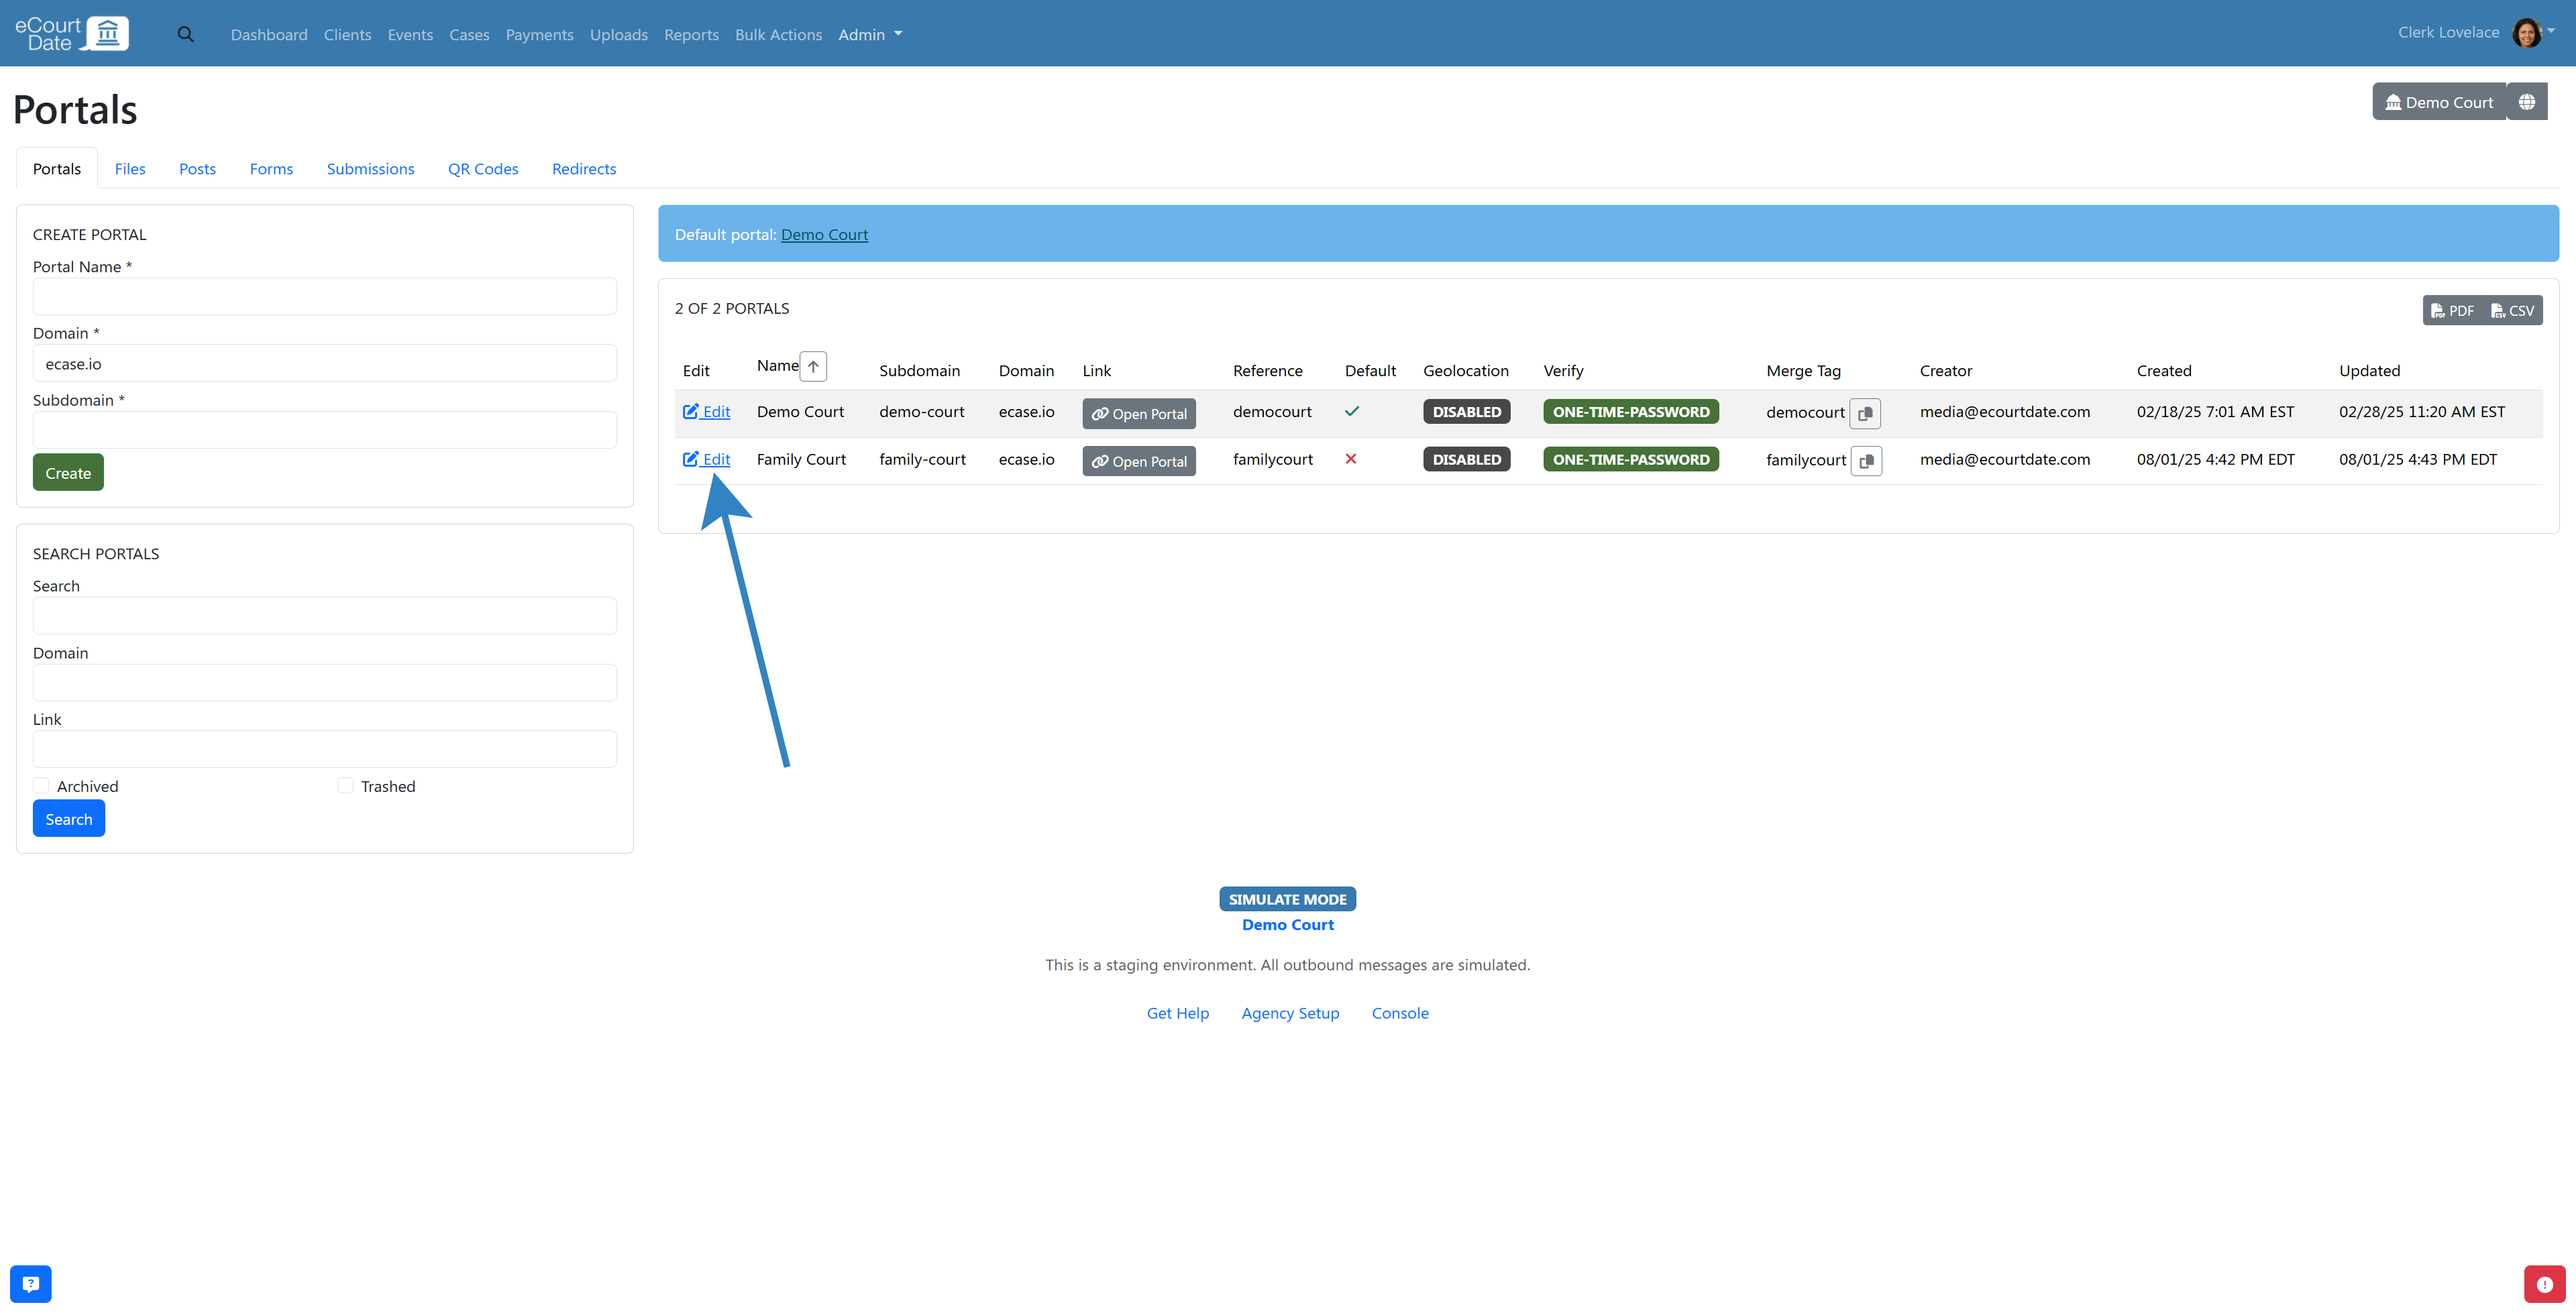
-
Adjust the settings to match your agency's branding and service requirements.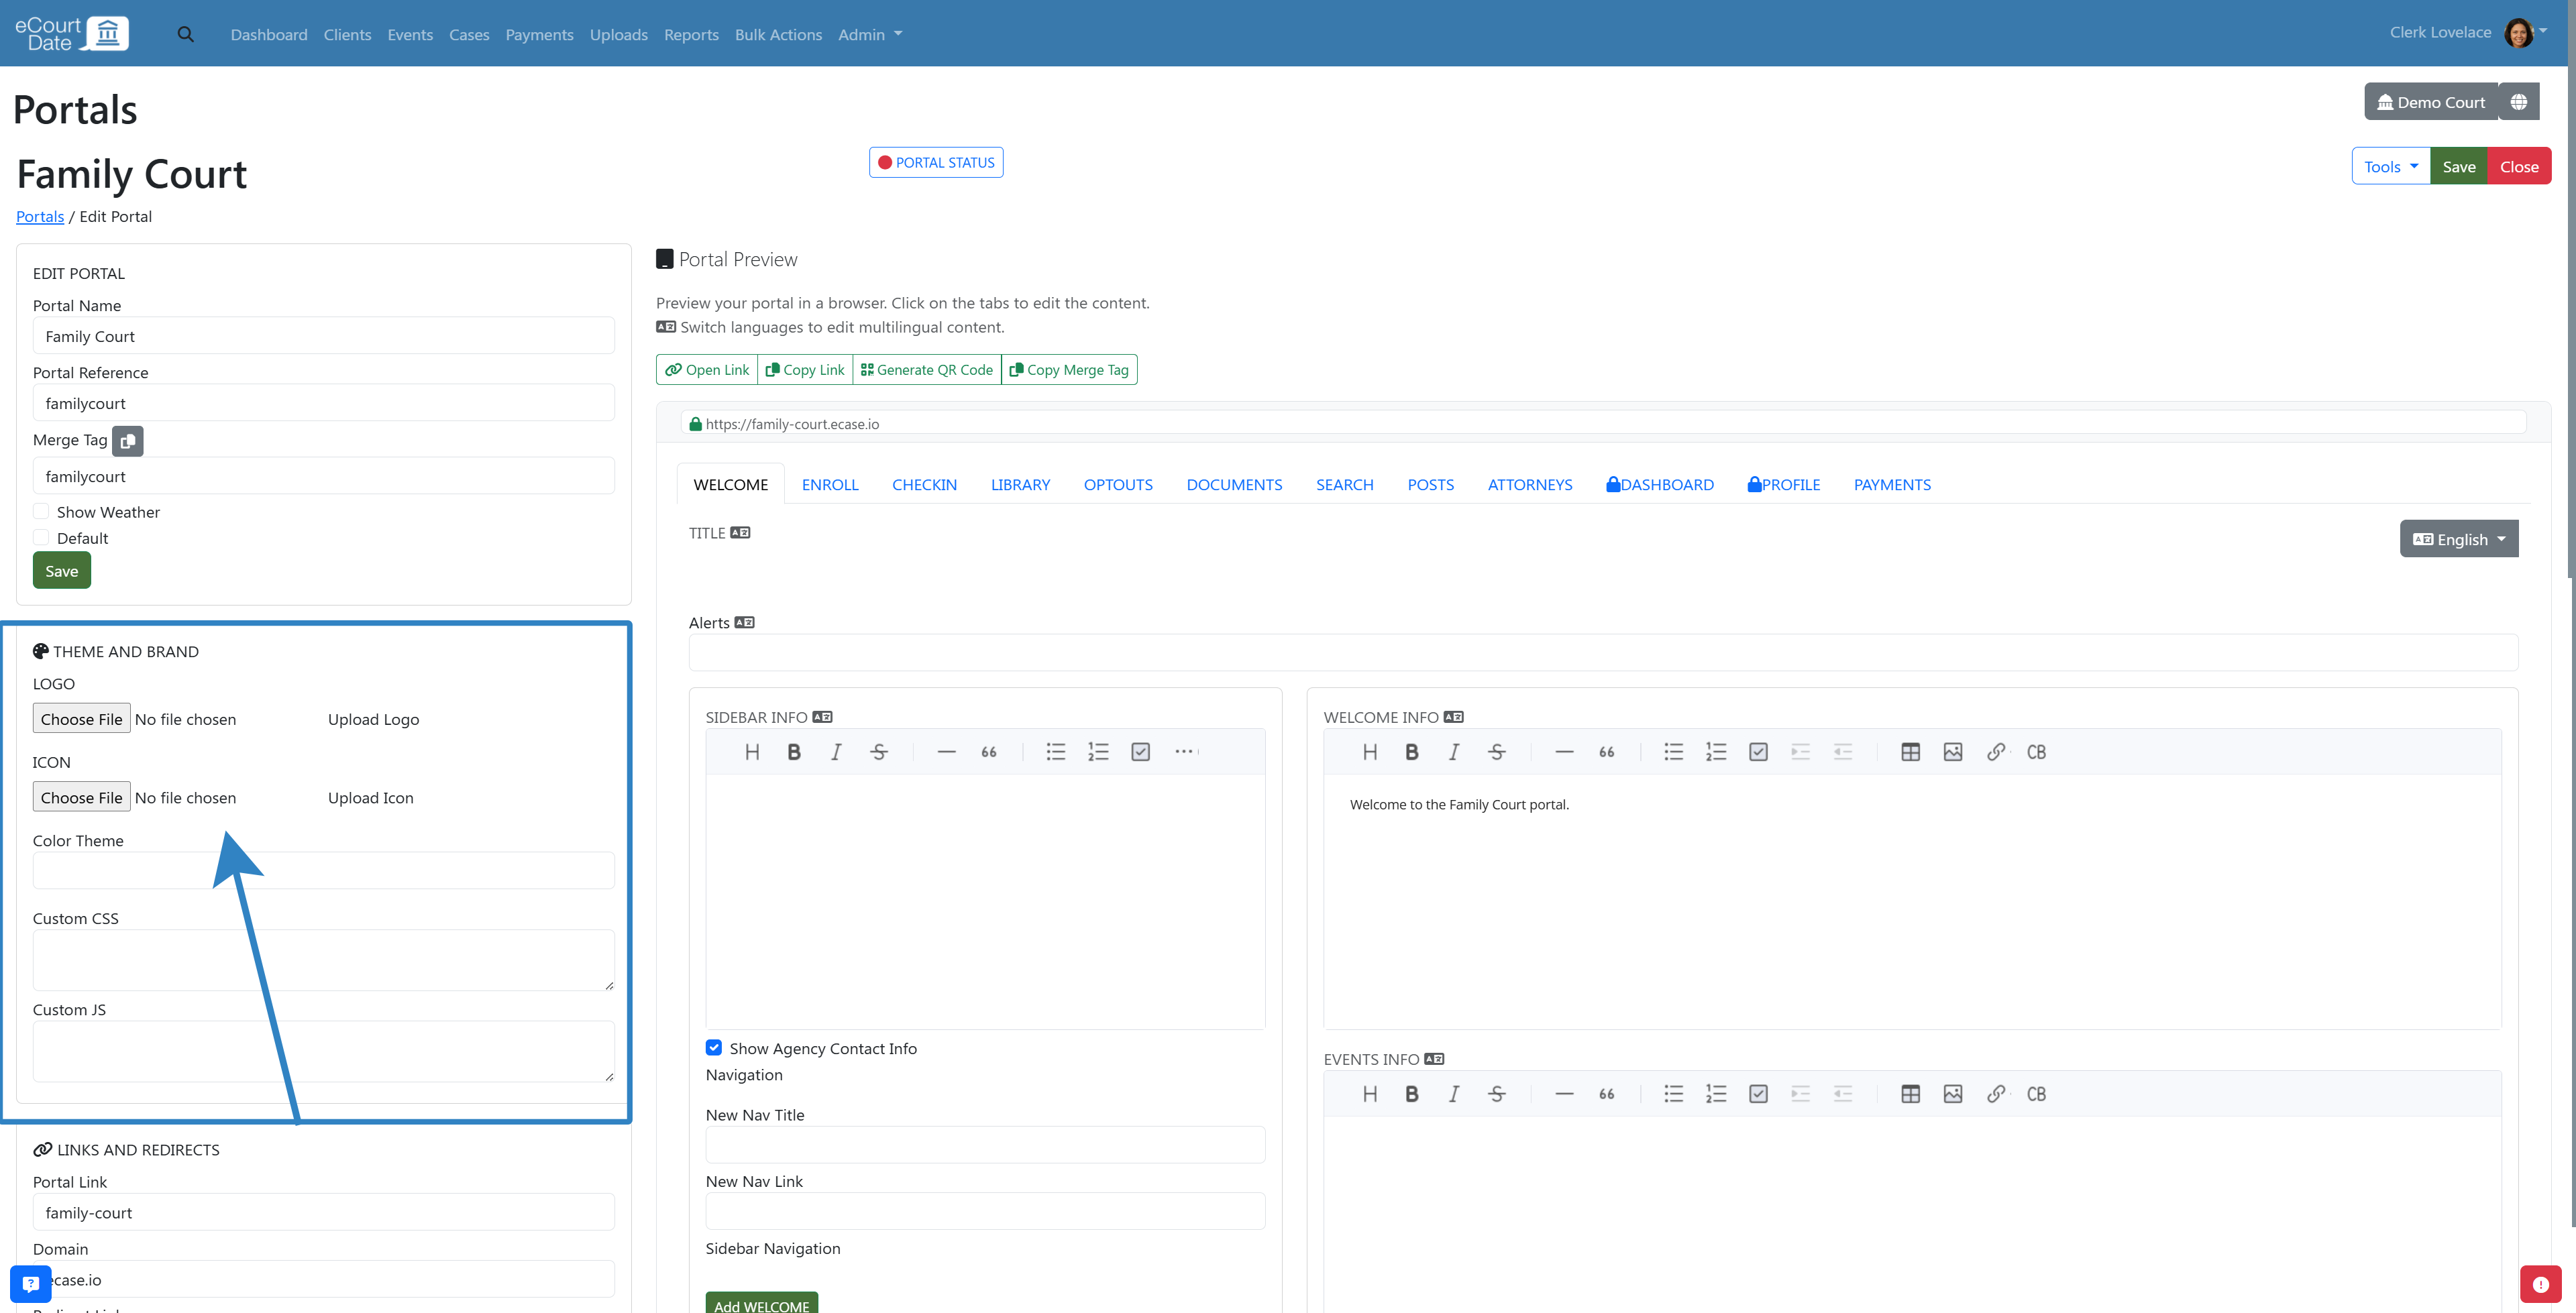
-
Save the changes once customization is complete.
What to Expect
After creating a portal, it is immediately accessible at the configured subdomain URL. Changes to portal settings take effect within a few minutes. Portals are designed to work across all devices and include built-in security and compliance features.
Portal Features
Every eCourtDate web portal includes the following built-in capabilities:
- Responsive design: Portals are accessible from any device, including desktops, tablets, and smartphones. The layout adapts automatically to the visitor's screen size.
- ADA and WCAG compliance: Portals are designed to meet ADA and WCAG accessibility standards, ensuring all visitors can navigate and interact with your content.
- Multi-language support: Portal content supports multiple languages. Configure translations for titles, descriptions, and navigation labels to serve clients in their preferred language.
- Visitor tracking: Track and manage portal visitors through the Opens section. Monitor which pages clients visit, their device information, and engagement metrics. See How to Track Portal Opens for details.
- Custom domain support: Use your own agency domain instead of the default ecase.io domain. See How to Create a Custom Domain for setup instructions.
- SSL certificate included: Every portal includes a free SSL certificate that is provisioned and renewed automatically. All portal traffic is encrypted over HTTPS.
- DDoS protection: Portals include built-in DDoS protection to guard against malicious traffic and ensure availability for your clients.
Best Practices
- Use your agency's logo and color scheme to create a professional, branded experience for clients.
- Enable only the portal features your clients need to keep the interface simple and focused.
- Test your portal on multiple devices (desktop, tablet, phone) before sharing with clients.
- Configure multi-language support if you serve clients who speak different languages.
- Generate QR codes for high-traffic locations like courtroom lobbies and front desks.
Frequently Asked Questions
How do I share my portal with clients?
Messaging
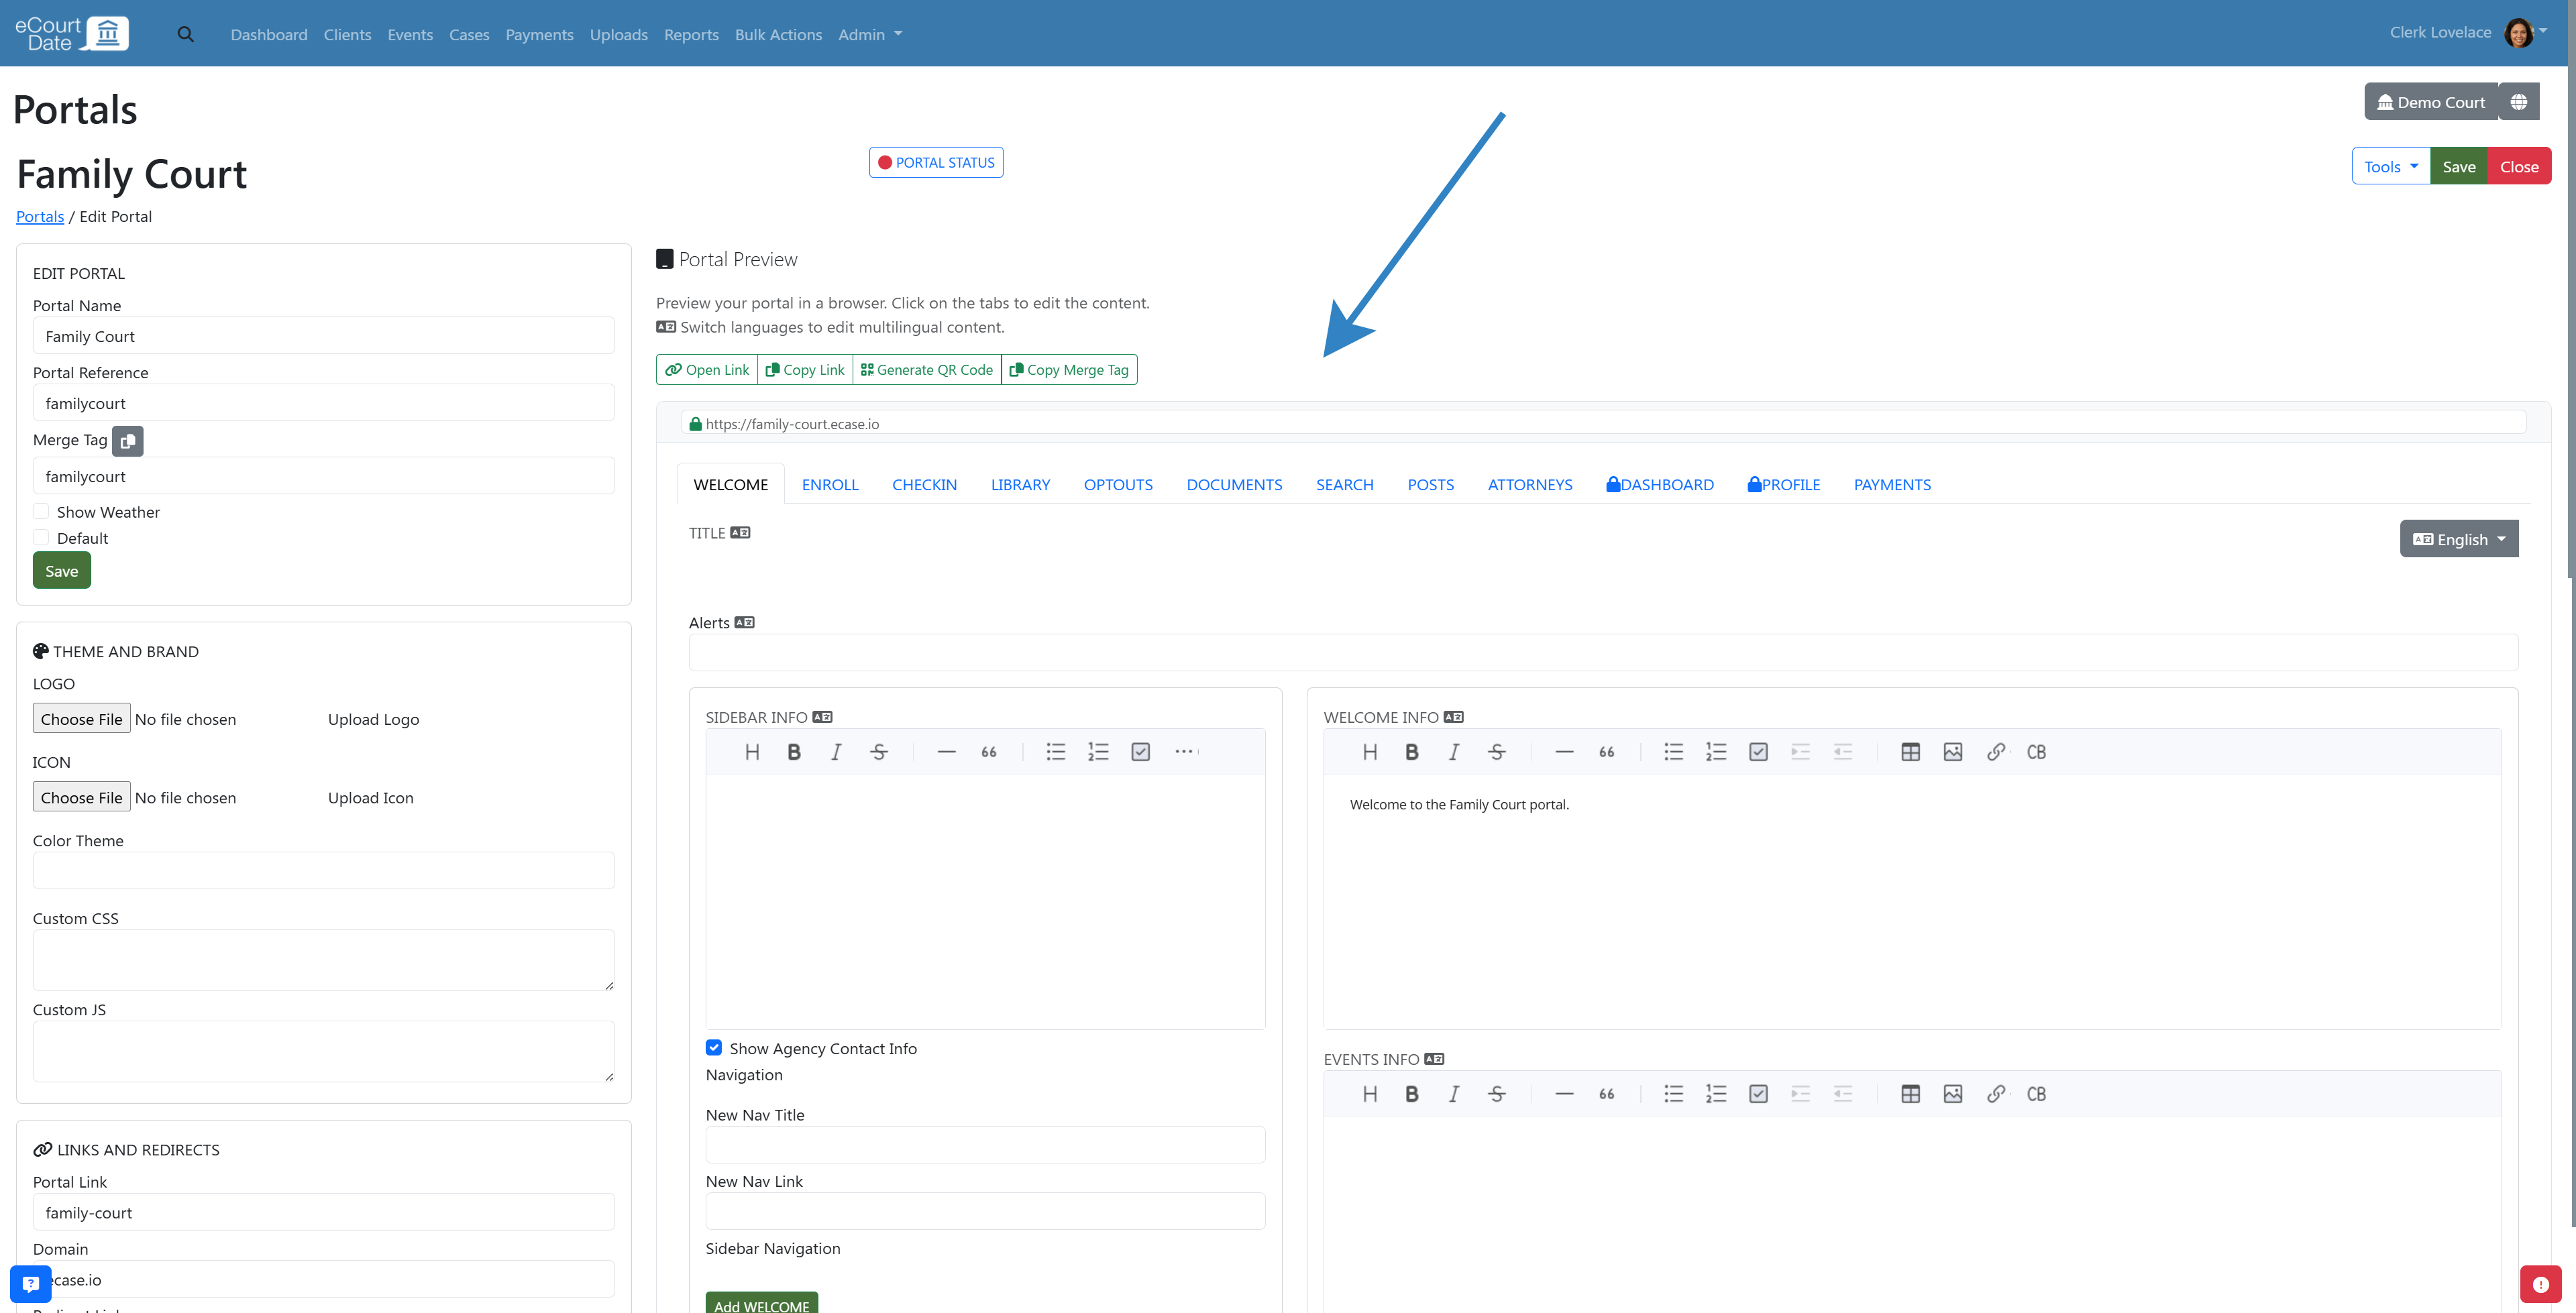
To include a link to the portal in outbound messages, click the Copy Link button when editing the portal. To share a link to the enroll page or a specific page, click the tab, then click the Copy Link button. Once copied, paste the link in any message templates. Ensure to test any message templates with a link before sharing.
QR Codes
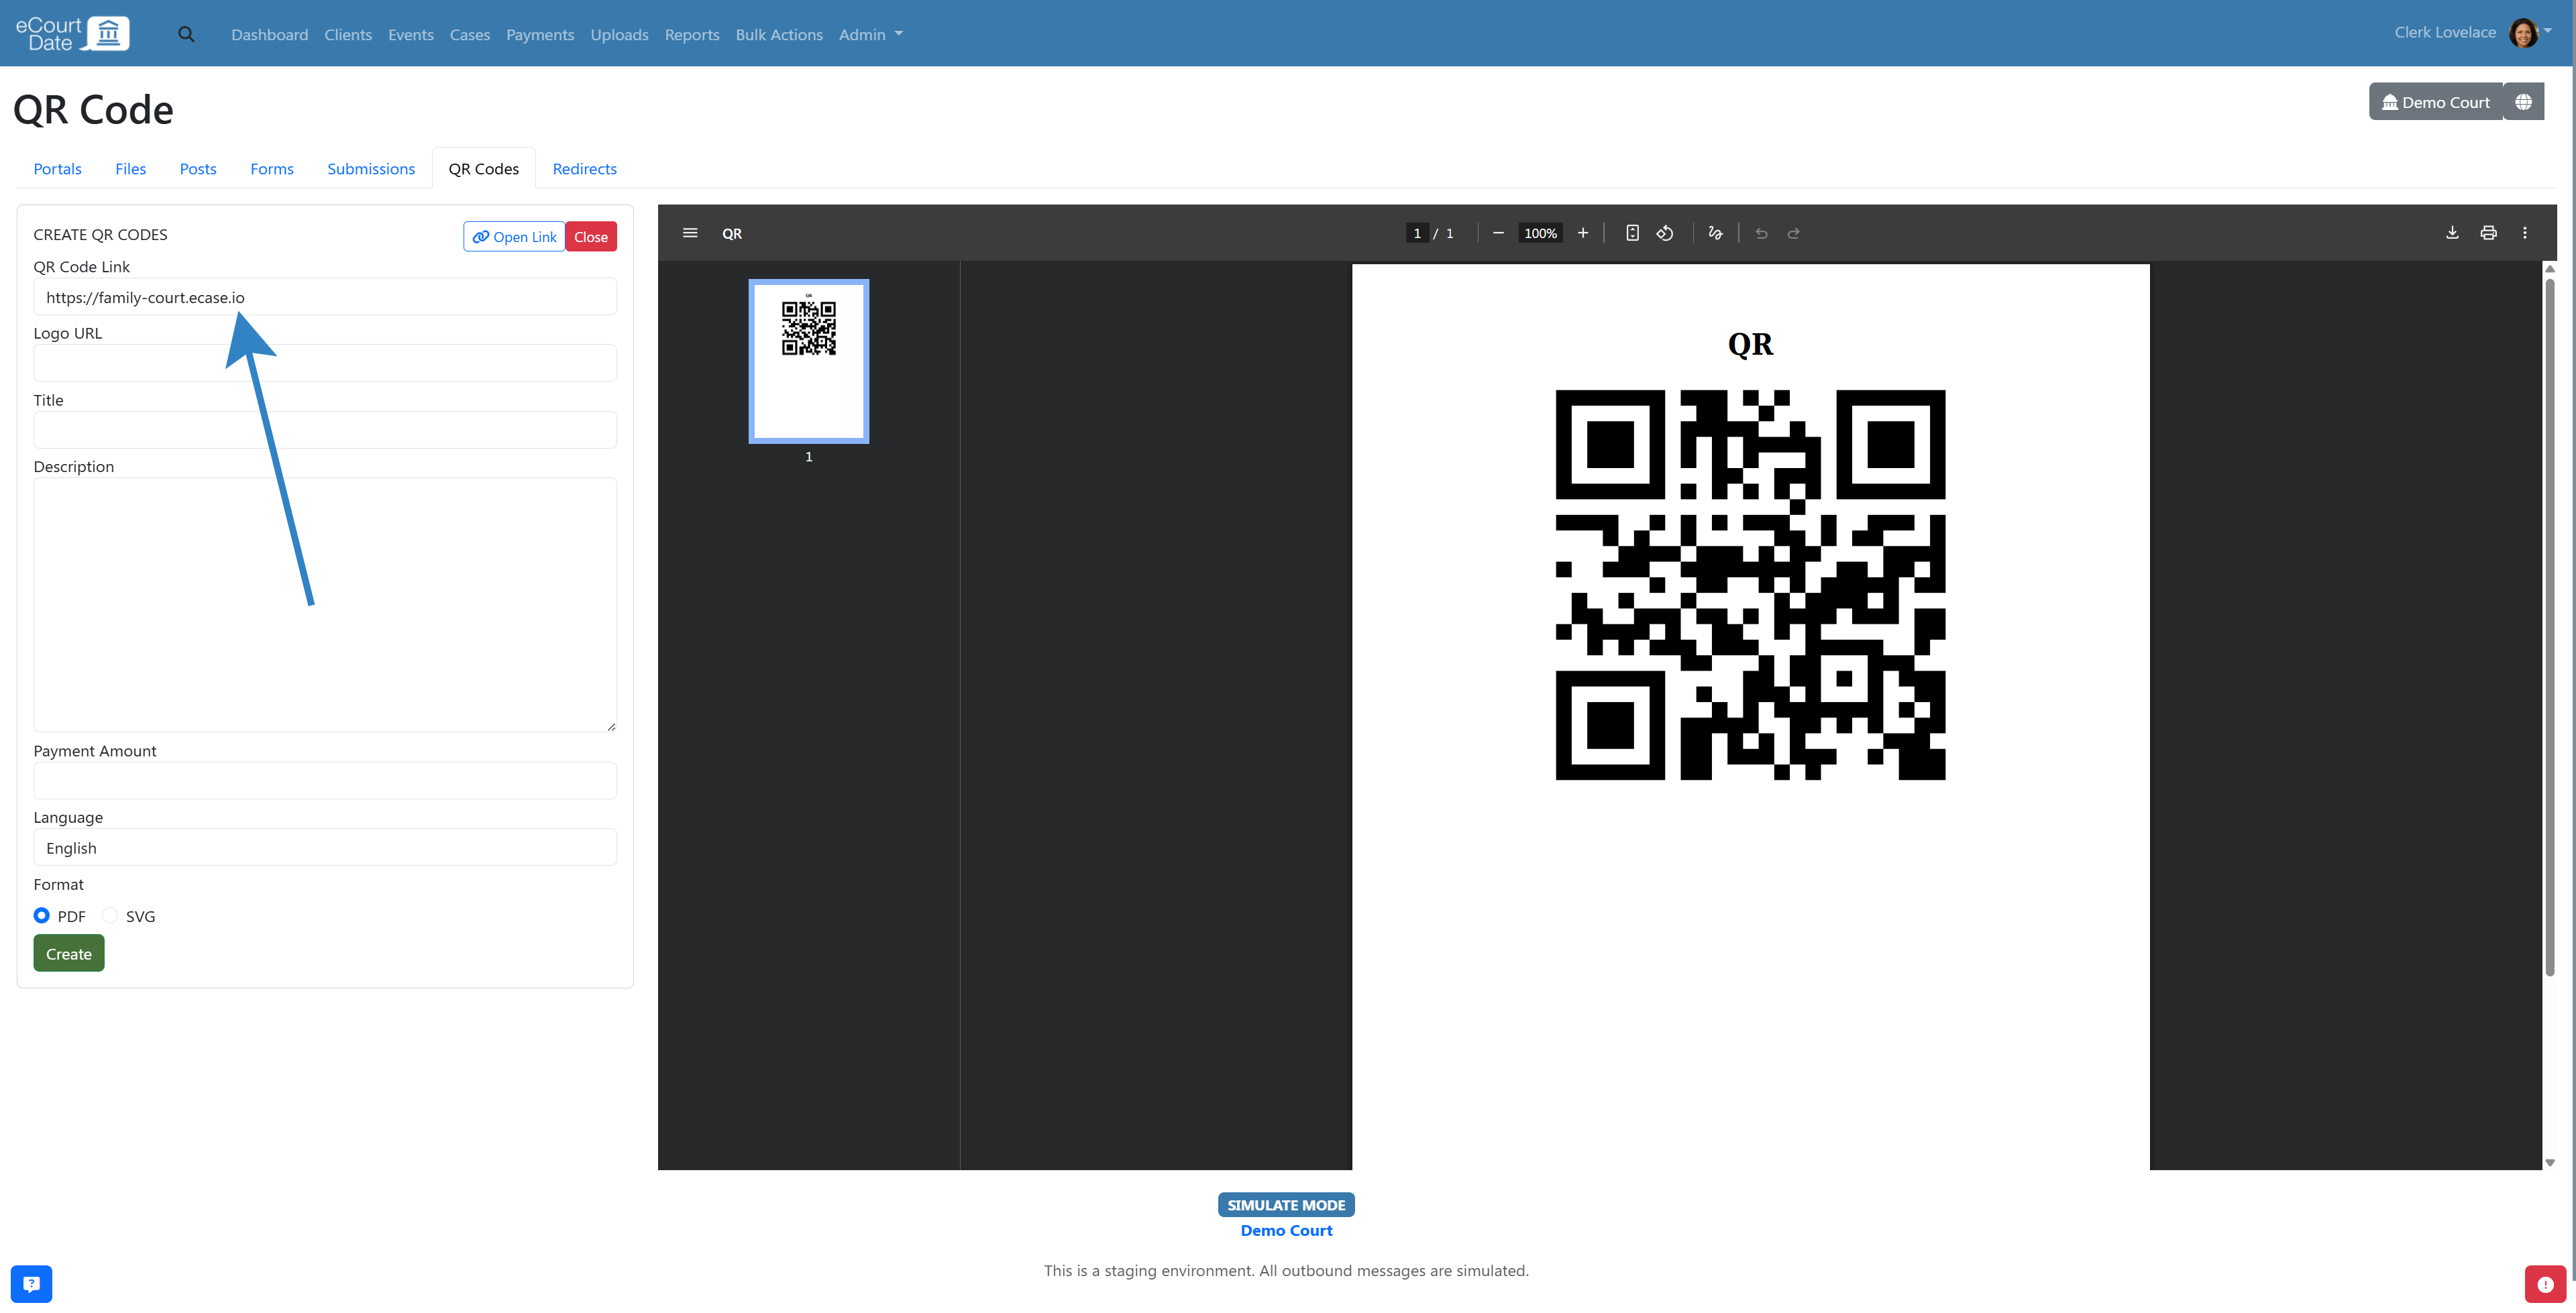
To create a QR code, click the *Generate QR Code *button when editing the portal. You will be automatically redirected to the QR code. Ensure to test the QR code before sharing.
To manage QR codes in general, click the *Close *button to go back to the main portals page. Then click the *QR Codes *tab. You can create a new QR code or view previously generated ones. 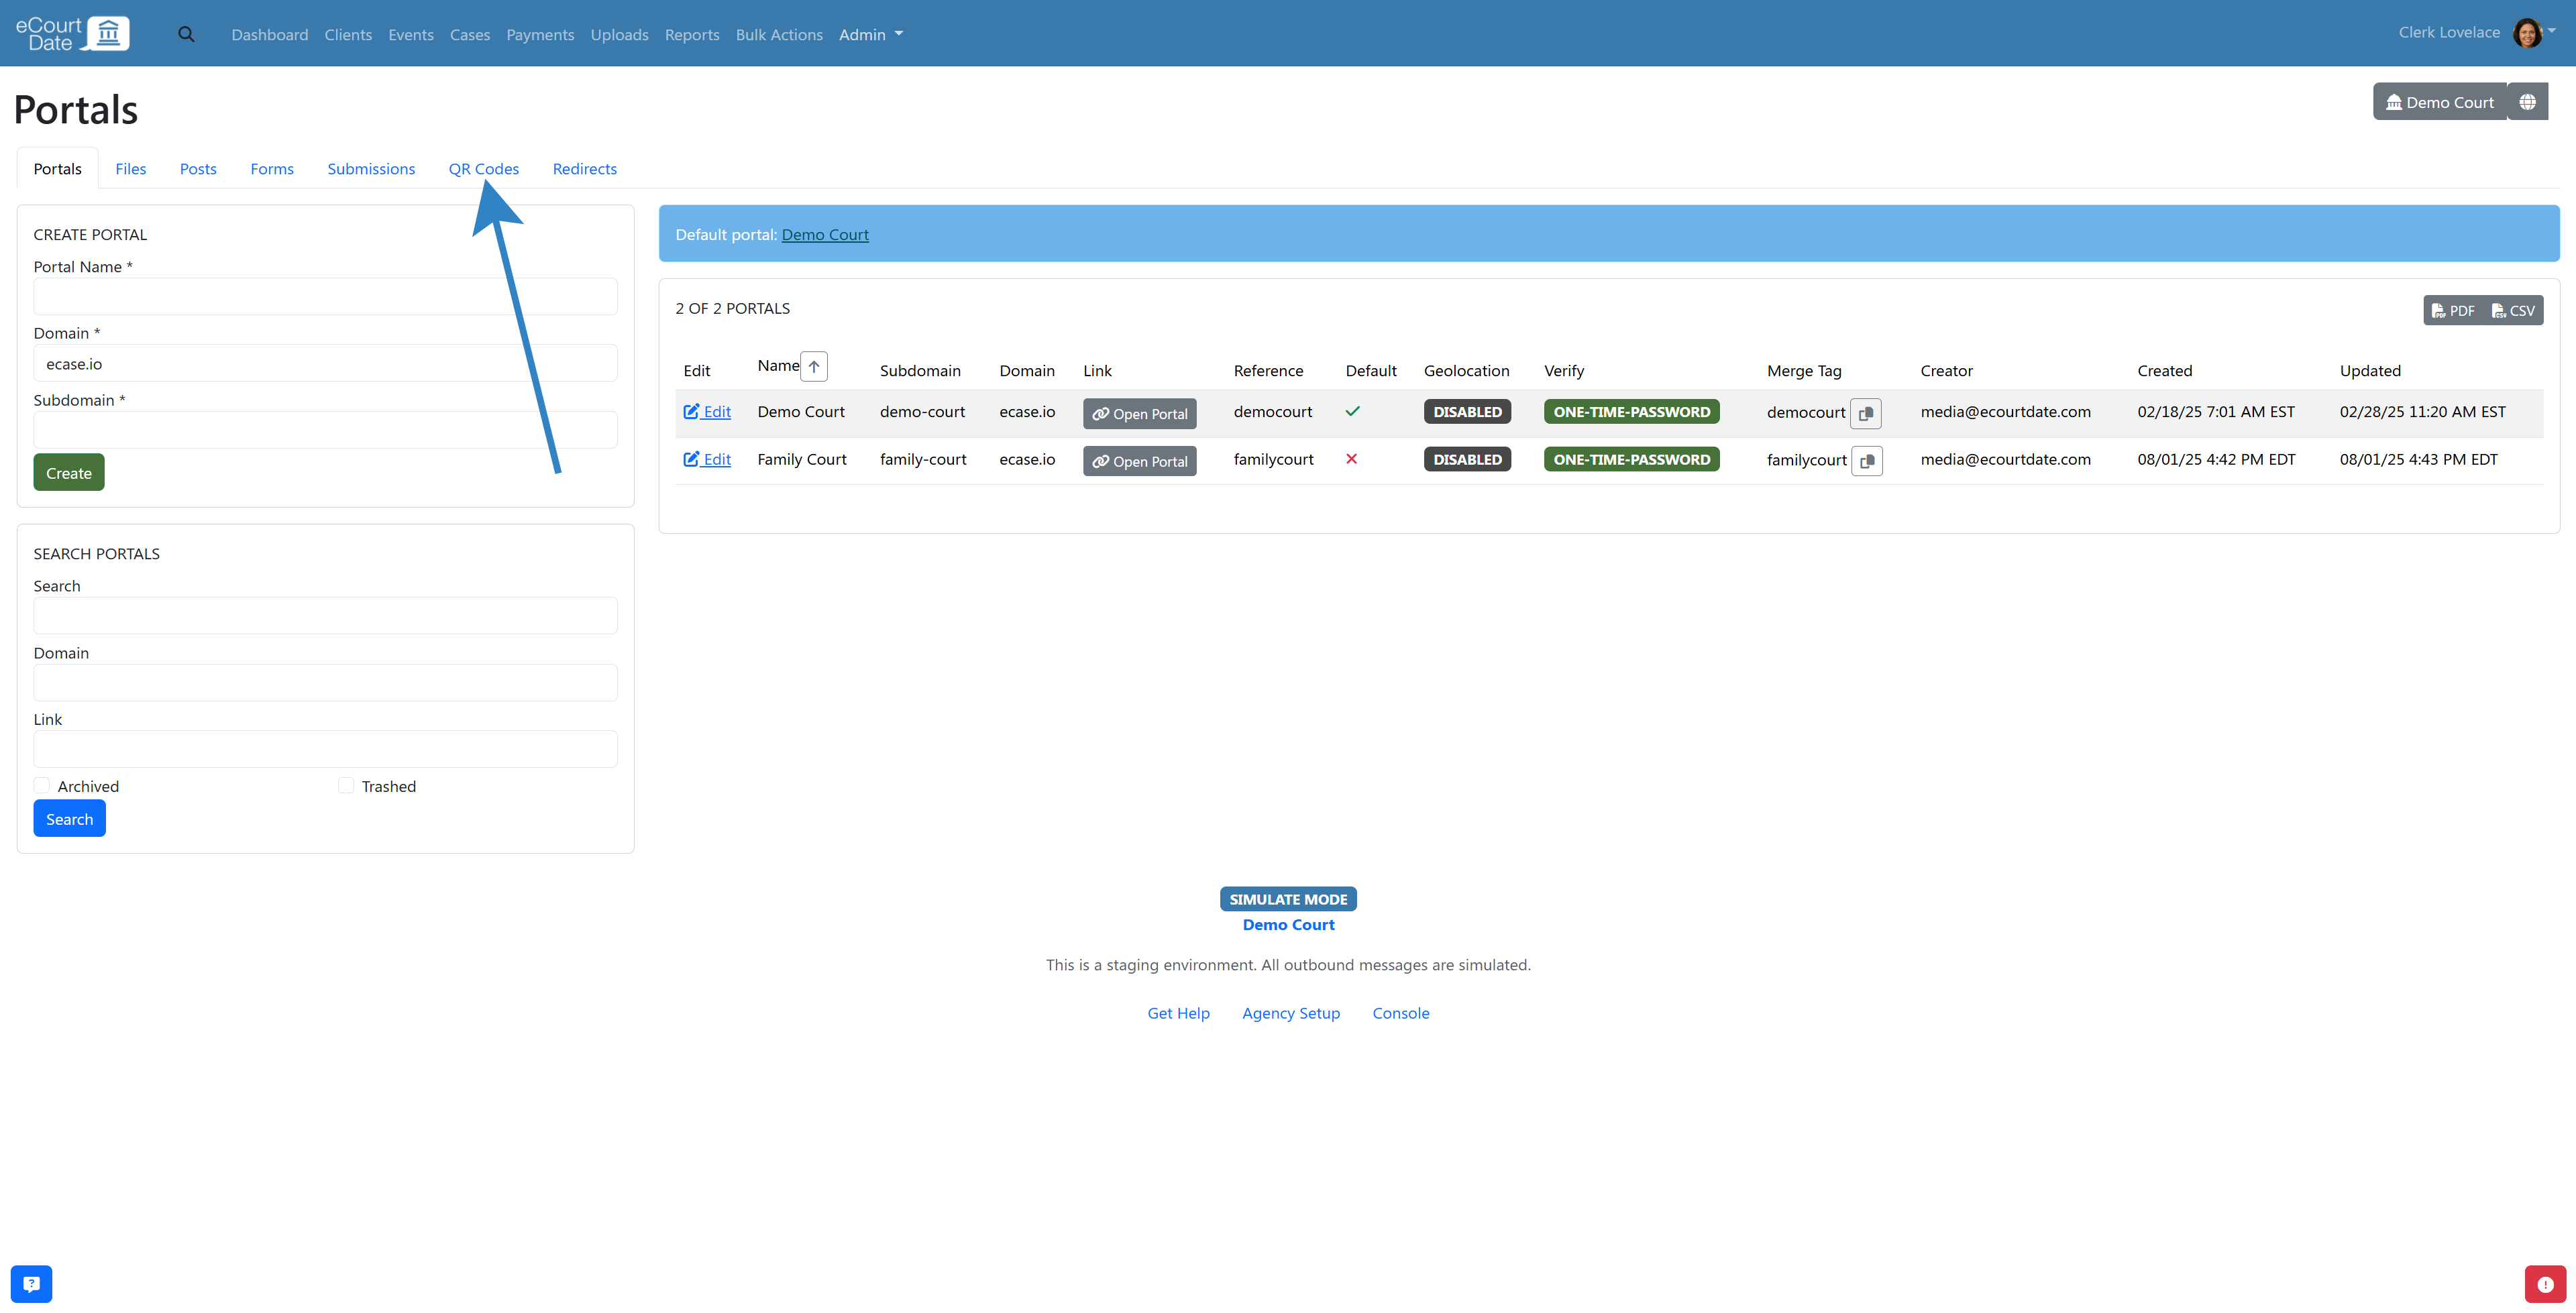
Can I use our agency domain instead of ecase.io?
Yes, you can create a custom domain. Refer to our guide on custom domains to learn more.
Troubleshooting
I changed a setting and it's not reflecting on the portal.
Ensure that you clicked the Save button to apply any changes. Some changes may take up to 5 minutes to reflect on the portal.
I changed the domain or subdomain and the portal is no longer working.
If you are using an ecase.io domain, wait up to 1 hour for the change to take effect.
If you are using a custom domain, ensure that you've properly configured the DNS records. Changes to DNS may take 1 - 2 days to take effect.
Learn how to create and customize web portals for your clients on the eCourtDate platform.
### Overview
Web portals on the eCourtDate platform are customizable and dynamic websites that allow your agency's end clients to interact with your services effectively. These portals serve as a hub where clients can register for notifications, view events, download and upload files, and sign in to change their preferences. Embedding these portals into your agency's website or sharing them through QR codes extends their accessibility. Web portals give clients the ability to find answers, track their calendar, and complete tasks on their own. This self-service approach reduces the need to contact staff, keeps communication clear, and allows agencies to focus on more complex requests.
### Prerequisites
Before creating a web portal, ensure that you have:
- Admin access to the eCourtDate platform
- Necessary agency branding assets (e.g., logos, color schemes)
- Details on the services and functionalities you wish to offer through the portal
- Information regarding client access permissions and security settings
### How to Steps
Follow these step-by-step instructions to create a web portal:
#### Step 1: Access the Portals Page
- Navigate to the **Admin** dropdown in the top navigation bar.
- Select **Portals** from the list.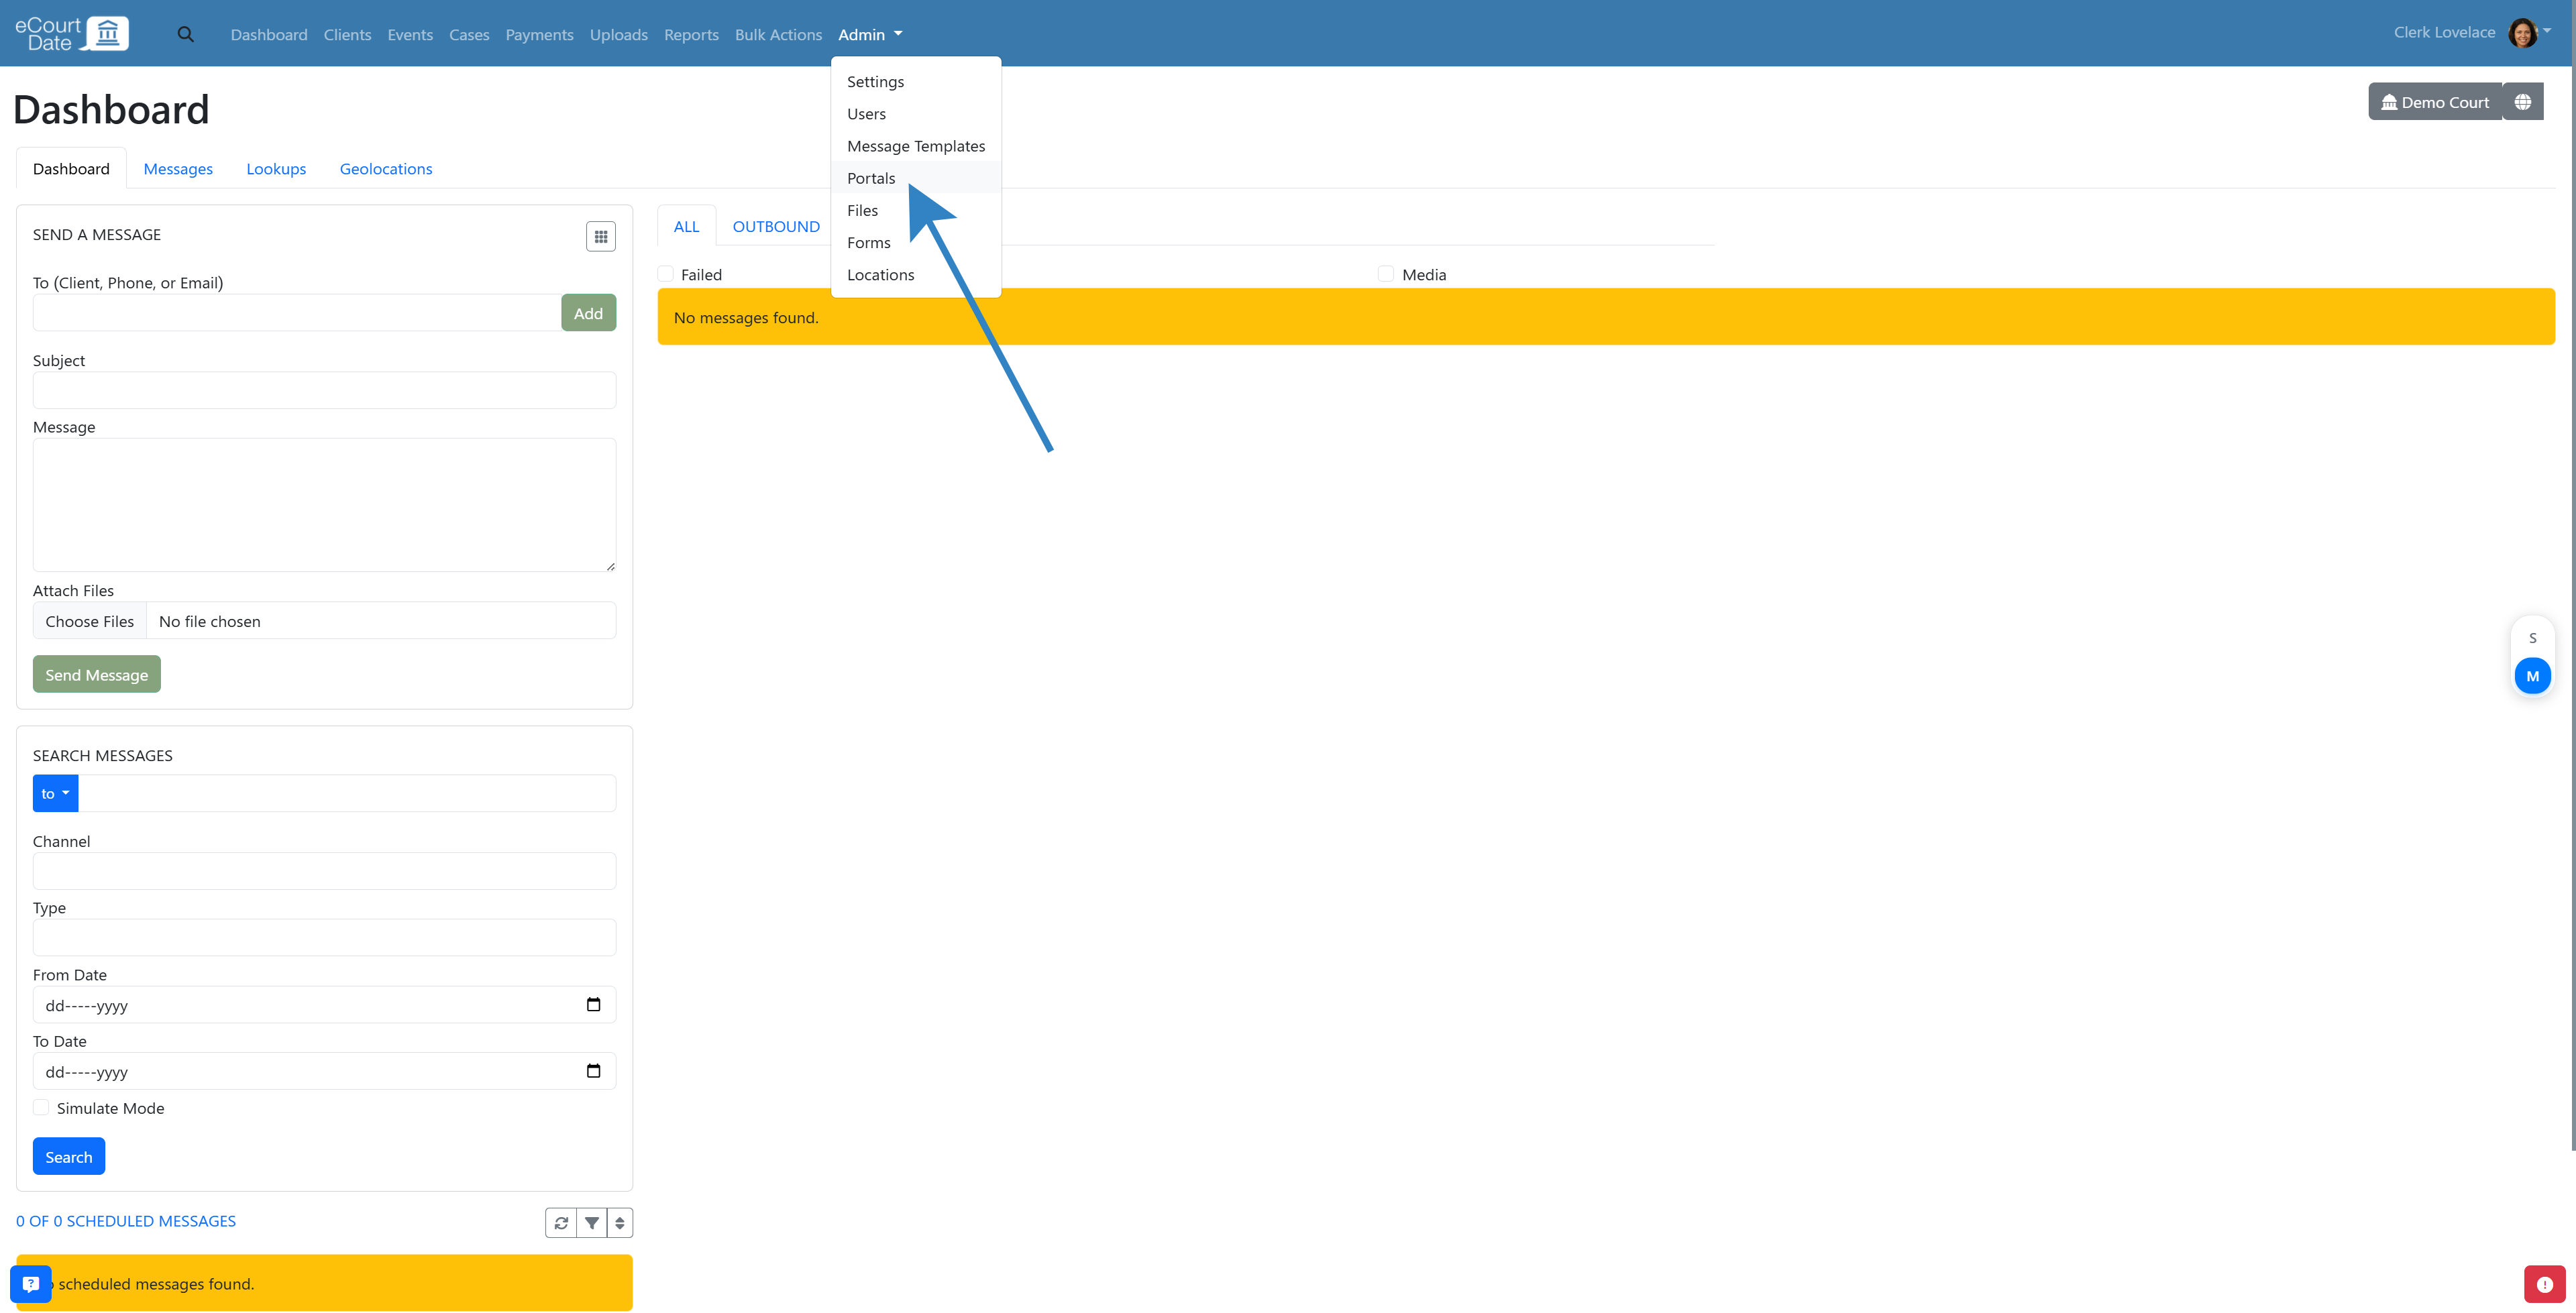
#### Step 2: Create a New Portal
- In the left column, locate the **Create Portal** form.
- Enter the Portal Name, choose the Domain, and set the Subdomain.
- Click the **Create** button to generate the portal.
#### Step 3: Customize the Portal
- After creating, you will be redirected to the new portal. Otherwise, click on the "Edit" button on the portal that you want to make changes to.
- Adjust the settings to match your agency's branding and service requirements.
- Save the changes once customization is complete.
### What to Expect
After creating a portal, it is immediately accessible at the configured subdomain URL. Changes to portal settings take effect within a few minutes. Portals are designed to work across all devices and include built-in security and compliance features.
### Portal Features
Every eCourtDate web portal includes the following built-in capabilities:
- **Responsive design:** Portals are accessible from any device, including desktops, tablets, and smartphones. The layout adapts automatically to the visitor's screen size.
- **ADA and WCAG compliance:** Portals are designed to meet ADA and WCAG accessibility standards, ensuring all visitors can navigate and interact with your content.
- **Multi-language support:** Portal content supports multiple languages. Configure translations for titles, descriptions, and navigation labels to serve clients in their preferred language.
- **Visitor tracking:** Track and manage portal visitors through the **Opens** section. Monitor which pages clients visit, their device information, and engagement metrics. See [How to Track Portal Opens](/how-to-track-portal-opens) for details.
- **Custom domain support:** Use your own agency domain instead of the default ecase.io domain. See [How to Create a Custom Domain](/how-to-create-a-custom-domain) for setup instructions.
- **SSL certificate included:** Every portal includes a free SSL certificate that is provisioned and renewed automatically. All portal traffic is encrypted over HTTPS.
- **DDoS protection:** Portals include built-in DDoS protection to guard against malicious traffic and ensure availability for your clients.
### Best Practices
- Use your agency's logo and color scheme to create a professional, branded experience for clients.
- Enable only the portal features your clients need to keep the interface simple and focused.
- Test your portal on multiple devices (desktop, tablet, phone) before sharing with clients.
- Configure multi-language support if you serve clients who speak different languages.
- Generate QR codes for high-traffic locations like courtroom lobbies and front desks.
### Frequently Asked Questions
**How do I share my portal with clients?**
**Messaging**
To include a link to the portal in outbound messages, click the *Copy Link* button when editing the portal. To share a link to the enroll page or a specific page, click the tab, then click the *Copy Link* button. Once copied, paste the link in any message templates. Ensure to test any message templates with a link before sharing.
**QR Codes**
To create a QR code, click the *Generate QR Code *button when editing the portal. You will be automatically redirected to the QR code. Ensure to test the QR code before sharing.
To manage QR codes in general, click the *Close *button to go back to the main portals page. Then click the *QR Codes *tab. You can create a new QR code or view previously generated ones. 
****
**Can I use our agency domain instead of ecase.io?**
Yes, you can create a custom domain. [Refer to our guide on custom domains](https://domains.ecourtdate.com/) to learn more.
### Troubleshooting
**I changed a setting and it's not reflecting on the portal.**
Ensure that you clicked the *Save* button to apply any changes. Some changes may take up to 5 minutes to reflect on the portal.
**I changed the domain or subdomain and the portal is no longer working.**
If you are using an *ecase.io* domain, wait up to 1 hour for the change to take effect.
If you are using a custom domain, ensure that you've properly configured the DNS records. Changes to DNS may take 1 - 2 days to take effect.
