Bulk Actions
How to Send a Mass Message using Bulk Actions
8 min read
Updated Feb 15, 2026
Bulk Actions let you send a message to multiple clients at once, saving time when you need to reach all or a subset of your agency's contacts.
Bulk Actions let you send a message to multiple clients at once, saving time when you need to reach all or a subset of your agency's contacts.
Overview
- What it is: Bulk Actions is a messaging tool that sends one-time messages to multiple clients simultaneously
- Why it matters: Eliminates the need to send individual messages, ensuring consistent communication across your client base
- Who uses it: Agency staff with bulk action permissions who need to send announcements, reminders, or corrections
- Expected outcomes: A single message delivered to all filtered clients via text, email, or both
Prerequisites
- You must have an eCourtDate staging or production agency
- You must be a super admin or have the Create Bulk Actions and Update Bulk Actions permissions
- You must be signed into the correct agency (verify the agency name in the top right corner)
How-To Steps
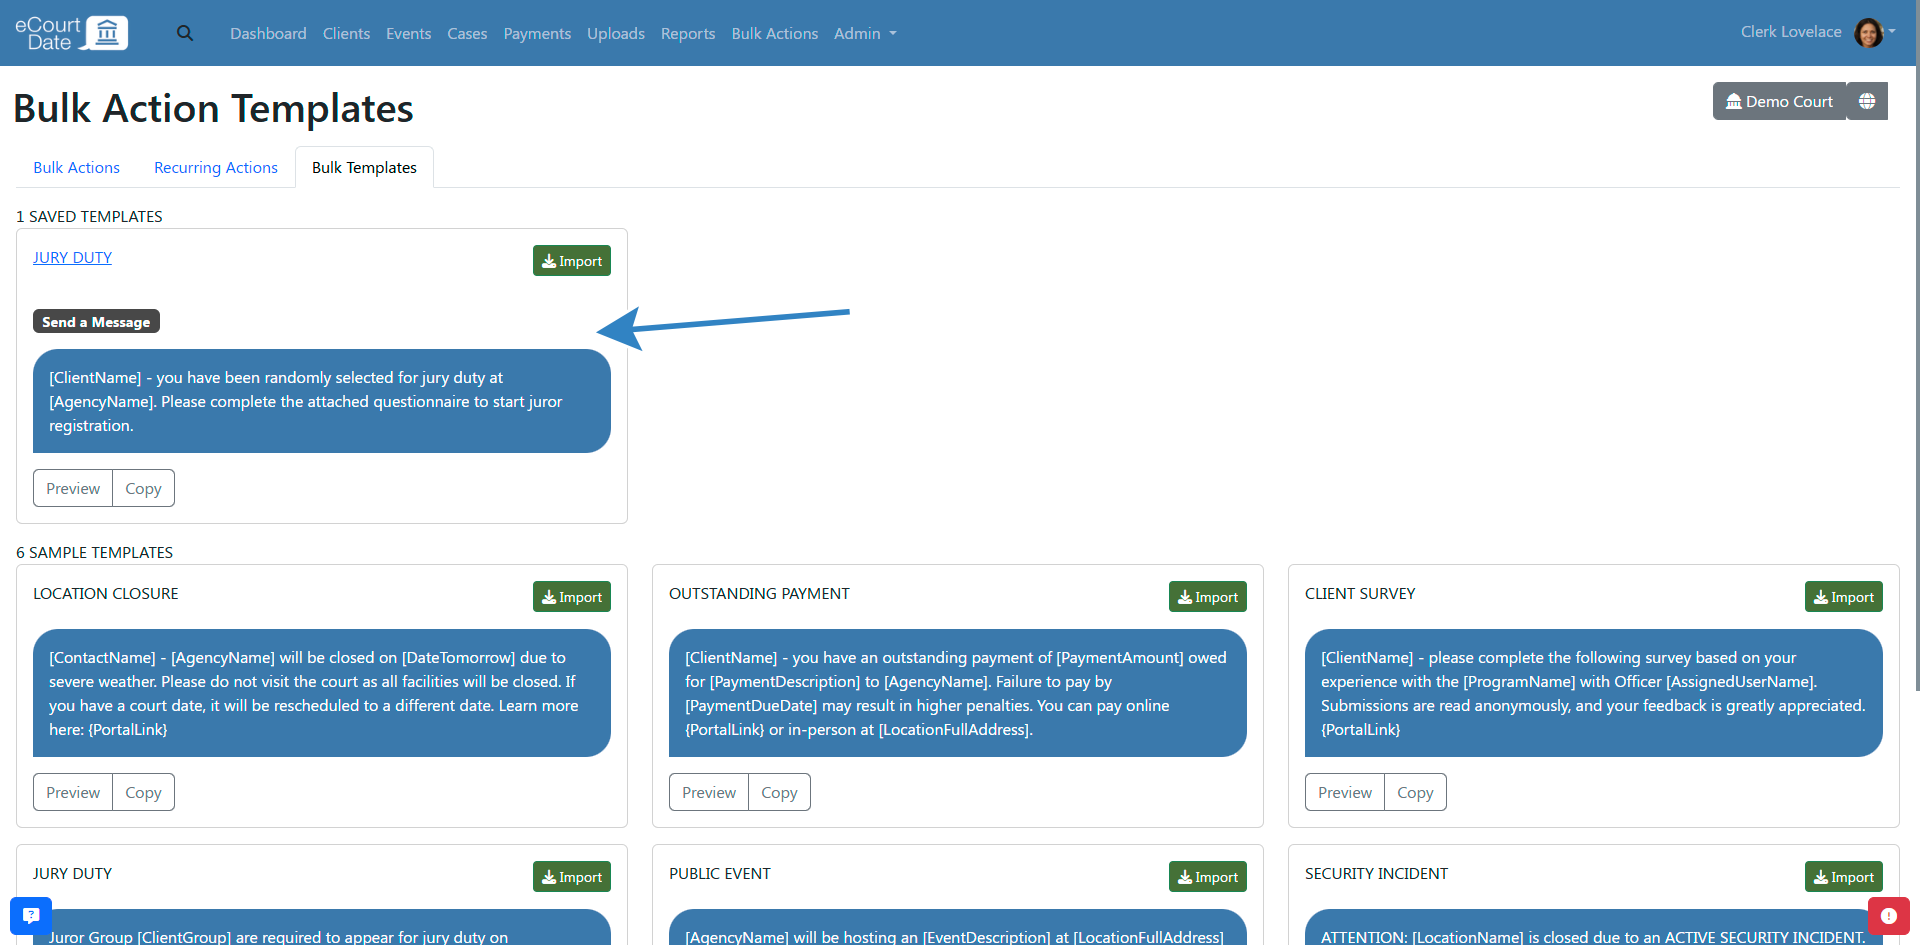
Step 1: Import a Sample Bulk Action (Quick Start)
Importing a sample bulk action is a quick way to get started.
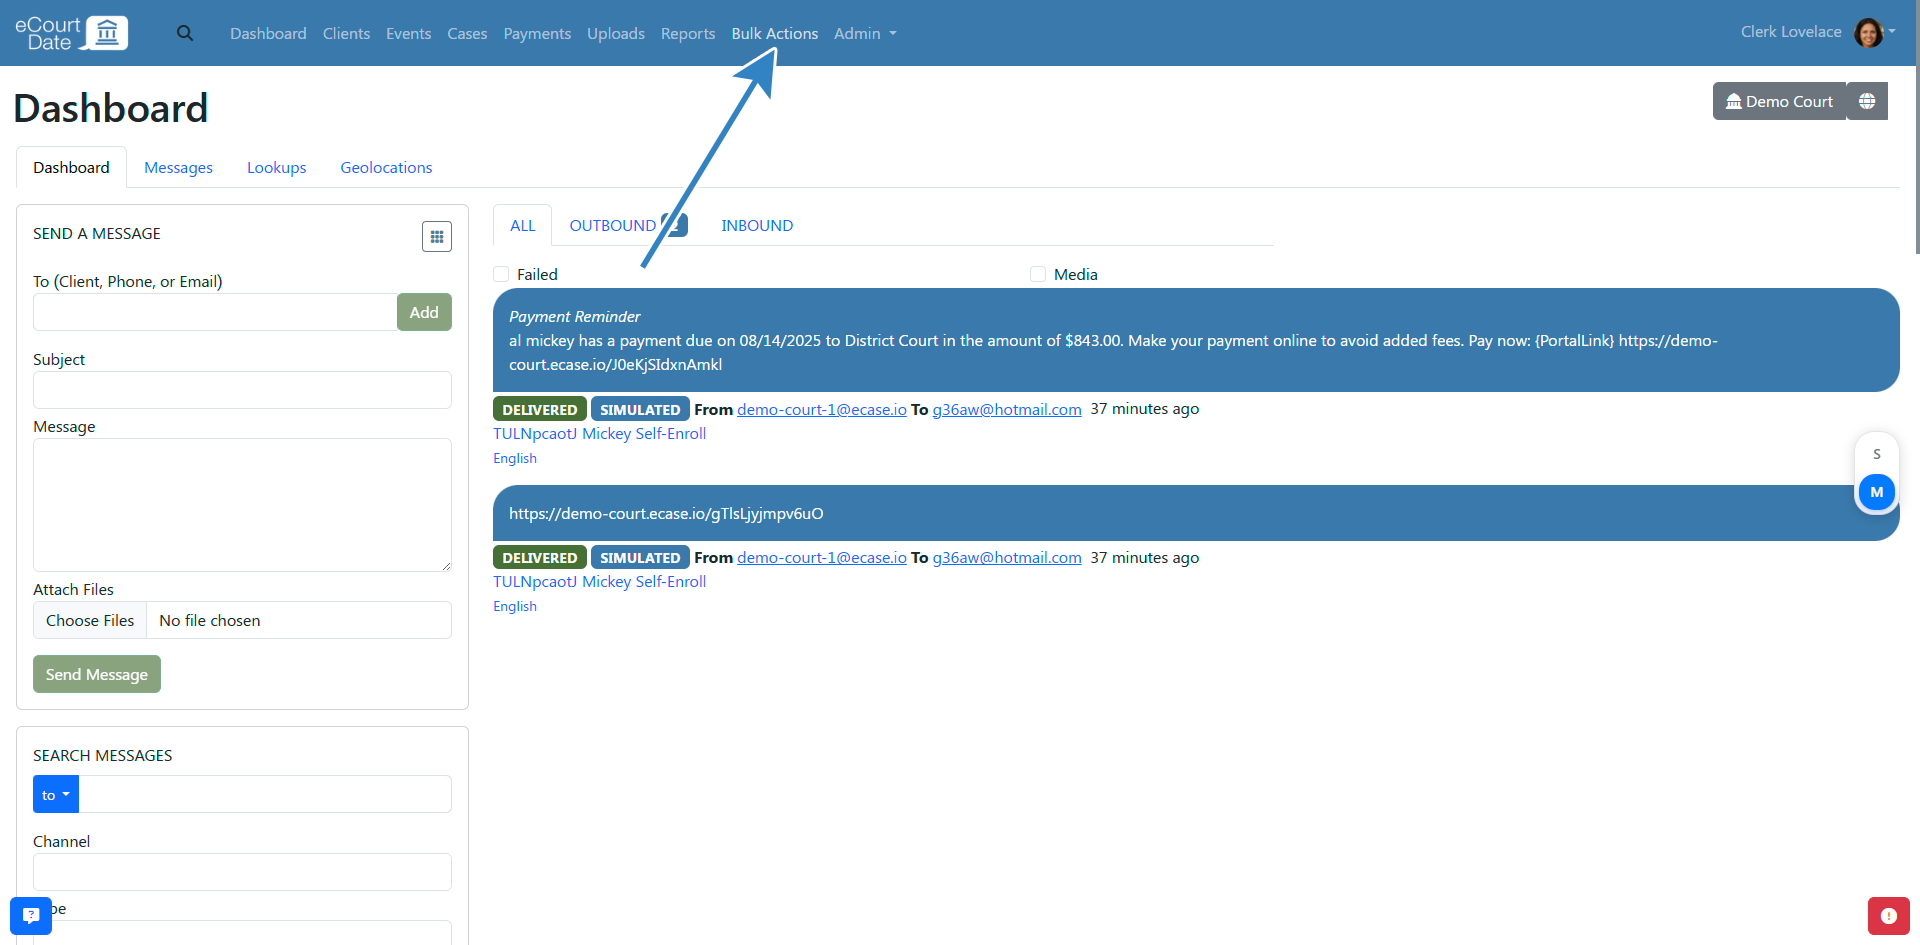
- Click Bulk Actions in the top navigation bar.
- Click the Bulk Templates tab.
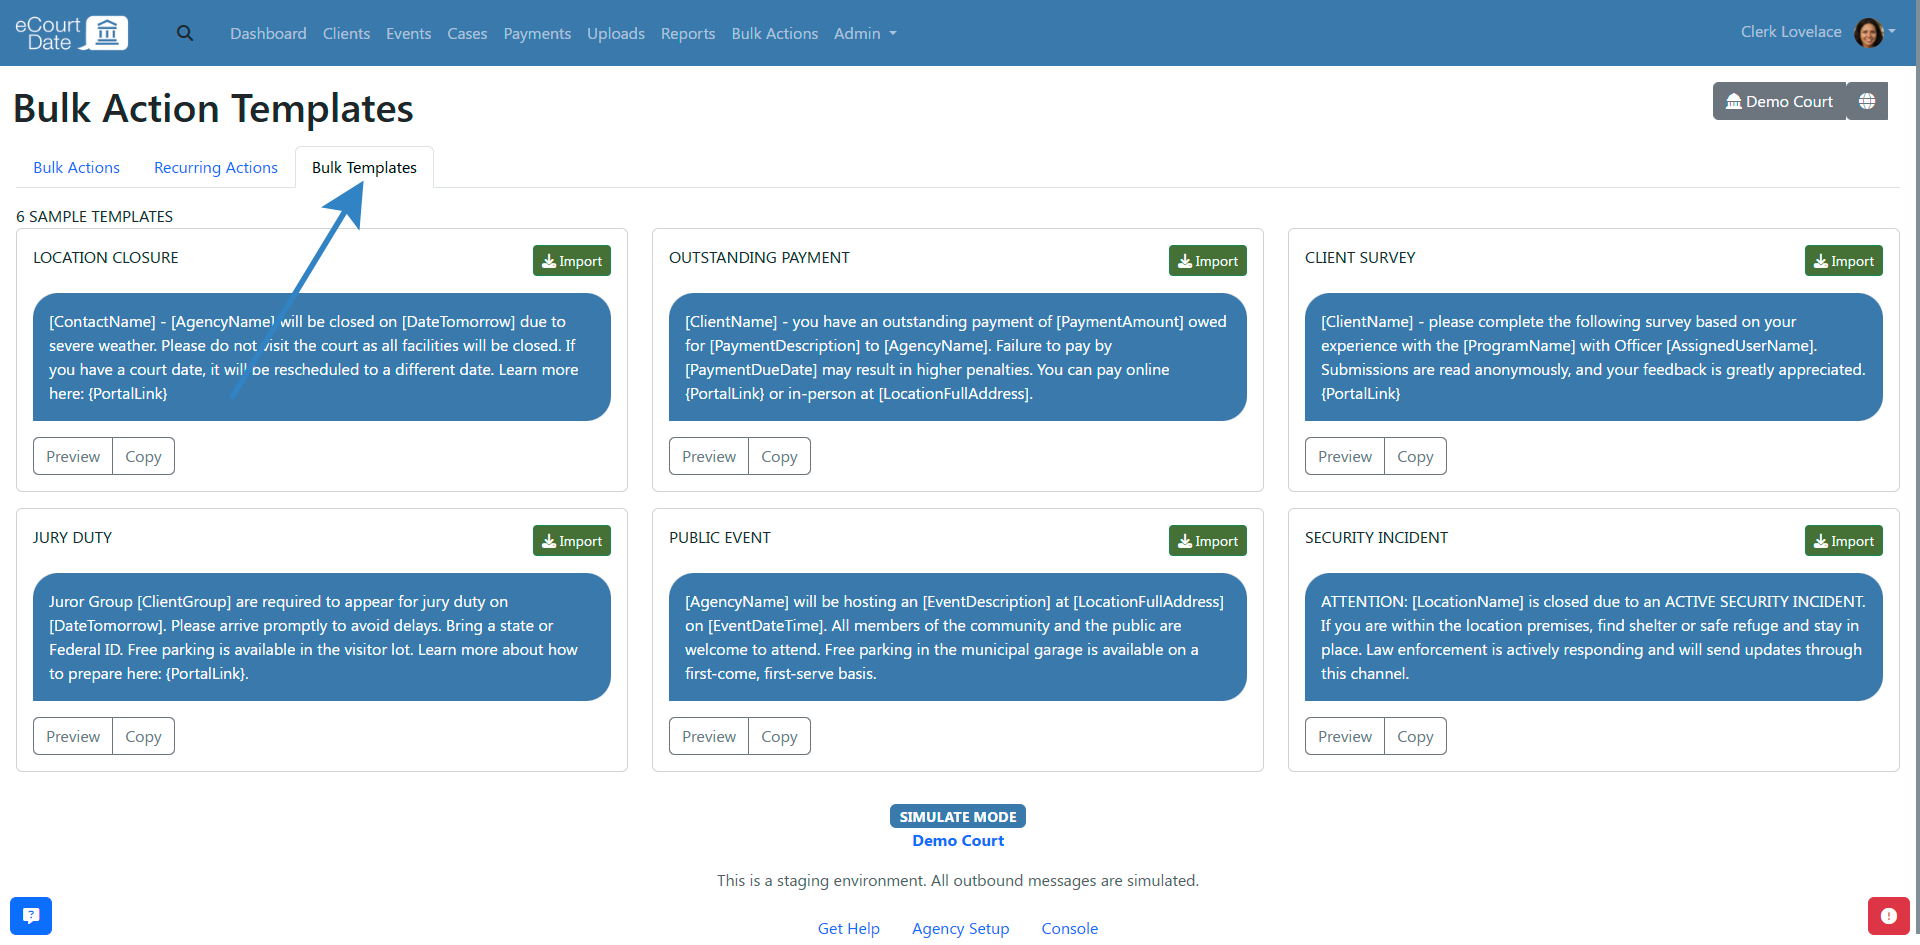
- Click the Import button for the sample bulk action you want to use.
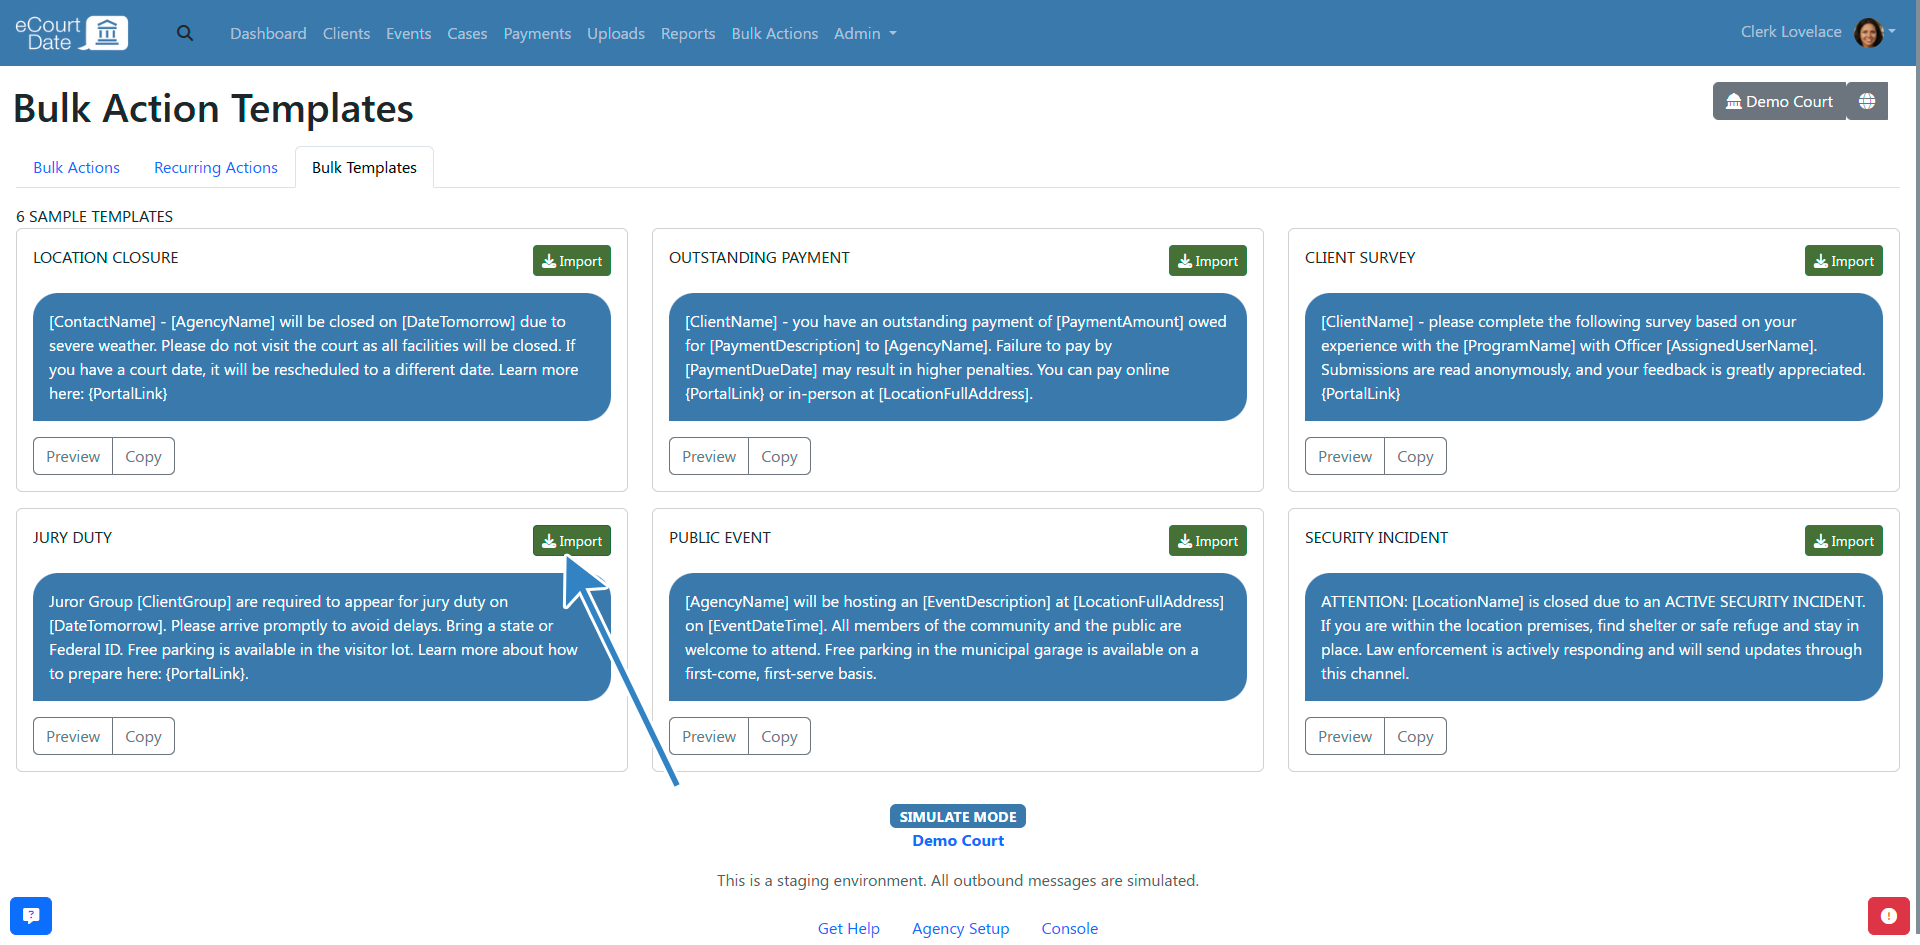
- Review the newly created bulk action page.
- Edit the bulk action to customize it for your agency, or click Live Run to send the message immediately.
Step 2: Create a Bulk Action from Scratch
- Click Bulk Actions in the top navigation bar.
- Click the Create button.
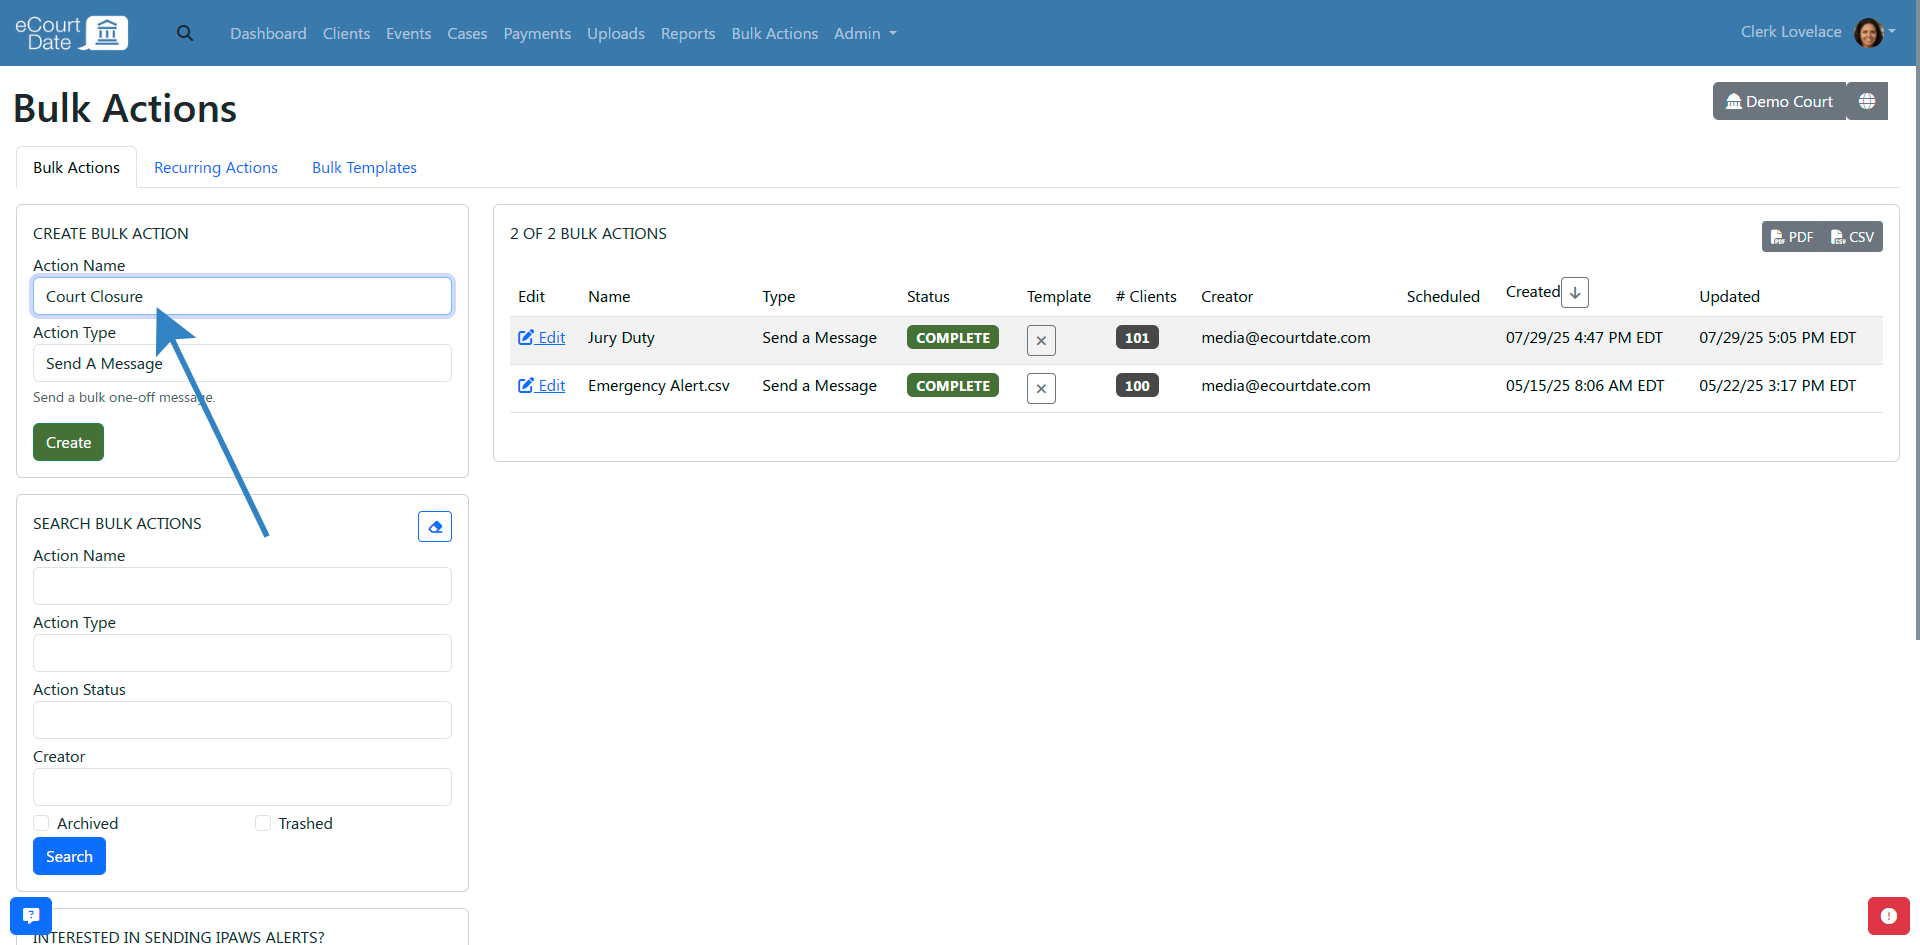
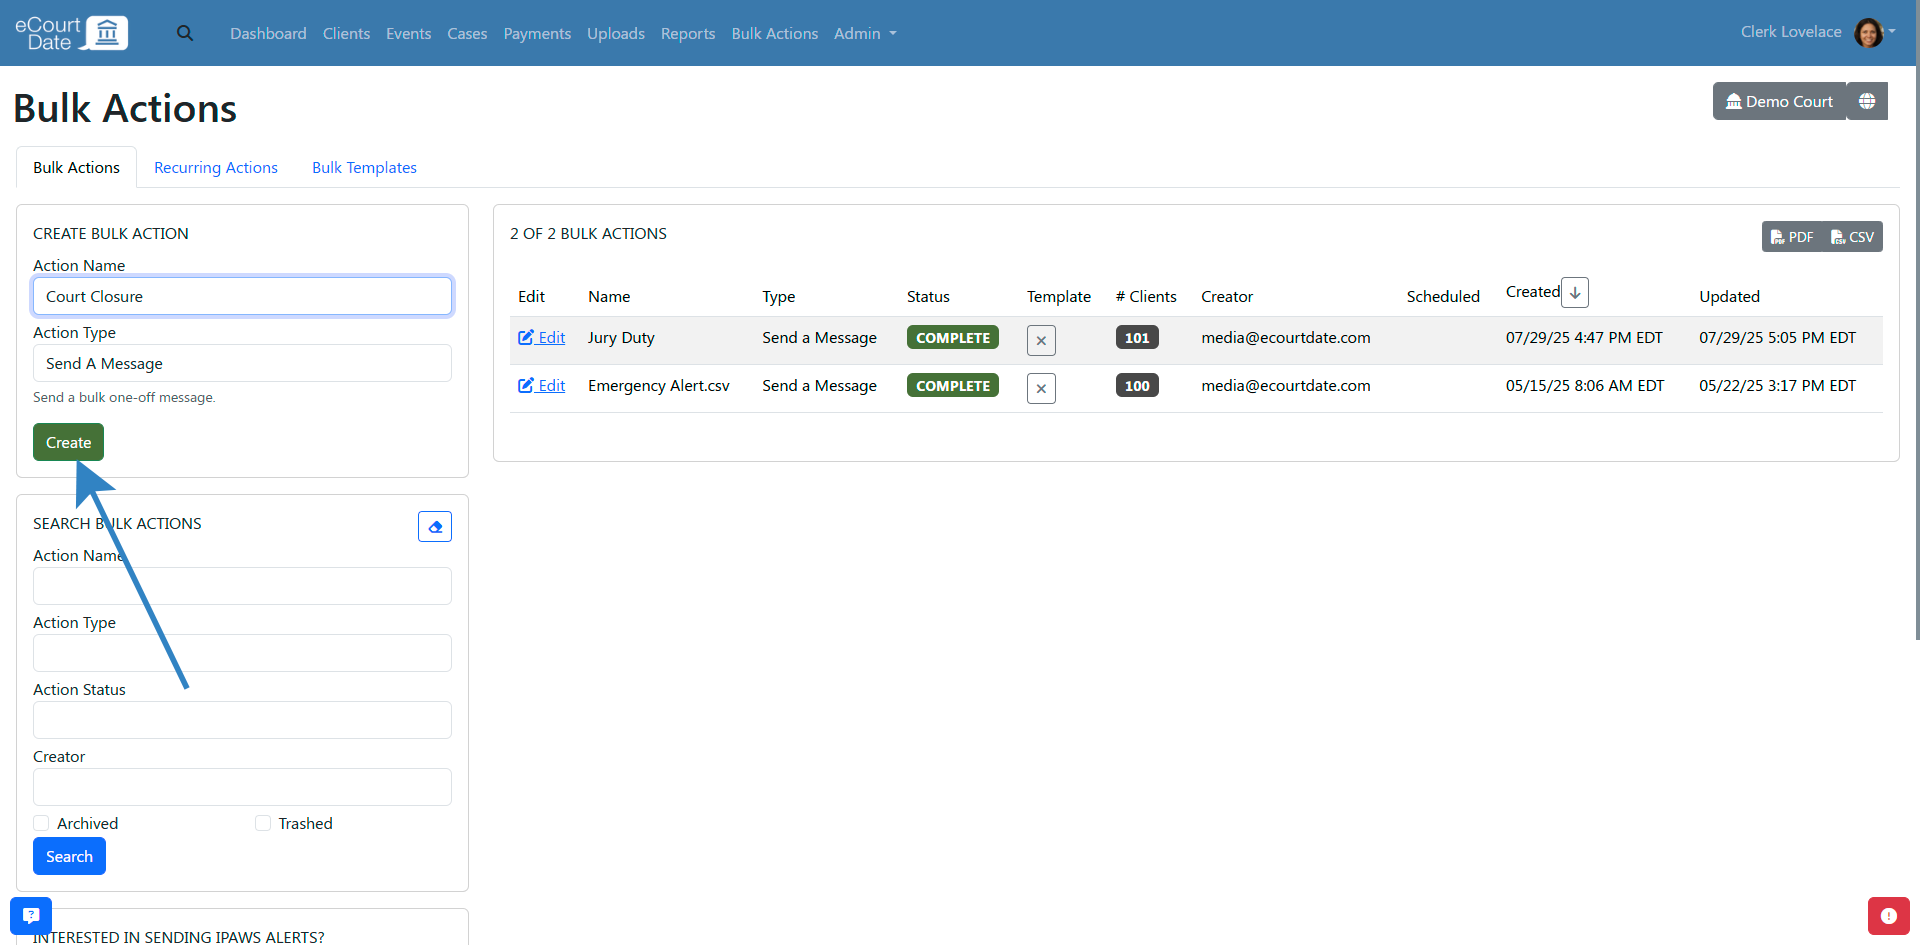
- Review the newly created bulk action edit page.
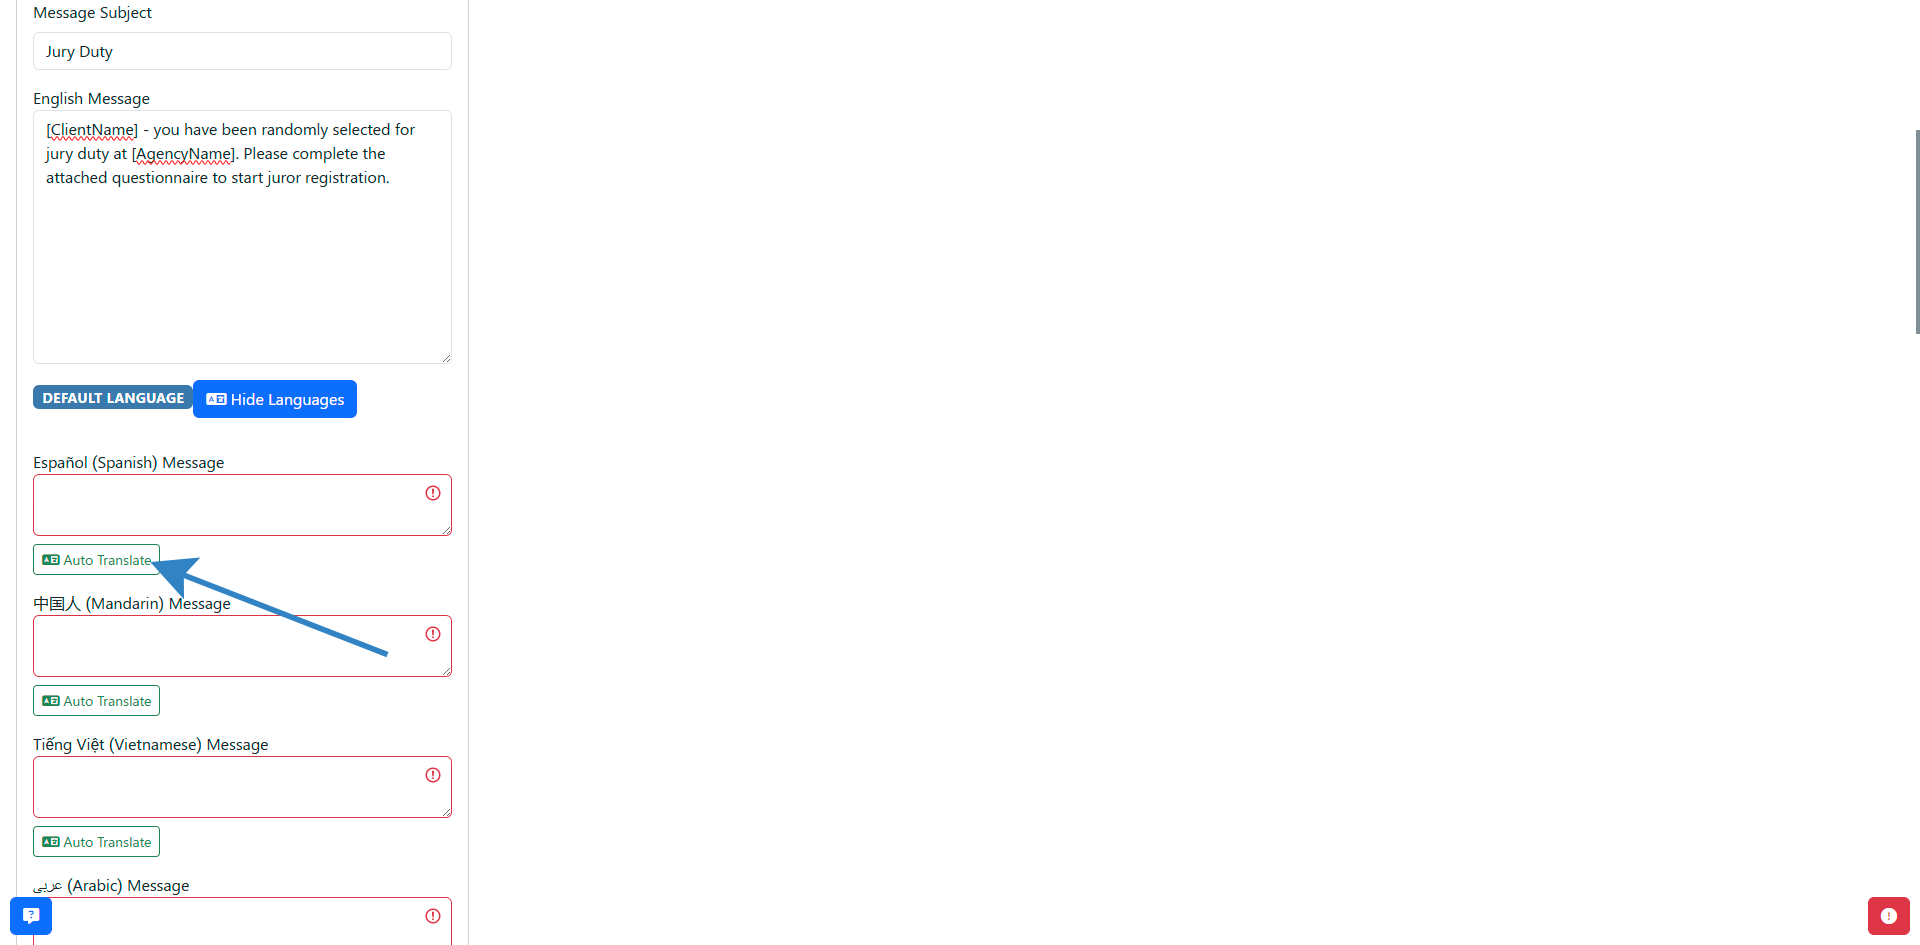
Step 3: Compose the Message
- Enter the English Subject for the message. The subject is automatically added to the message body for text messages.

- Enter the English Message body.
- (Optional) Set a Message Delay in minutes to delay sending after you click Live Run.
- (Optional) Click Show Languages to display additional languages enabled for your agency.
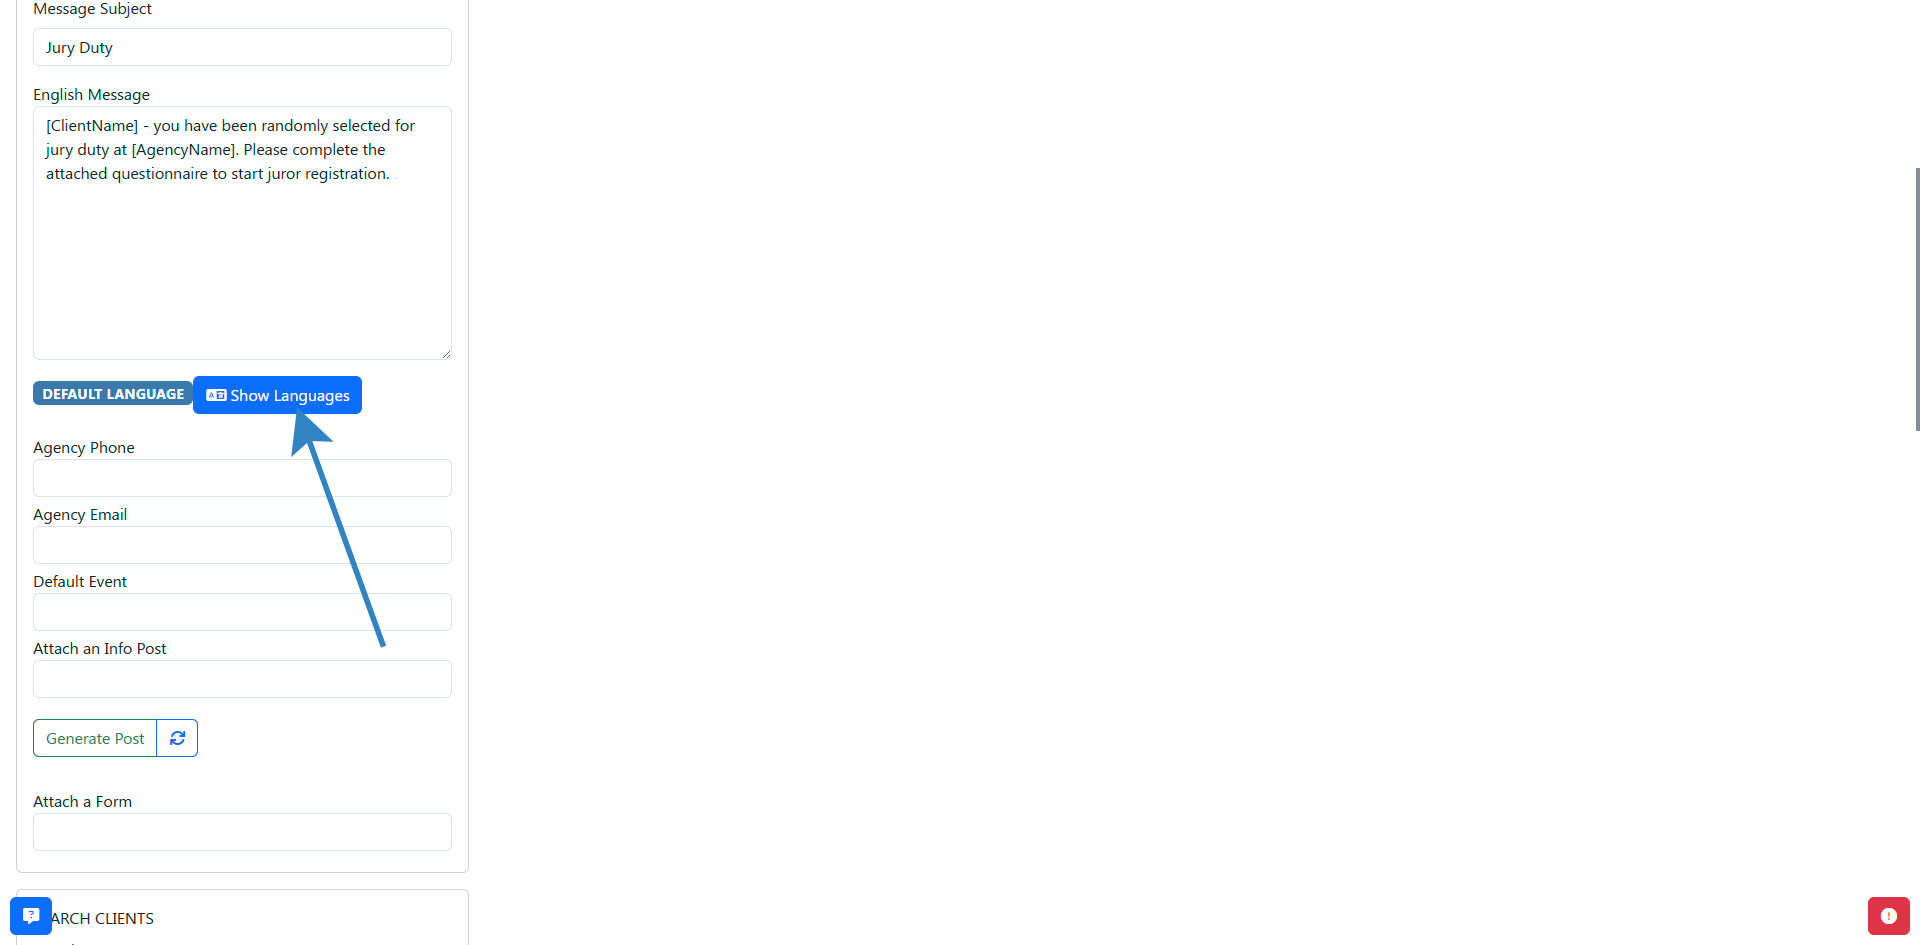
- (Optional) Click Auto Translate to automatically translate the message into other languages.
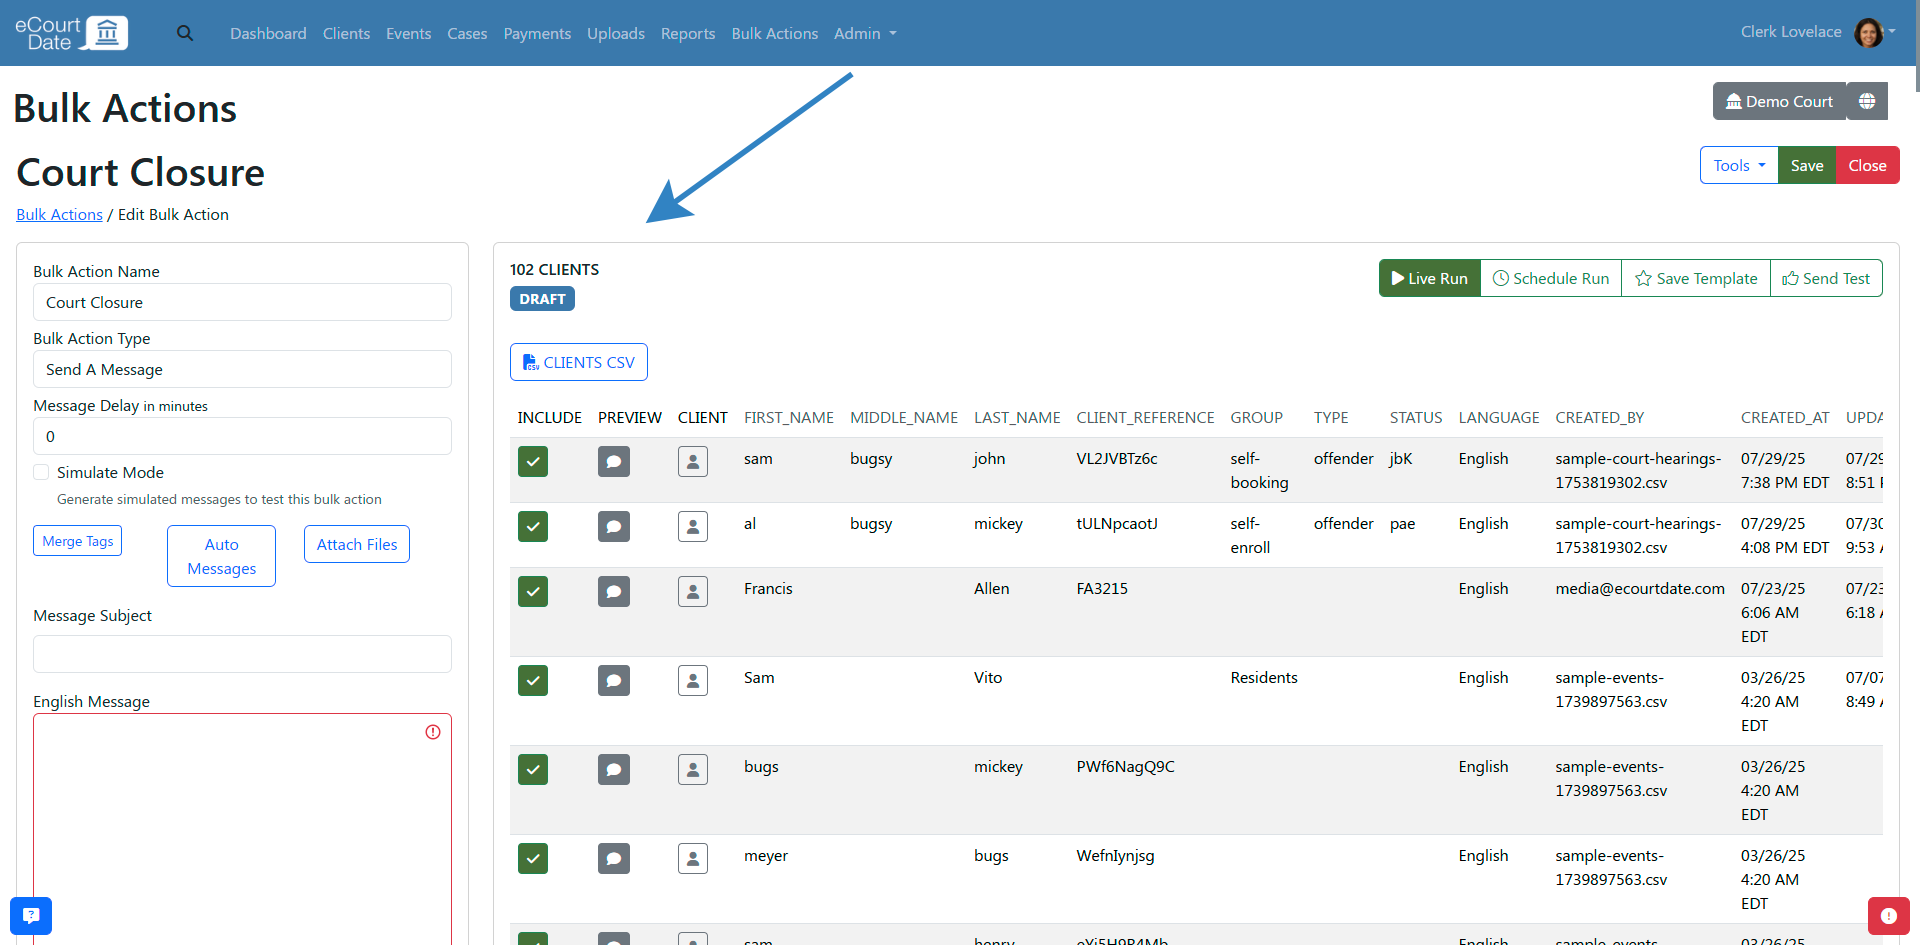
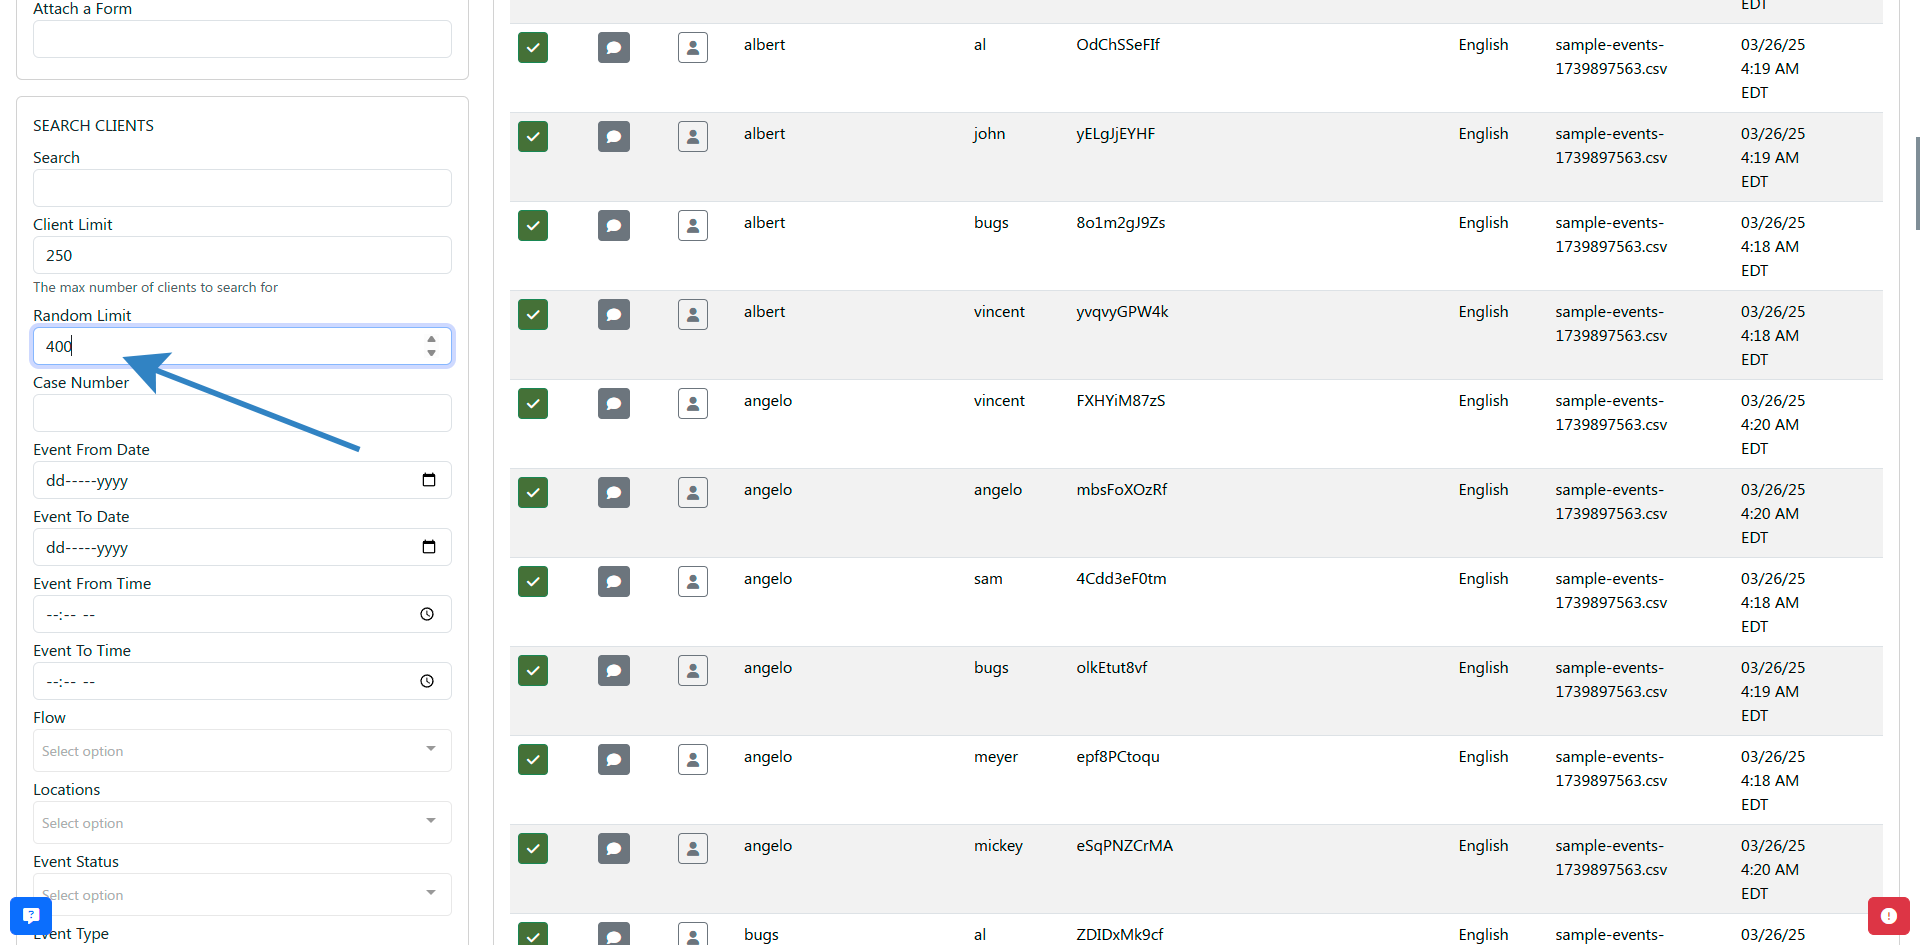
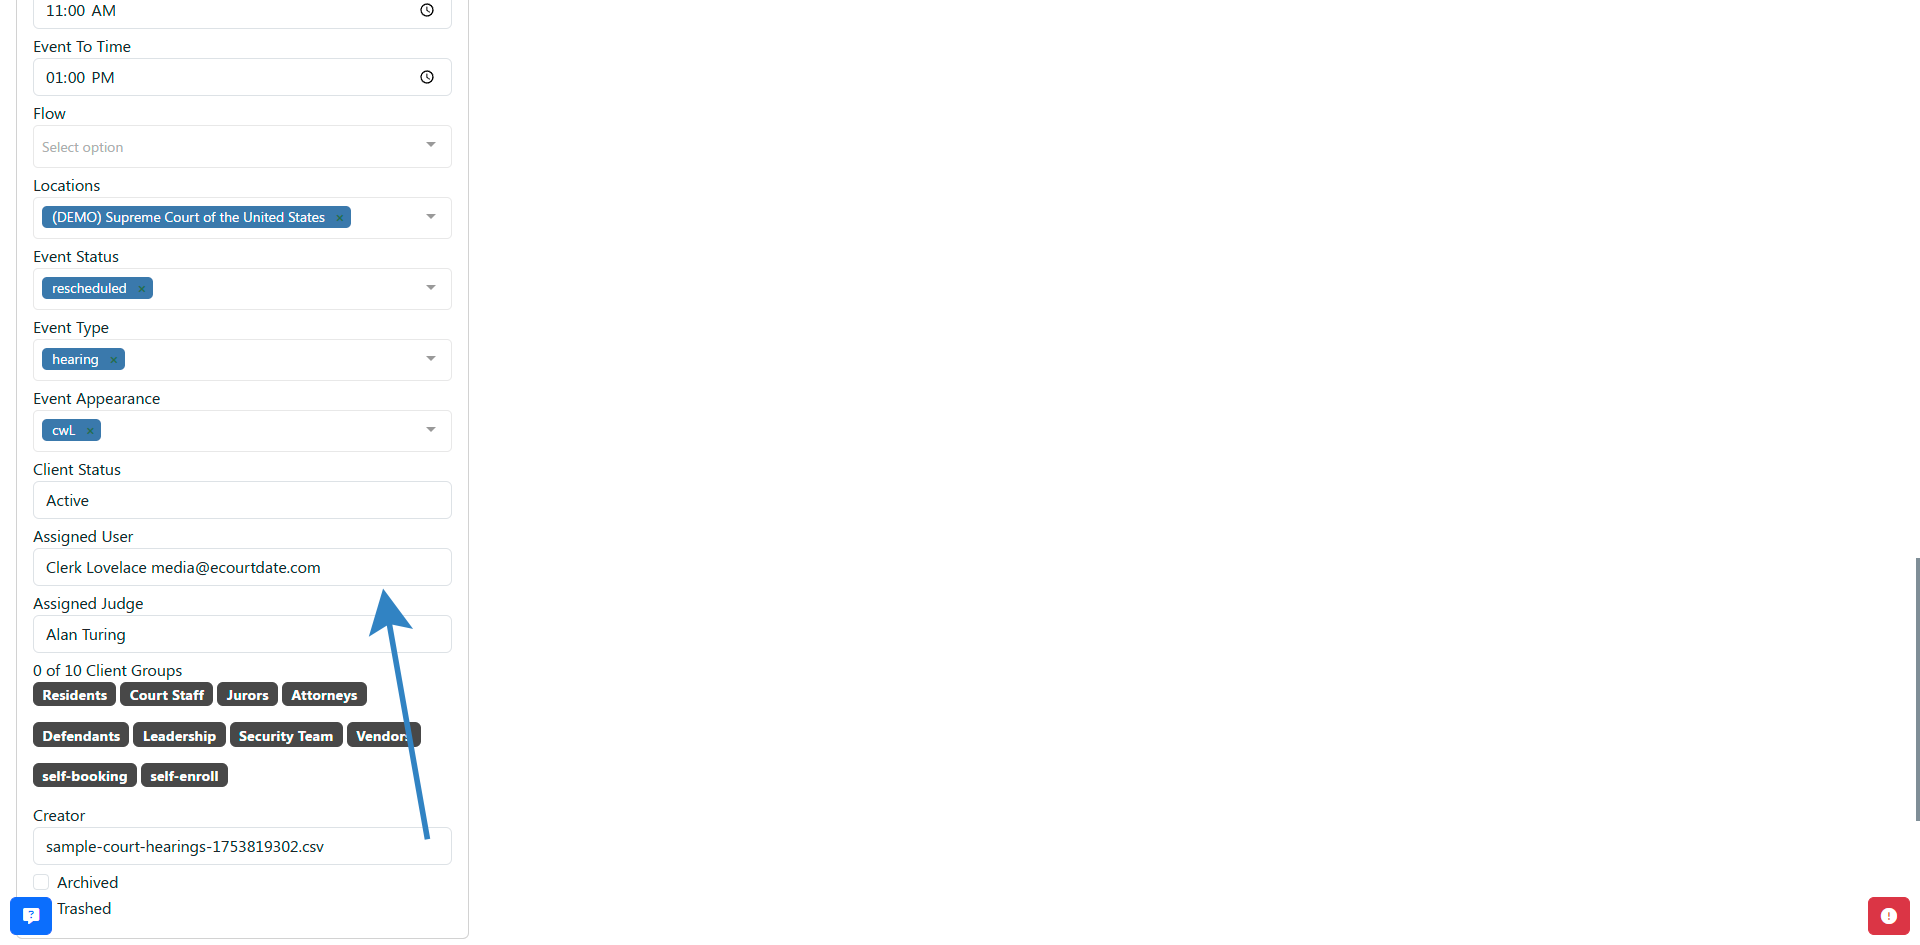
Step 4: Filter Clients
Use the Search Clients section to narrow down which clients receive the message.
- Use the Search Field to filter clients by general criteria.
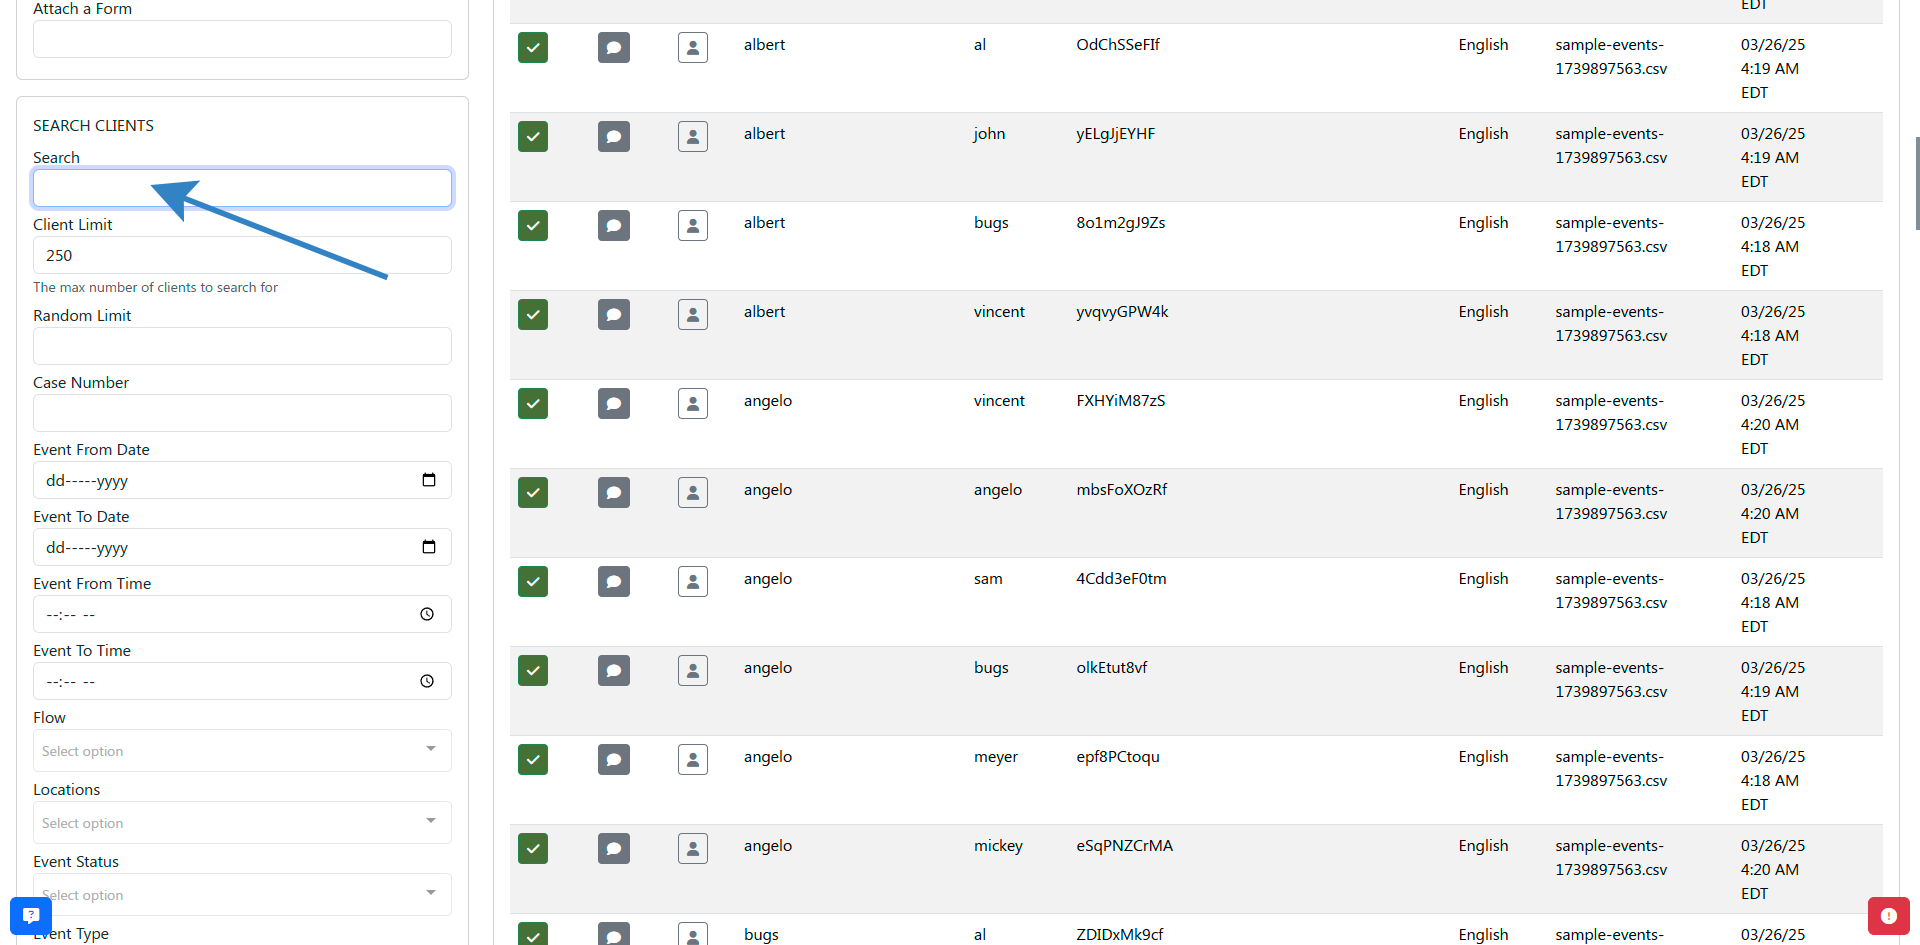
- Set the Client Limit to cap the maximum number of recipients.

- Set the Random Limit to select a random subset of matching clients.
- Use additional filters as needed:
- Case Number to filter by case
- Event From Date and Event To Date to filter by event date range
- Event From Time and Event To Time to filter by event time range
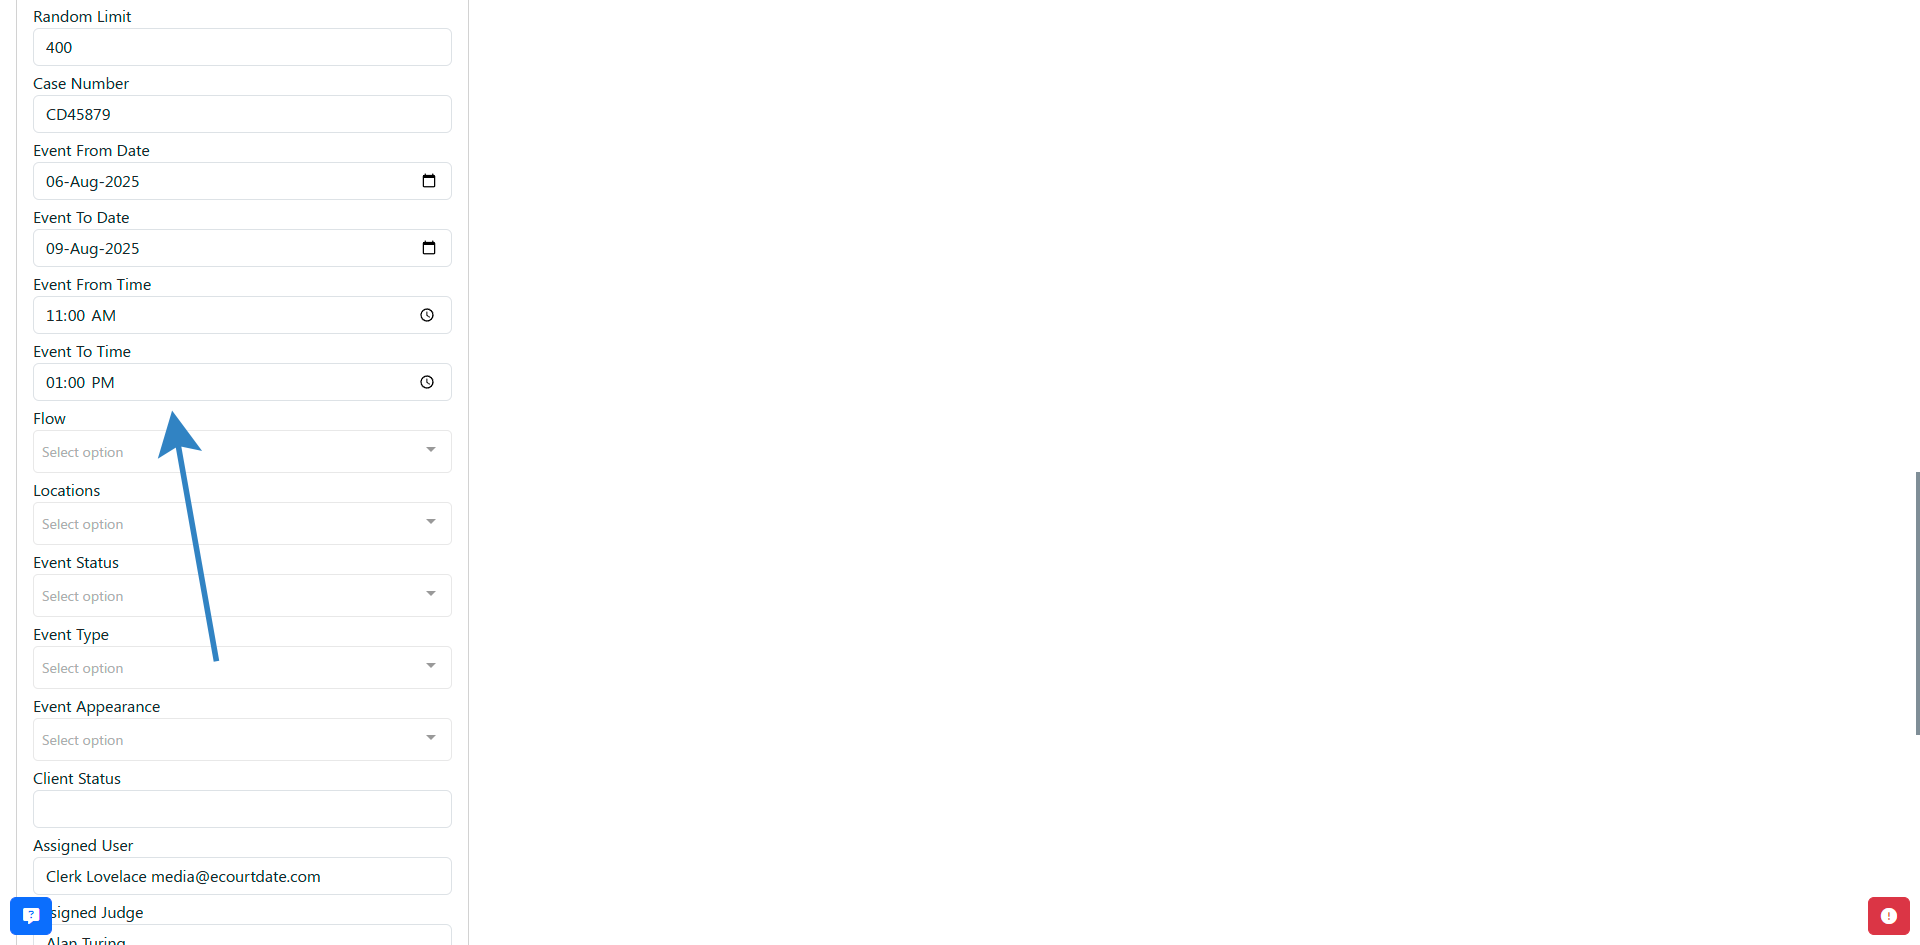
- Select Client Status, Assigned User, Assigned Group, Assigned Organization, or Creator to refine results further.
Note: All search filters use the AND operator. A client must match every filter to be included.
Step 5: Exclude Clients
- Review the filtered client list.
- Click the Include/Exclude button next to any client you want to remove from the message.

- Excluded clients show a red button and will not receive the message.
Step 6: Test the Message
- Click the Send Test button.

- Verify the pre-filled phone number and email address (your own).
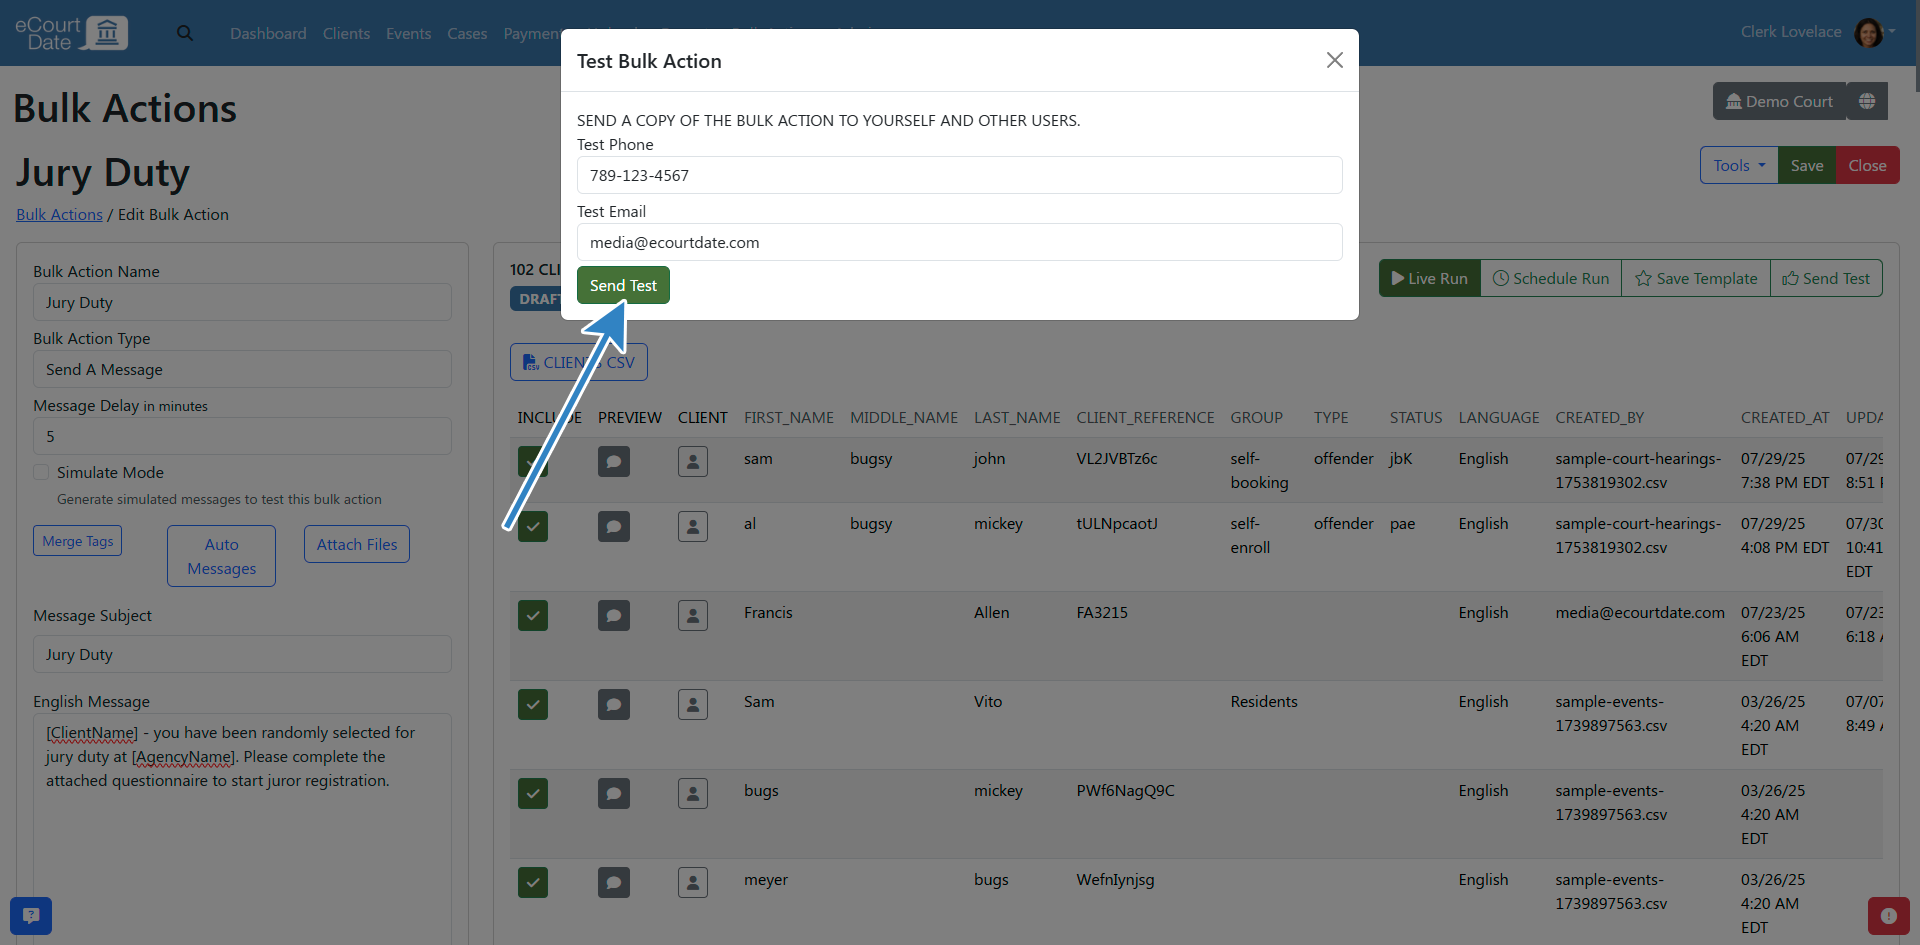
- Click Send Test again to deliver the test message.
Step 7: Preview the Message
- Click the Preview button next to any client in the list.
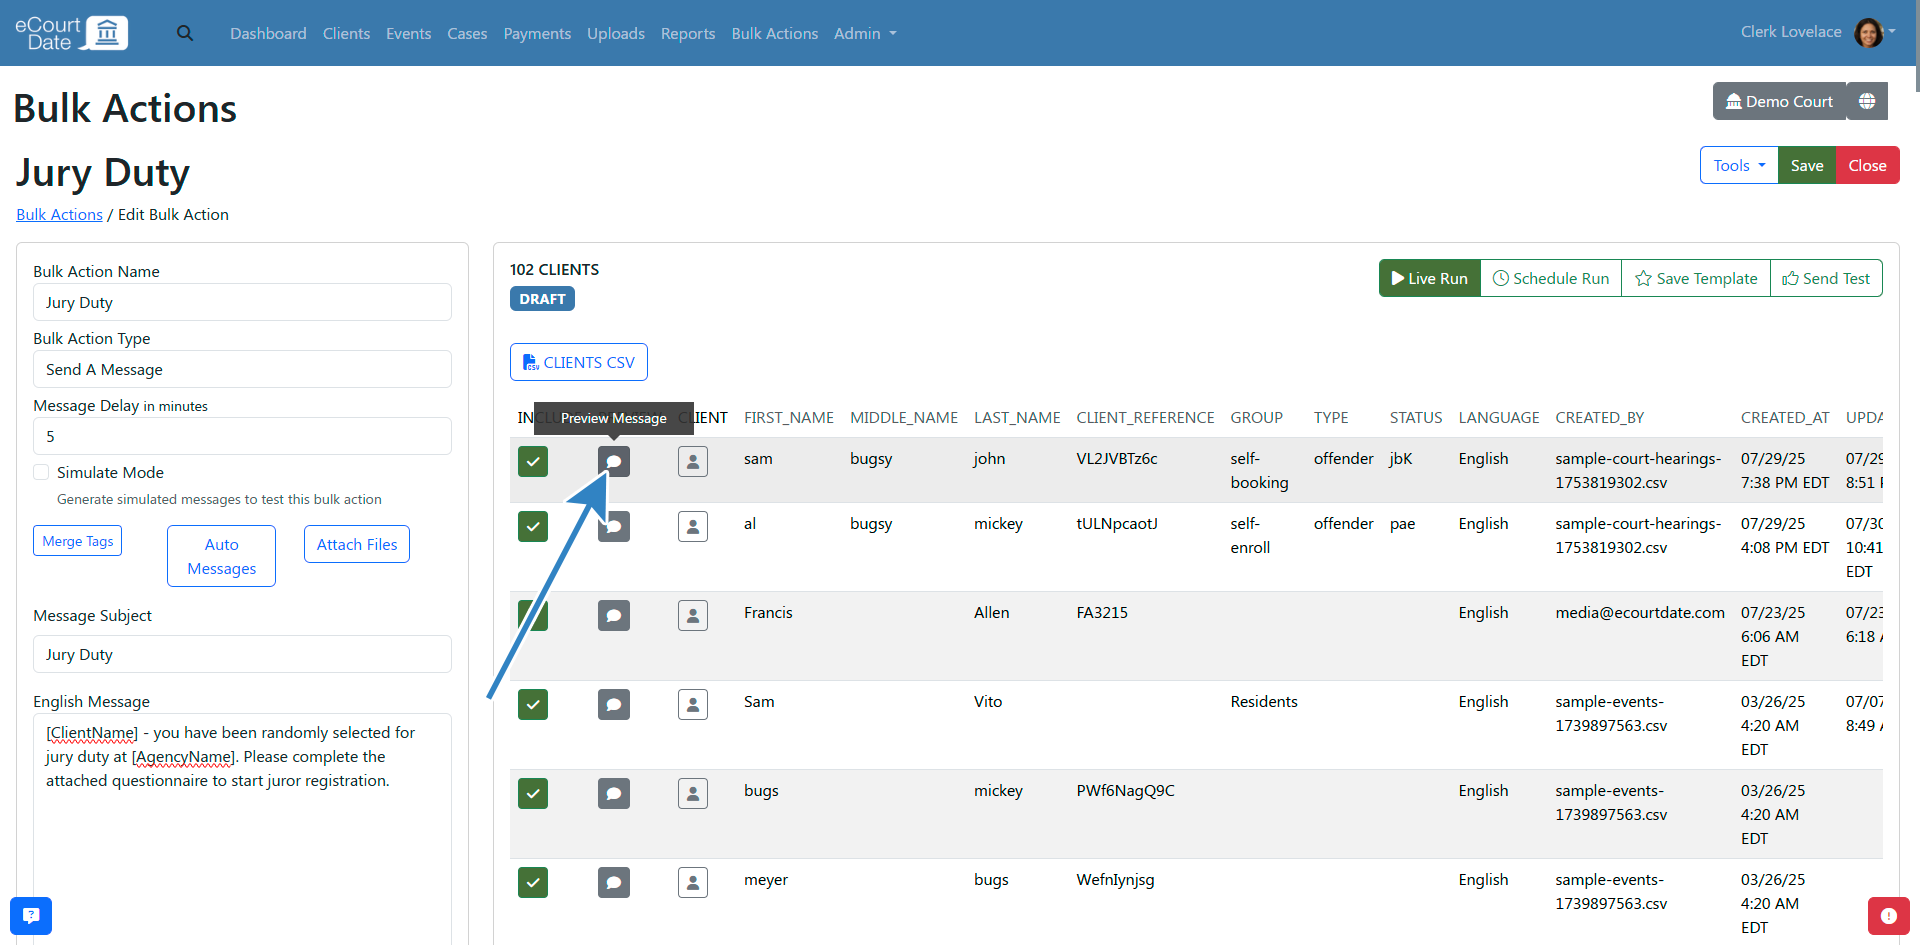
- Review the subject and message body. Any merge tags are replaced with the client's actual data.

Step 8: Schedule or Send the Bulk Action
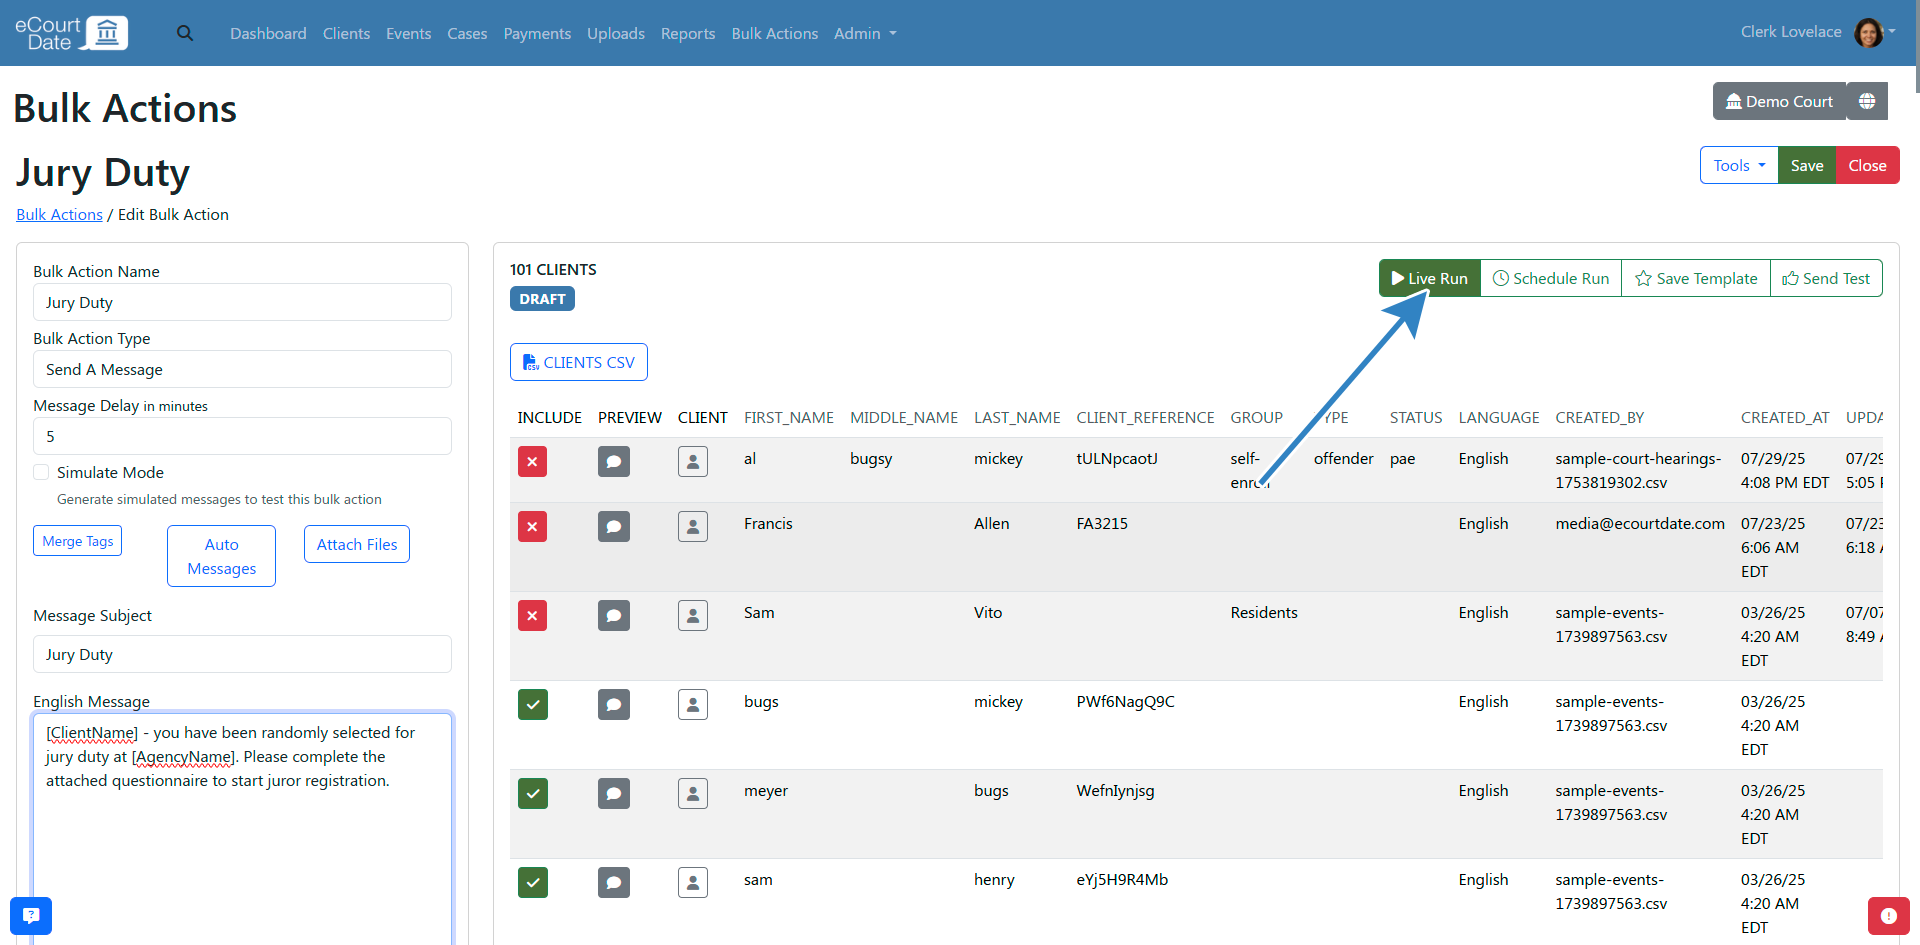
To send immediately: Click the Live Run button.
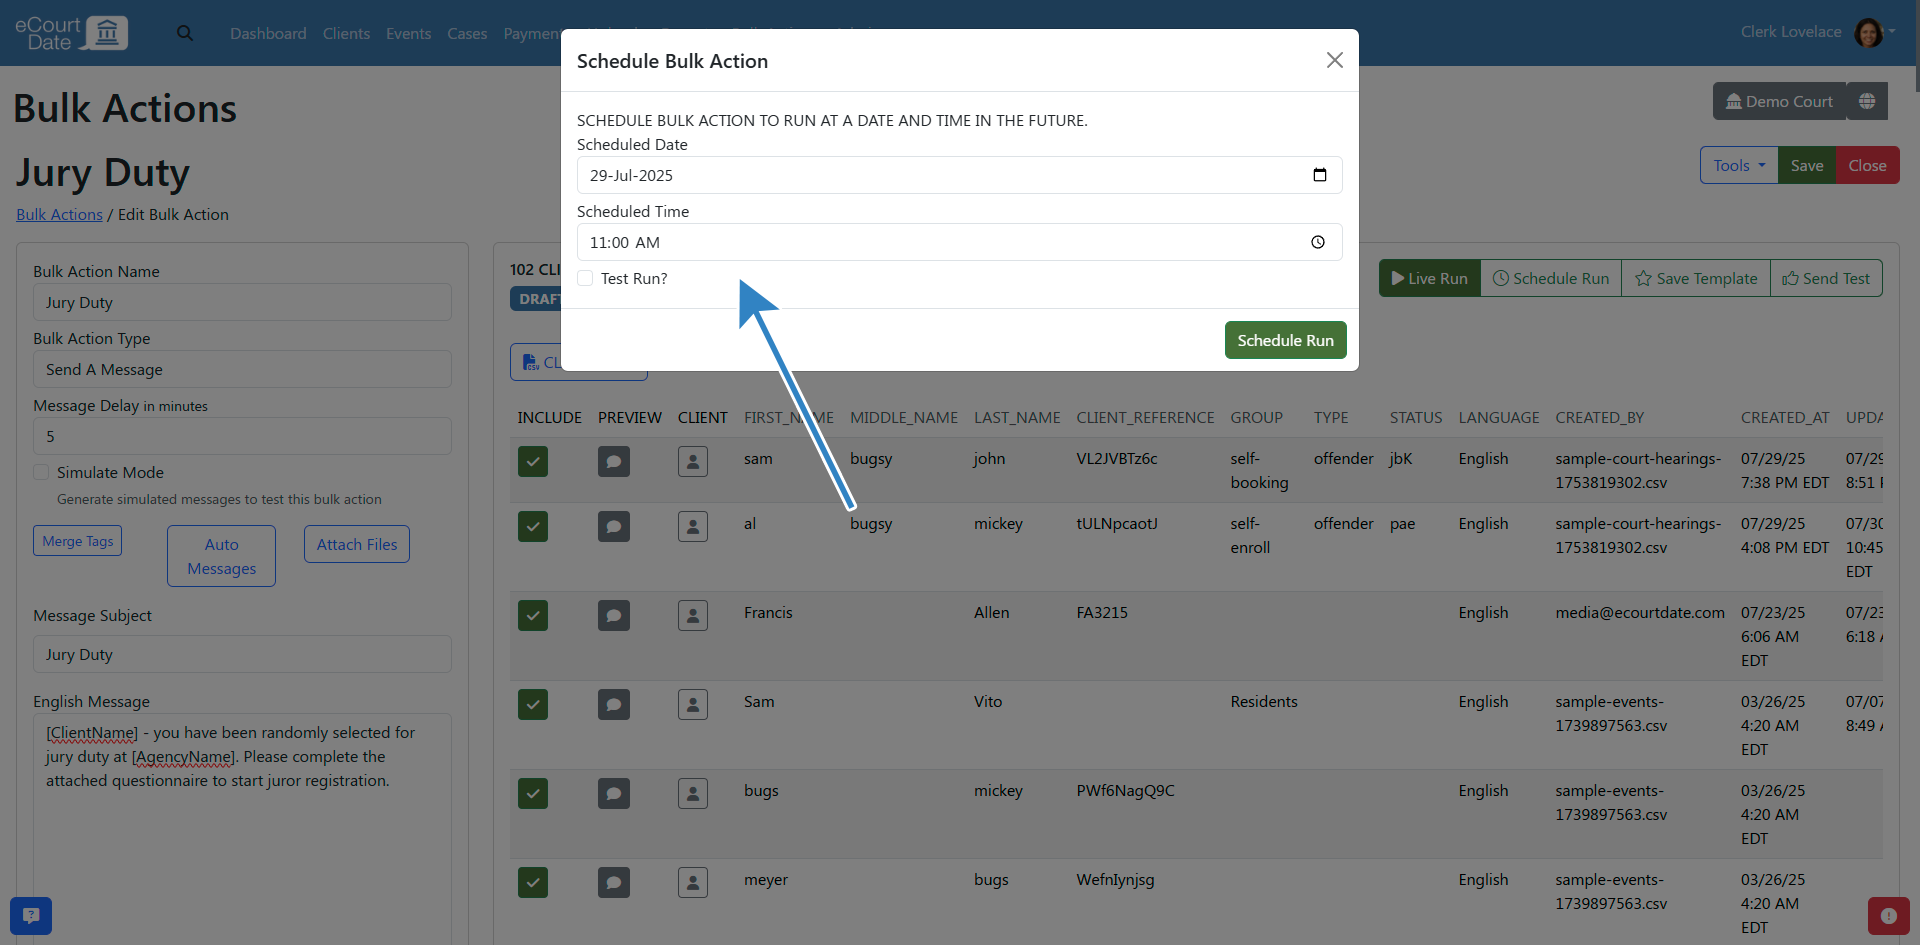
To schedule for later:
- Click the Schedule Run button.
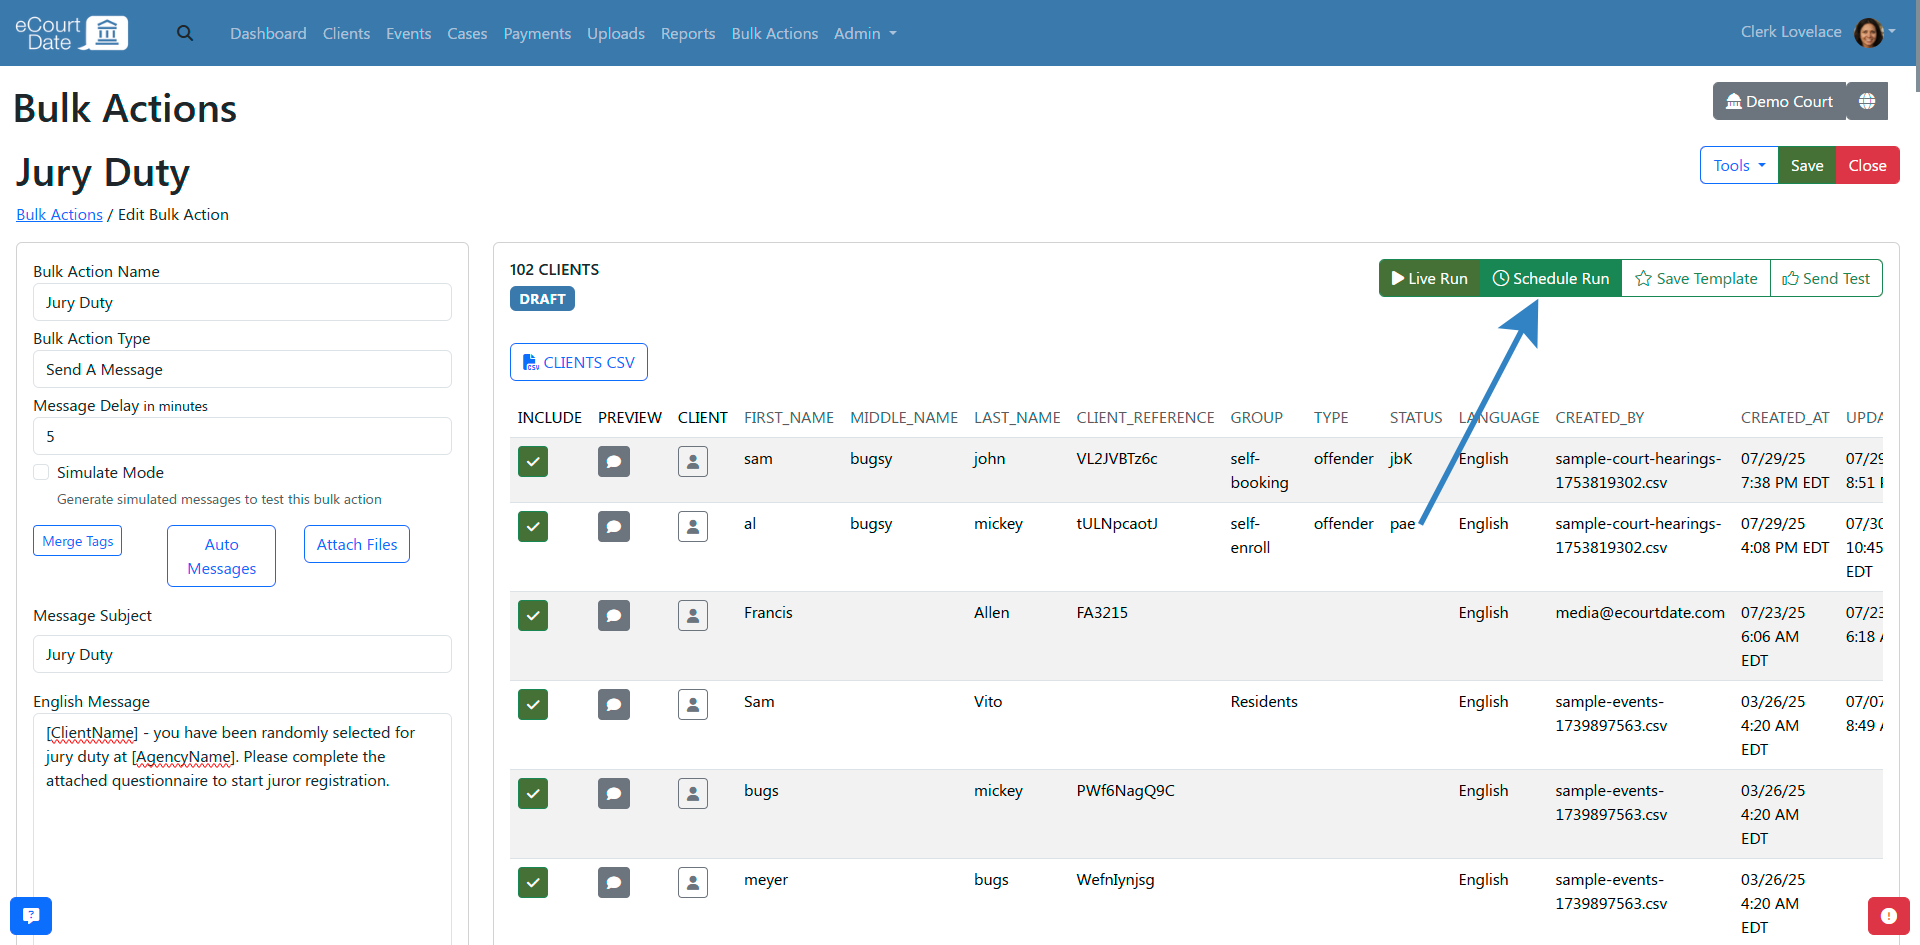
- Set the Scheduled Date and Scheduled Time.
- Click Schedule Run to confirm.
The bulk action runs automatically in live mode at the scheduled date and time.
Step 9: Save as a Template (Optional)
- Click the Save Template button to save your bulk action as a reusable template.
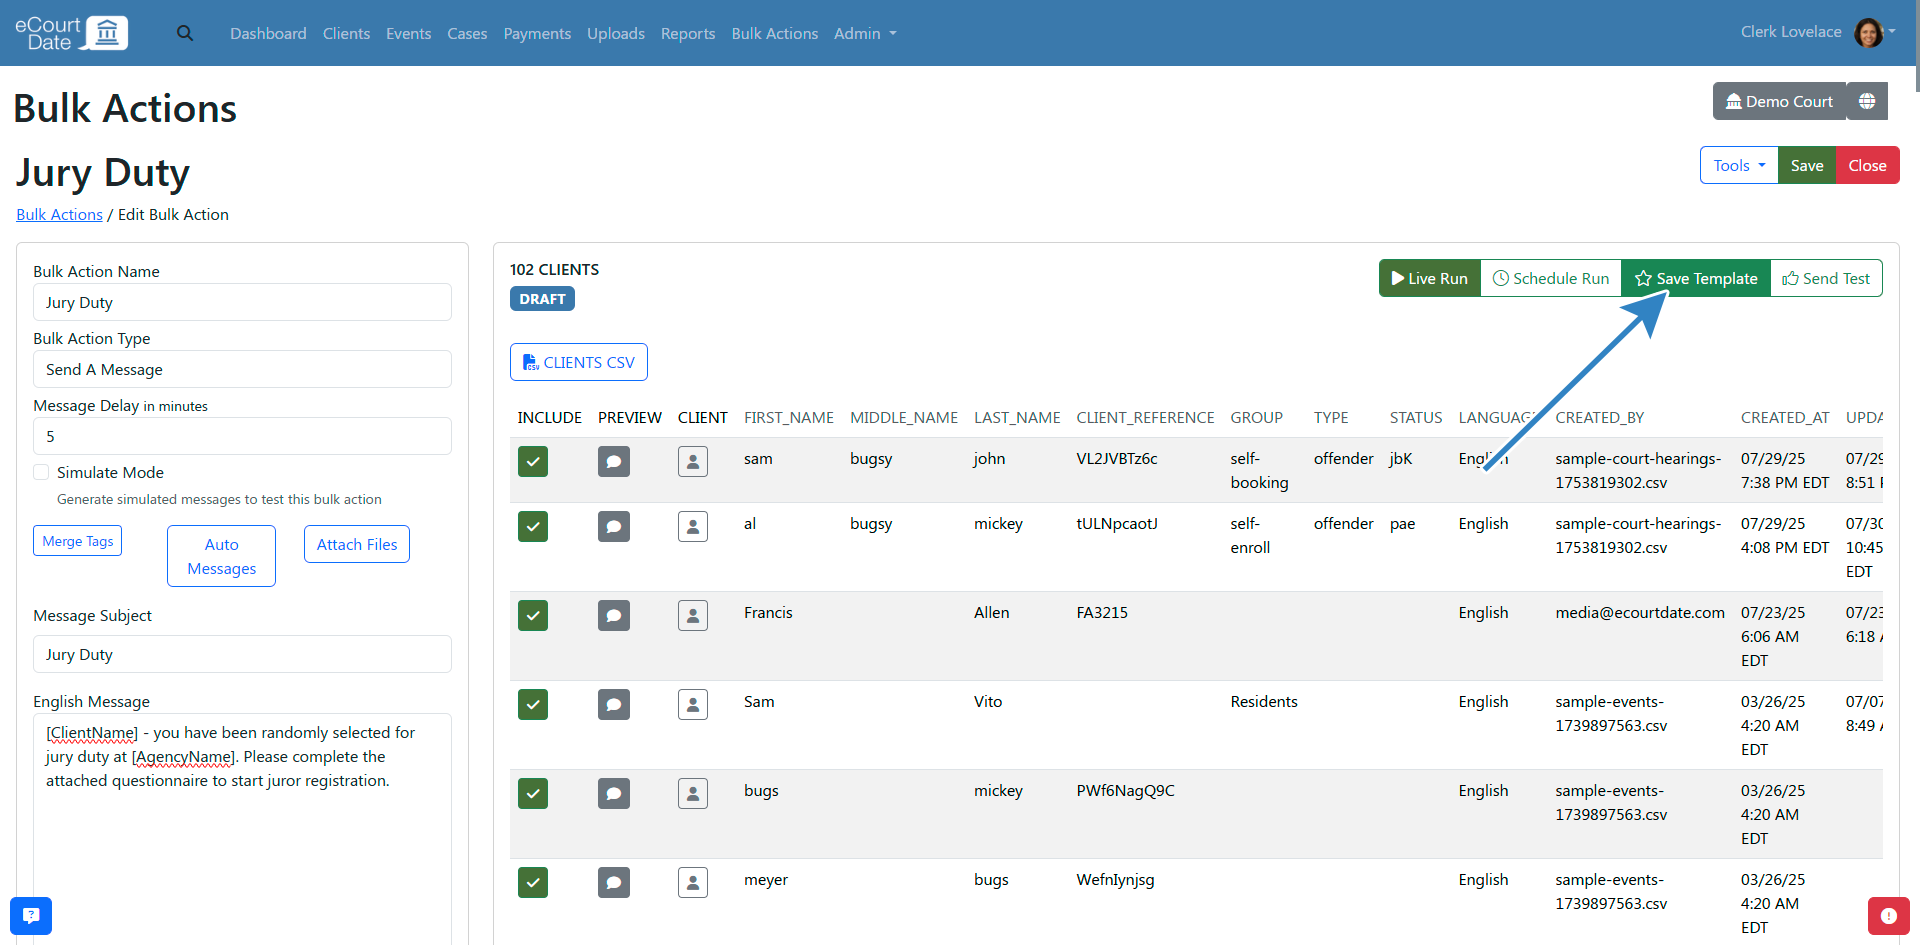
- Find your saved template in the Bulk Templates tab for future use.
Step 10: Schedule a Recurring Bulk Action (Optional)
Set up a bulk action to run automatically on a recurring schedule.
- Click the Schedule Run button on the bulk action page.
- Enable the Recurring option.
- Select the recurrence frequency (daily, weekly, or monthly).
- Set the start date and time for the first run.
- Click Schedule Run to confirm.
The bulk action runs automatically at each scheduled interval, using the same filters and message content. You can edit the recurring schedule or cancel it at any time from the bulk action page. See How to Create Recurring Actions for details.
Step 11: Run a Bulk Action from an Upload or CSV Paste
Send messages to a specific list of clients by uploading a file or pasting CSV data directly.
- Click Bulk Actions in the top navigation bar.
- Create a new bulk action or edit an existing one.
- In the Search Clients section, click the Upload or Paste CSV option.
- Upload a CSV file or paste comma-separated values containing client identifiers (such as case numbers, client references, or phone numbers).
- The system matches the uploaded data against existing client records and populates the recipient list.
- Review the matched clients, then proceed with composing and sending the message.
This approach is useful when you have a specific list of recipients that cannot be easily filtered using the standard search options.
Bulk Action Types Reference
While this article focuses on sending mass messages, bulk actions support multiple action types beyond messaging. Each type lets you perform a specific operation across many records at once.
| Type |
Description |
| Send Message |
Send a text, email, or voice message to multiple clients |
| Create Events |
Create events for multiple clients based on filters |
| Update Status |
Change the status of multiple client, case, or event records |
| Assign Users |
Assign staff members to multiple client or case records |
| Assign Groups |
Add multiple clients to a group |
| Assign Flows |
Assign a flow to multiple events or cases |
| Update Fields |
Update a specific field value across multiple records |
| Archive |
Archive multiple records at once |
| Trash |
Trash multiple records at once |
| Export |
Export filtered records to CSV or PDF |
To use a different bulk action type, select the type from the Action Type dropdown when creating or editing a bulk action. Each type has its own configuration options and filters. See How to Create Events via Bulk Actions and How to Assign Users via Bulk Actions for specific guides.
What to Expect
After clicking Live Run, messages begin sending to all included clients. Depending on the number of recipients, delivery may take a few minutes. You can monitor the status of each message from the bulk action page. If you set a Message Delay, messages will be queued and sent after the specified number of minutes.
Best Practices
- Always send a test message to yourself before running a bulk action live
- Use the Preview feature to verify merge tags resolve correctly for different clients
- Start with a small Client Limit on your first run to confirm everything works as expected
- Save frequently used bulk actions as templates to save time on future sends
- Use specific filters to target the right audience and avoid sending unnecessary messages
Frequently Asked Questions
Q: Can I cancel a bulk action after clicking Live Run?
A: Once a bulk action starts processing, individual messages are queued for delivery. Contact your administrator immediately if you need to stop an in-progress bulk action.
Q: What happens if a client has opted out of messages?
A: Clients who have opted out of communications will not receive the bulk action message. The system automatically respects opt-out preferences.
Q: Can I use merge tags in bulk action messages?
A: Yes. You can include merge tags such as client name, event date, and case number. Use the Preview button to verify that tags resolve correctly for each client.
Q: How do I send a bulk action in multiple languages?
A: Click Show Languages to display additional language fields, then click Auto Translate to translate your English message automatically. You can also manually edit each translation.
Q: Is there a limit on how many clients I can include?
A: There is no fixed limit, but sending to a very large number of clients may take longer to process. Use the Client Limit field to control the maximum number of recipients per run.
Troubleshooting
Issue: Bulk action shows zero clients after applying filters.
Symptoms: The client list is empty even though you expect matches.
Solution:
- Verify each filter value is correct (all filters use the AND operator)
- Remove one filter at a time to identify which filter is too restrictive
- Confirm clients exist with the specified status, group, or date range
Issue: Test message not received.
Symptoms: You clicked Send Test but did not receive a text or email.
Solution:
- Verify your phone number and email address are correct in the test form
- Check that your agency has an active phone number and email configured under Admin > Settings
- Confirm your device is not blocking messages from the agency number
Important: If you continue to experience issues after following these troubleshooting steps, sign in to eCourtDate and create a ticket by clicking the ticket button in the bottom right corner of the screen.
Related Articles
Bulk Actions let you send a message to multiple clients at once, saving time when you need to reach all or a subset of your agency's contacts.
### Overview
- **What it is:** Bulk Actions is a messaging tool that sends one-time messages to multiple clients simultaneously
- **Why it matters:** Eliminates the need to send individual messages, ensuring consistent communication across your client base
- **Who uses it:** Agency staff with bulk action permissions who need to send announcements, reminders, or corrections
- **Expected outcomes:** A single message delivered to all filtered clients via text, email, or both
### Prerequisites
- You must have an eCourtDate staging or production agency
- You must be a super admin or have the **Create Bulk Actions** and **Update Bulk Actions** permissions
- You must be signed into the correct agency (verify the agency name in the top right corner)
### How-To Steps
#### Step 1: Import a Sample Bulk Action (Quick Start)
Importing a sample bulk action is a quick way to get started.
1. Click **Bulk Actions** in the top navigation bar.

2. Click the **Bulk Templates** tab.

3. Click the **Import** button for the sample bulk action you want to use.

4. Review the newly created bulk action page.

5. Edit the bulk action to customize it for your agency, or click **Live Run** to send the message immediately.

#### Step 2: Create a Bulk Action from Scratch
1. Click **Bulk Actions** in the top navigation bar.

2. Click the **Create** button.


3. Review the newly created bulk action edit page.

#### Step 3: Compose the Message
1. Enter the **English Subject** for the message. The subject is automatically added to the message body for text messages.

2. Enter the **English Message** body.
3. (Optional) Set a **Message Delay** in minutes to delay sending after you click **Live Run**.
4. (Optional) Click **Show Languages** to display additional languages enabled for your agency.

5. (Optional) Click **Auto Translate** to automatically translate the message into other languages.

#### Step 4: Filter Clients
Use the **Search Clients** section to narrow down which clients receive the message.
1. Use the **Search Field** to filter clients by general criteria.

2. Set the **Client Limit** to cap the maximum number of recipients.

3. Set the **Random Limit** to select a random subset of matching clients.

4. Use additional filters as needed:
- **Case Number** to filter by case
- **Event From Date** and **Event To Date** to filter by event date range
- **Event From Time** and **Event To Time** to filter by event time range

5. Select **Client Status**, **Assigned User**, **Assigned Group**, **Assigned Organization**, or **Creator** to refine results further.

> **Note:** All search filters use the AND operator. A client must match every filter to be included.
#### Step 5: Exclude Clients
1. Review the filtered client list.
2. Click the **Include/Exclude** button next to any client you want to remove from the message.

3. Excluded clients show a red button and will not receive the message.
#### Step 6: Test the Message
1. Click the **Send Test** button.

2. Verify the pre-filled phone number and email address (your own).

3. Click **Send Test** again to deliver the test message.
#### Step 7: Preview the Message
1. Click the **Preview** button next to any client in the list.

2. Review the subject and message body. Any merge tags are replaced with the client's actual data.

#### Step 8: Schedule or Send the Bulk Action
**To send immediately:** Click the **Live Run** button.
**To schedule for later:**
1. Click the **Schedule Run** button.

2. Set the **Scheduled Date** and **Scheduled Time**.
3. Click **Schedule Run** to confirm.

The bulk action runs automatically in live mode at the scheduled date and time.
#### Step 9: Save as a Template (Optional)
1. Click the **Save Template** button to save your bulk action as a reusable template.

2. Find your saved template in the **Bulk Templates** tab for future use.

#### Step 10: Schedule a Recurring Bulk Action (Optional)
Set up a bulk action to run automatically on a recurring schedule.
1. Click the **Schedule Run** button on the bulk action page.
2. Enable the **Recurring** option.
3. Select the recurrence frequency (daily, weekly, or monthly).
4. Set the start date and time for the first run.
5. Click **Schedule Run** to confirm.
The bulk action runs automatically at each scheduled interval, using the same filters and message content. You can edit the recurring schedule or cancel it at any time from the bulk action page. See [How to Create Recurring Actions](/how-to-create-recurring-actions) for details.
#### Step 11: Run a Bulk Action from an Upload or CSV Paste
Send messages to a specific list of clients by uploading a file or pasting CSV data directly.
1. Click **Bulk Actions** in the top navigation bar.
2. Create a new bulk action or edit an existing one.
3. In the **Search Clients** section, click the **Upload** or **Paste CSV** option.
4. Upload a CSV file or paste comma-separated values containing client identifiers (such as case numbers, client references, or phone numbers).
5. The system matches the uploaded data against existing client records and populates the recipient list.
6. Review the matched clients, then proceed with composing and sending the message.
This approach is useful when you have a specific list of recipients that cannot be easily filtered using the standard search options.
#### Bulk Action Types Reference
While this article focuses on sending mass messages, bulk actions support multiple action types beyond messaging. Each type lets you perform a specific operation across many records at once.
| Type | Description |
|------|-------------|
| **Send Message** | Send a text, email, or voice message to multiple clients |
| **Create Events** | Create events for multiple clients based on filters |
| **Update Status** | Change the status of multiple client, case, or event records |
| **Assign Users** | Assign staff members to multiple client or case records |
| **Assign Groups** | Add multiple clients to a group |
| **Assign Flows** | Assign a flow to multiple events or cases |
| **Update Fields** | Update a specific field value across multiple records |
| **Archive** | Archive multiple records at once |
| **Trash** | Trash multiple records at once |
| **Export** | Export filtered records to CSV or PDF |
To use a different bulk action type, select the type from the **Action Type** dropdown when creating or editing a bulk action. Each type has its own configuration options and filters. See [How to Create Events via Bulk Actions](/how-to-create-events-via-bulk-actions) and [How to Assign Users via Bulk Actions](/how-to-assign-users-via-bulk-actions) for specific guides.
### What to Expect
After clicking **Live Run**, messages begin sending to all included clients. Depending on the number of recipients, delivery may take a few minutes. You can monitor the status of each message from the bulk action page. If you set a **Message Delay**, messages will be queued and sent after the specified number of minutes.
### Best Practices
- Always send a test message to yourself before running a bulk action live
- Use the **Preview** feature to verify merge tags resolve correctly for different clients
- Start with a small **Client Limit** on your first run to confirm everything works as expected
- Save frequently used bulk actions as templates to save time on future sends
- Use specific filters to target the right audience and avoid sending unnecessary messages
### Frequently Asked Questions
**Q: Can I cancel a bulk action after clicking Live Run?**
A: Once a bulk action starts processing, individual messages are queued for delivery. Contact your administrator immediately if you need to stop an in-progress bulk action.
**Q: What happens if a client has opted out of messages?**
A: Clients who have opted out of communications will not receive the bulk action message. The system automatically respects opt-out preferences.
**Q: Can I use merge tags in bulk action messages?**
A: Yes. You can include merge tags such as client name, event date, and case number. Use the **Preview** button to verify that tags resolve correctly for each client.
**Q: How do I send a bulk action in multiple languages?**
A: Click **Show Languages** to display additional language fields, then click **Auto Translate** to translate your English message automatically. You can also manually edit each translation.
**Q: Is there a limit on how many clients I can include?**
A: There is no fixed limit, but sending to a very large number of clients may take longer to process. Use the **Client Limit** field to control the maximum number of recipients per run.
### Troubleshooting
**Issue:** Bulk action shows zero clients after applying filters.
**Symptoms:** The client list is empty even though you expect matches.
**Solution:**
1. Verify each filter value is correct (all filters use the AND operator)
2. Remove one filter at a time to identify which filter is too restrictive
3. Confirm clients exist with the specified status, group, or date range
**Issue:** Test message not received.
**Symptoms:** You clicked **Send Test** but did not receive a text or email.
**Solution:**
1. Verify your phone number and email address are correct in the test form
2. Check that your agency has an active phone number and email configured under **Admin** > **Settings**
3. Confirm your device is not blocking messages from the agency number
> **Important:** If you continue to experience issues after following these troubleshooting steps, sign in to eCourtDate and create a ticket by clicking the ticket button in the bottom right corner of the screen.
### Related Articles
- [How to Send a One-off Message](/how-to-send-a-one-off-message)
- [How to Disable Messages based on Status](/how-to-disable-messages-based-on-status)
- [How to Create Events via Bulk Actions](/how-to-create-events-via-bulk-actions)
- [How to Assign Users via Bulk Actions](/how-to-assign-users-via-bulk-actions)
- [How to Use Merge Tags](/how-to-use-merge-tags)
- [How to Configure Opt-in and Opt-out Compliance](/how-to-configure-opt-in-and-opt-out-compliance)
- [Troubleshooting Automated Messages](/troubleshooting-automated-messages)