Flat file uploads let you bulk create and update clients, events, cases, and payments in your agency using a CSV, TXT, or XLSX file. Whether you upload files manually or automate transfers via SFTP, t...
Flat file uploads let you bulk create and update clients, events, cases, and payments in your agency using a CSV, TXT, or XLSX file. Whether you upload files manually or automate transfers via SFTP, this feature streamlines data management at scale.
Overview
The flat file upload process involves creating an upload template, mapping your file fields to eCourtDate fields, configuring processing settings, and then uploading your file. Upload templates are reusable, so you only need to set them up once per file format. You can process clients, events, cases, payments, and contacts in a single upload.
Prerequisites
- Administrator access to an eCourtDate agency
- A sample file in CSV, TXT, or XLSX format
- If your agency is live, test new uploads in a staging environment first
- Permissions:
create_uploads, update_uploads, create_upload_templates
Learn more about flat file uploads.
How-To Steps
Step 1: Create an Upload Template
- Log in to your eCourtDate production or staging agency.
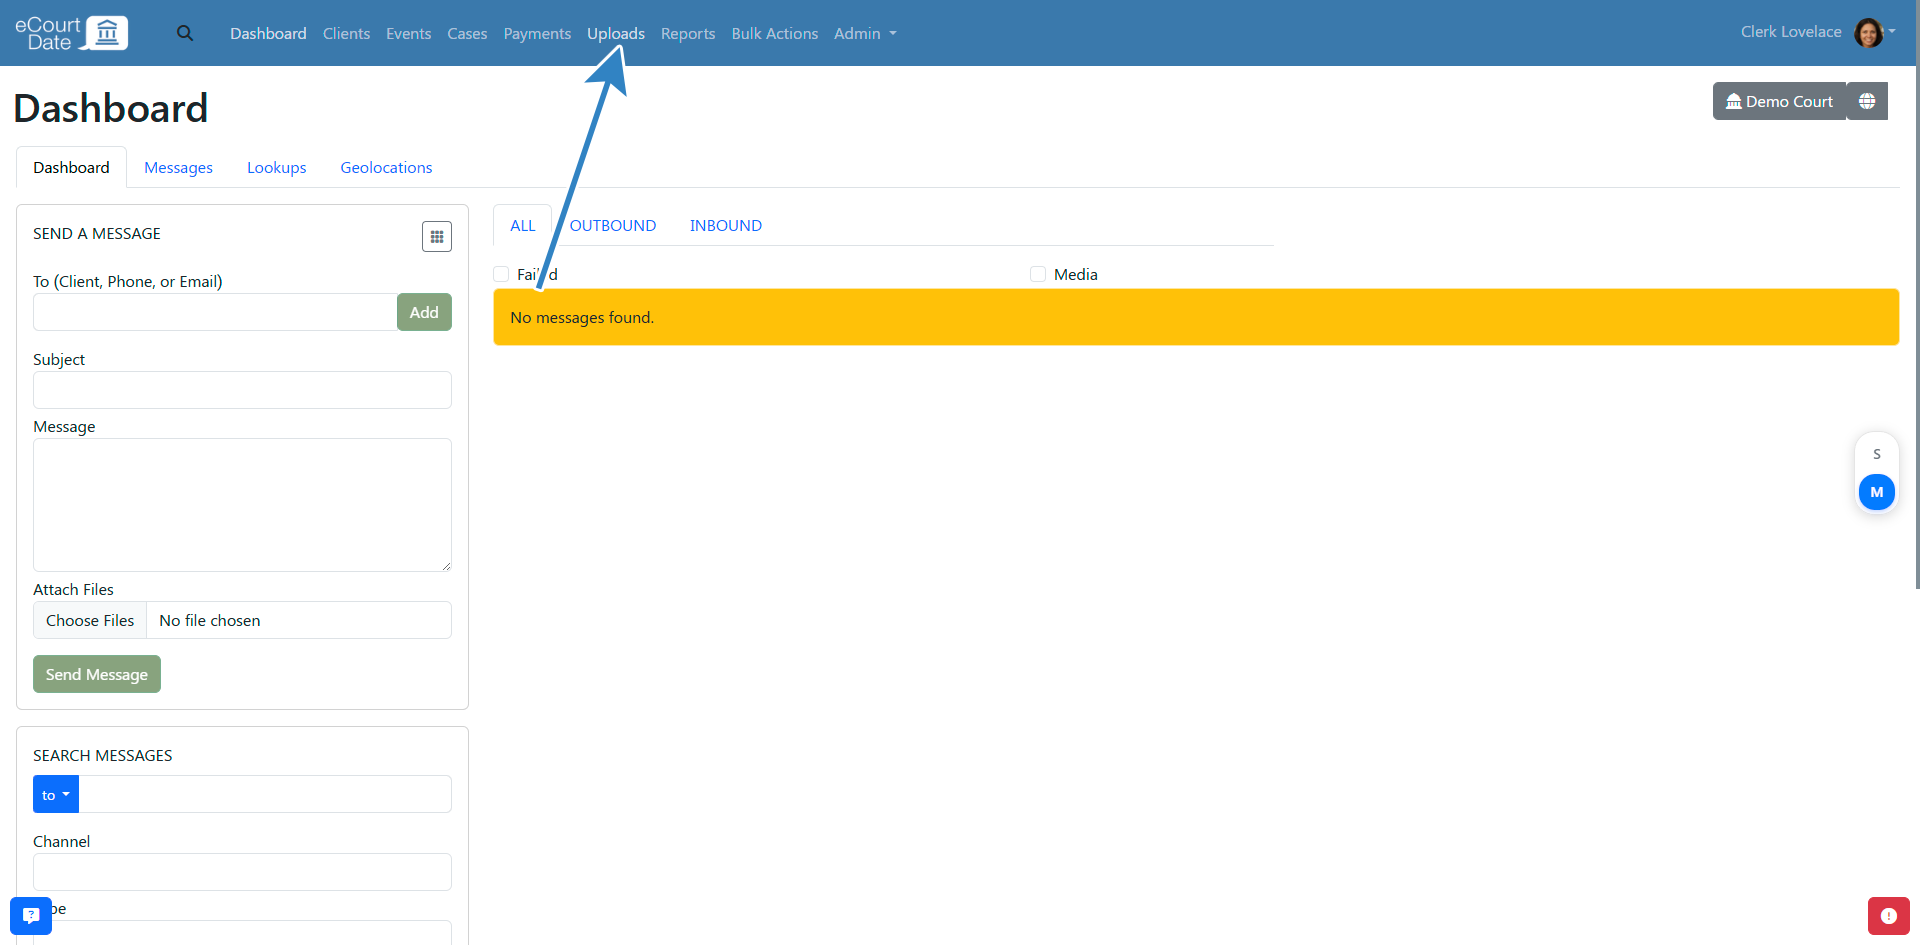
- Click Uploads in the top navigation.
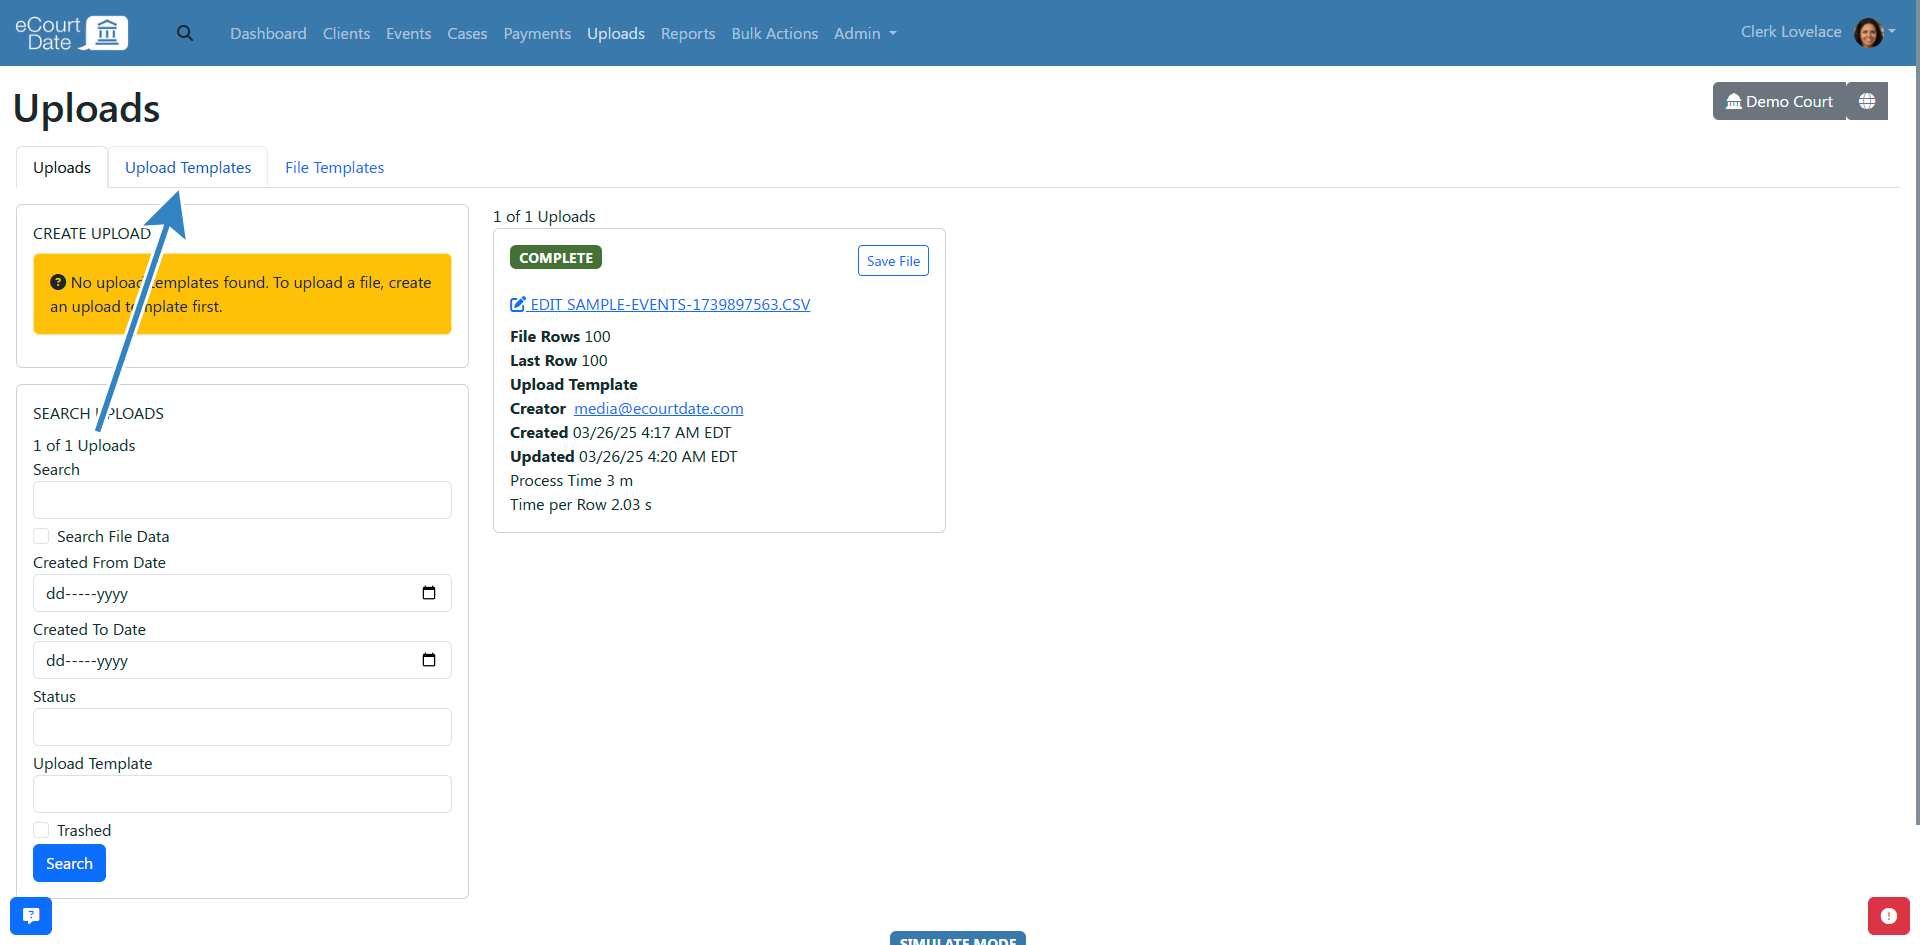
- Click the Upload Templates tab.
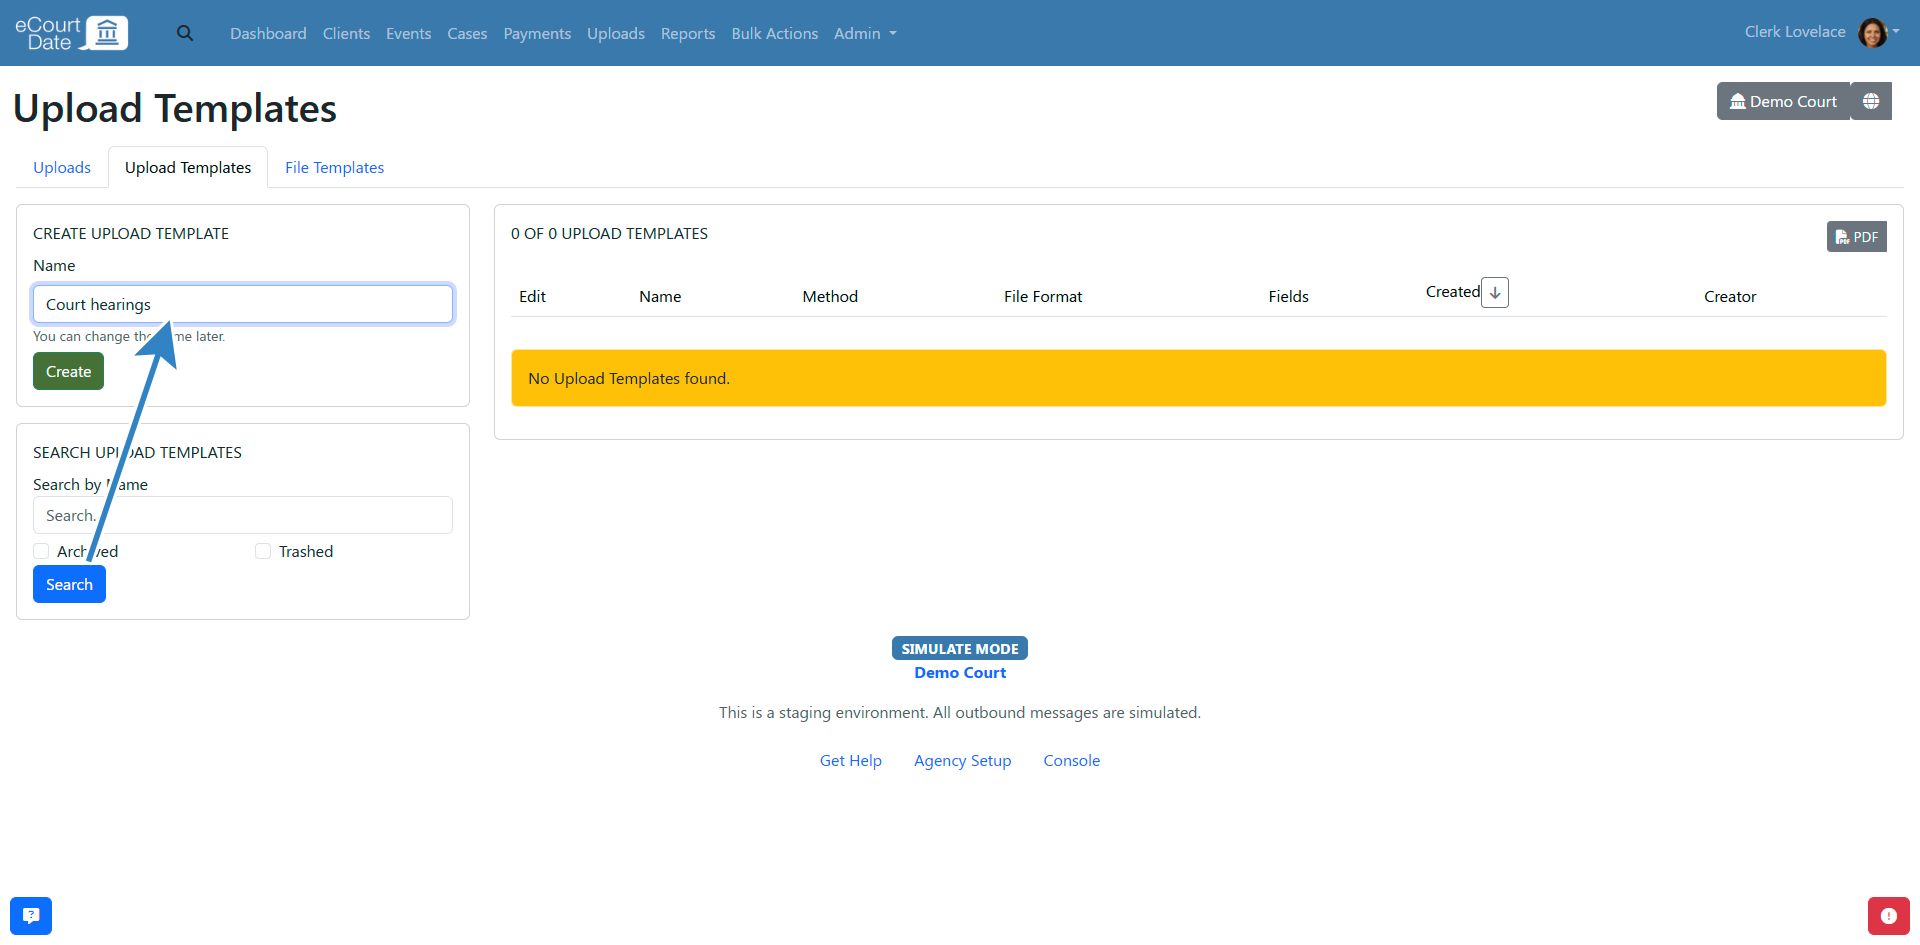
- Fill in the Create Upload Template form with a name and description.
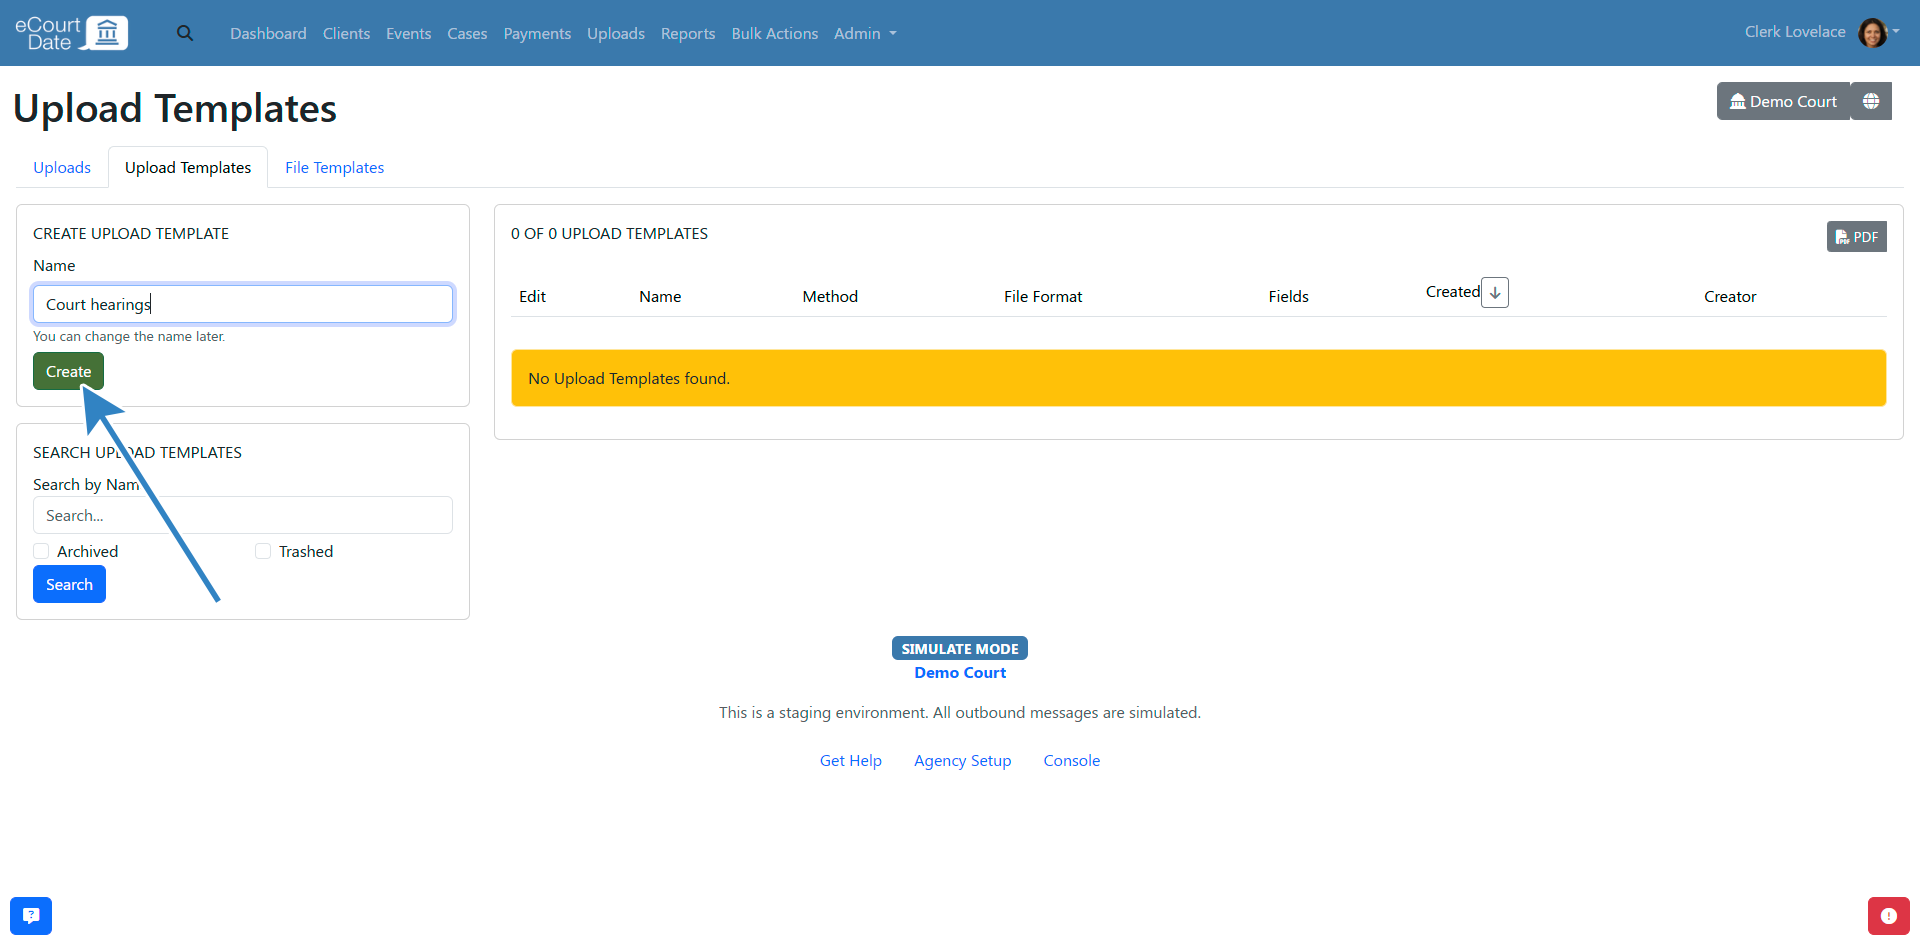
- Click the Create button.
You will be redirected to the newly created upload template.
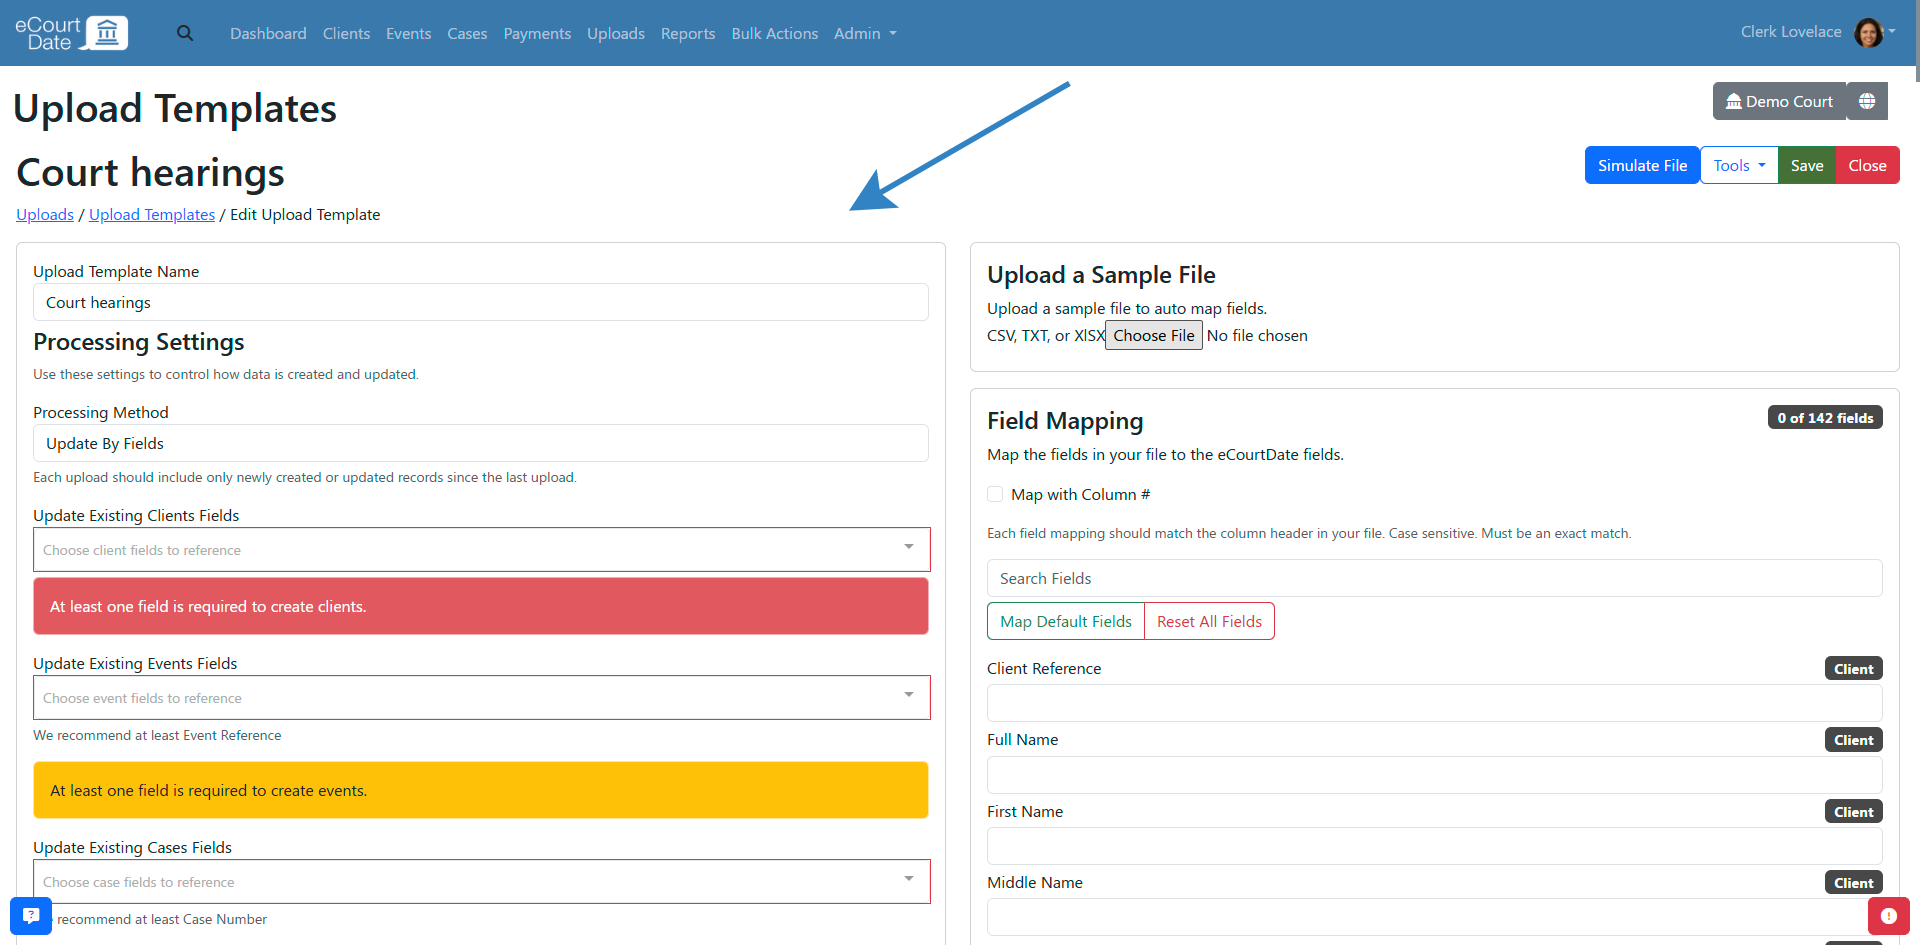
Step 2: Map the Upload Template
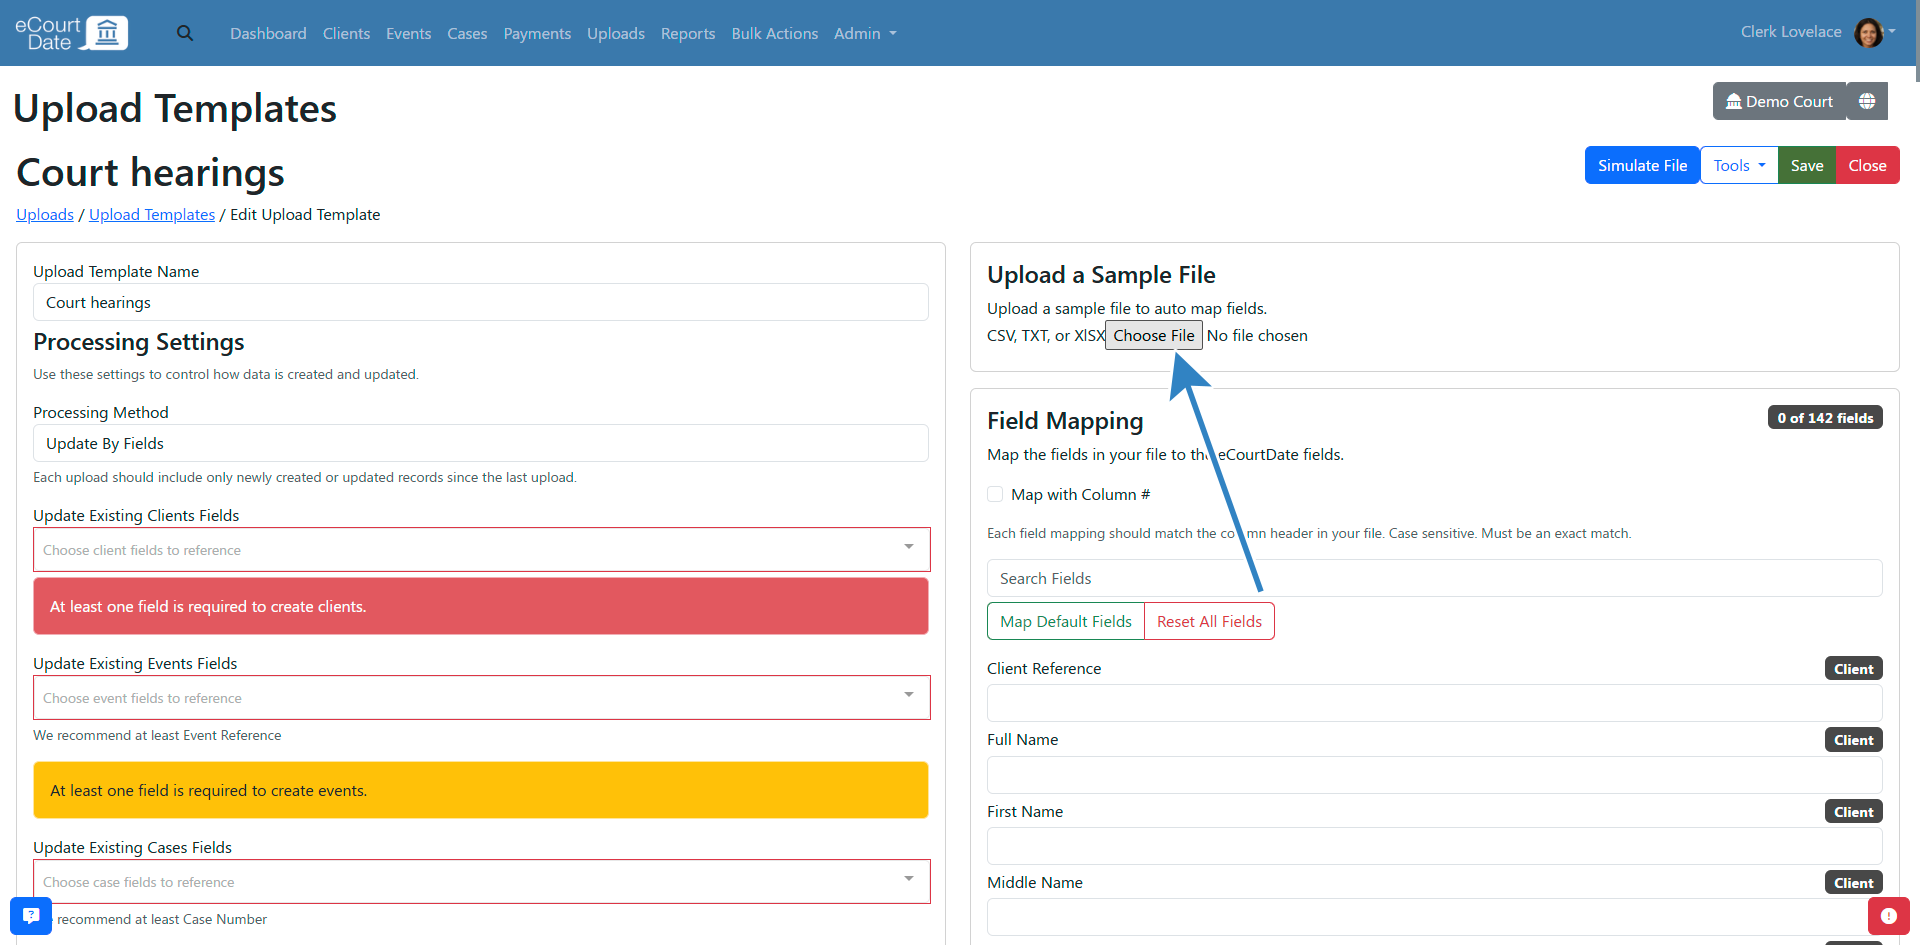
- In the Upload a Sample File section, select your sample file.
- If the file is readable, you will see a list of fields that need to be mapped.
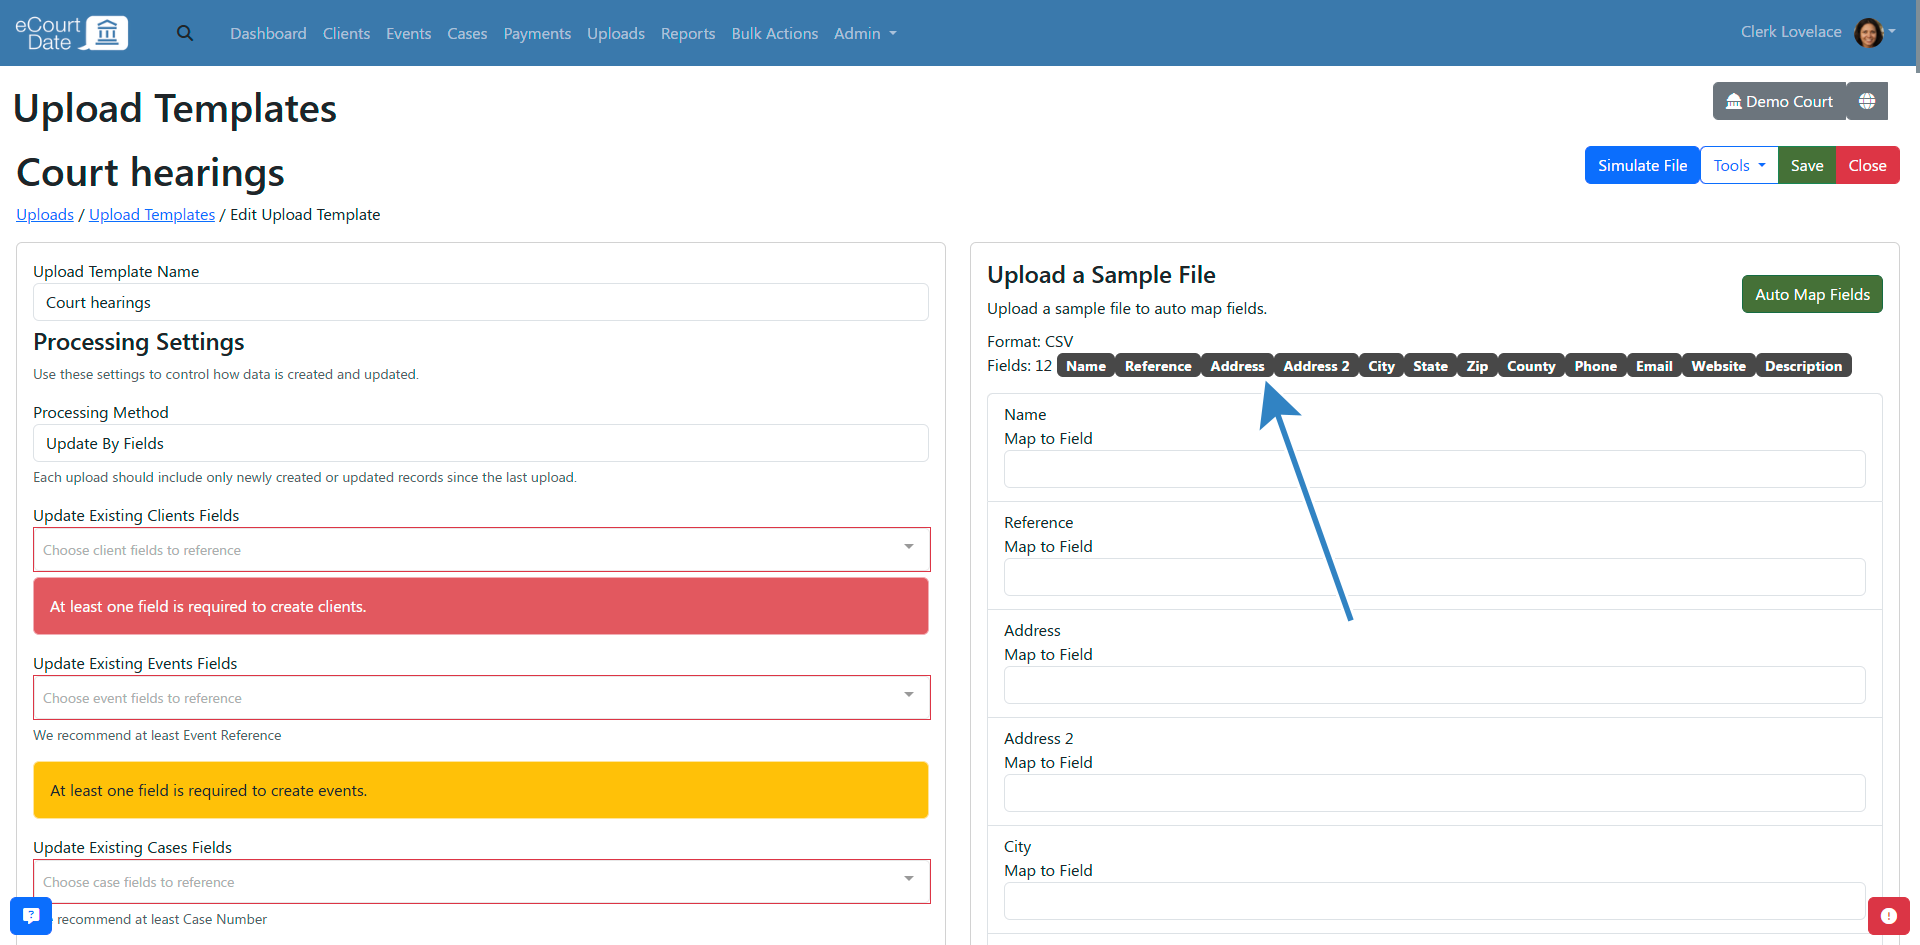
- Click the Auto Map Fields button to auto-map, or use the Map To Field dropdown for each field.

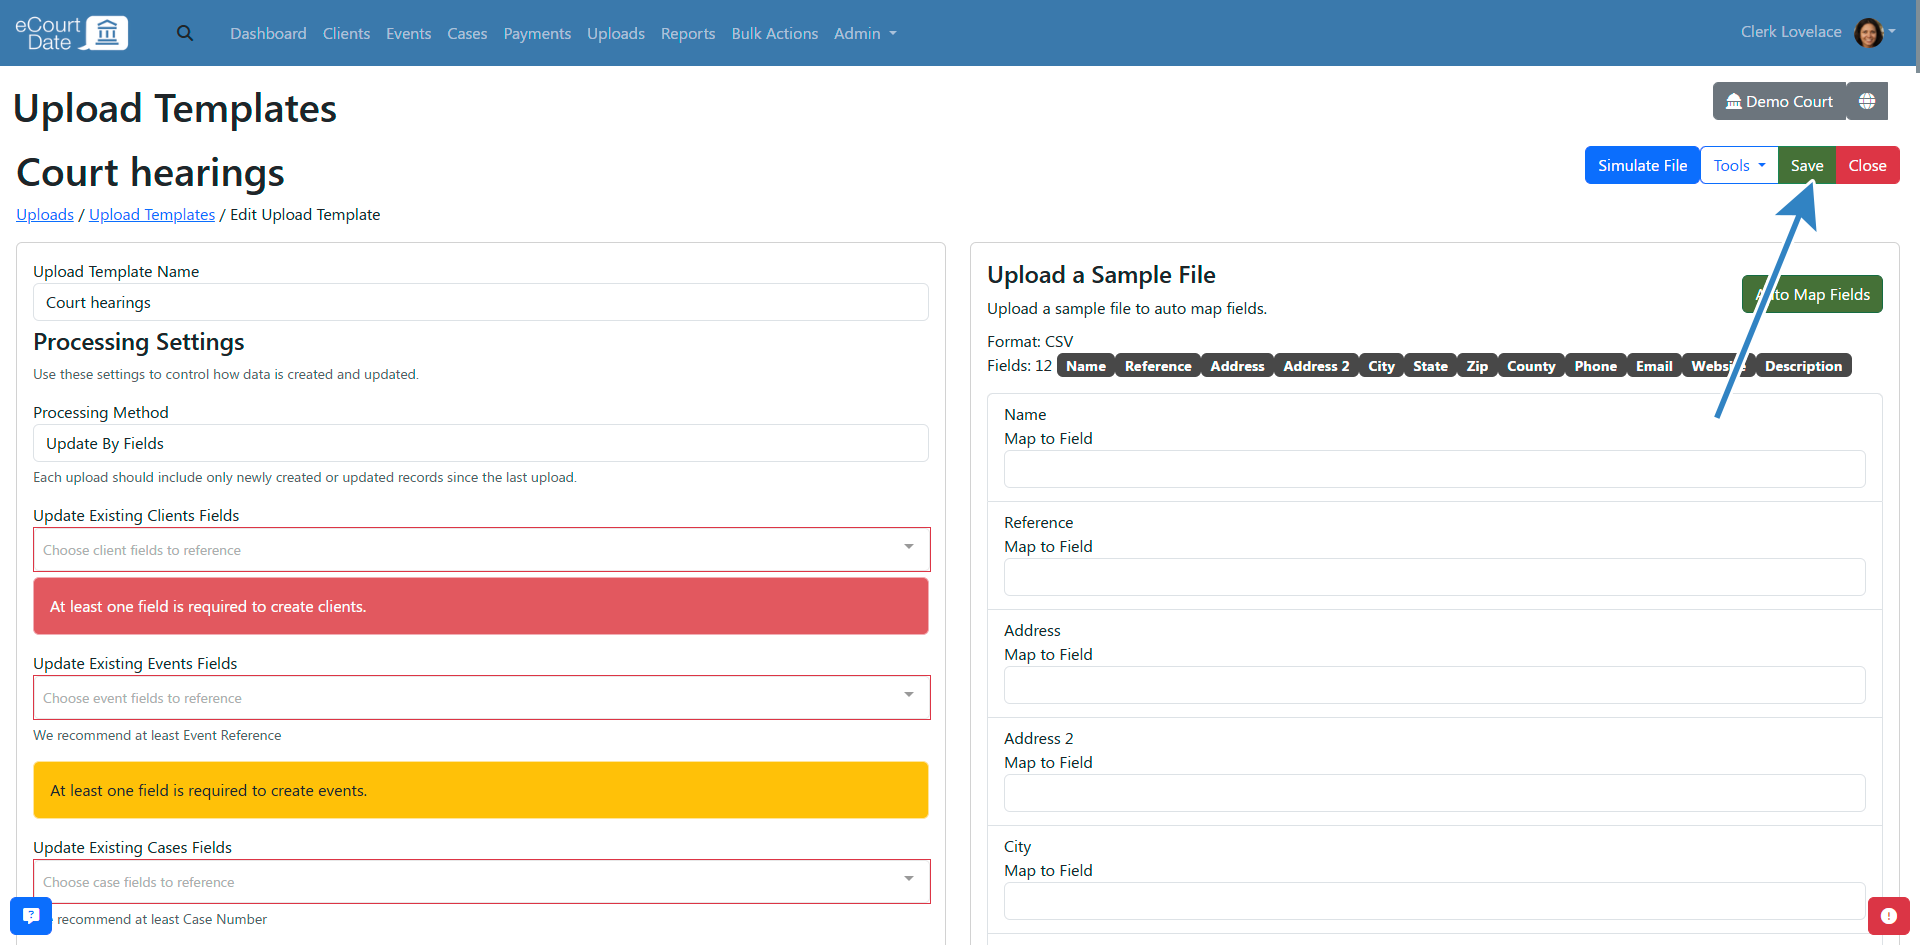
- Click the Save button to apply your changes.

(Optional) Manually Map Fields
If you need to manually map fields or fix auto-mapping issues, scroll to the Field Mapping section.
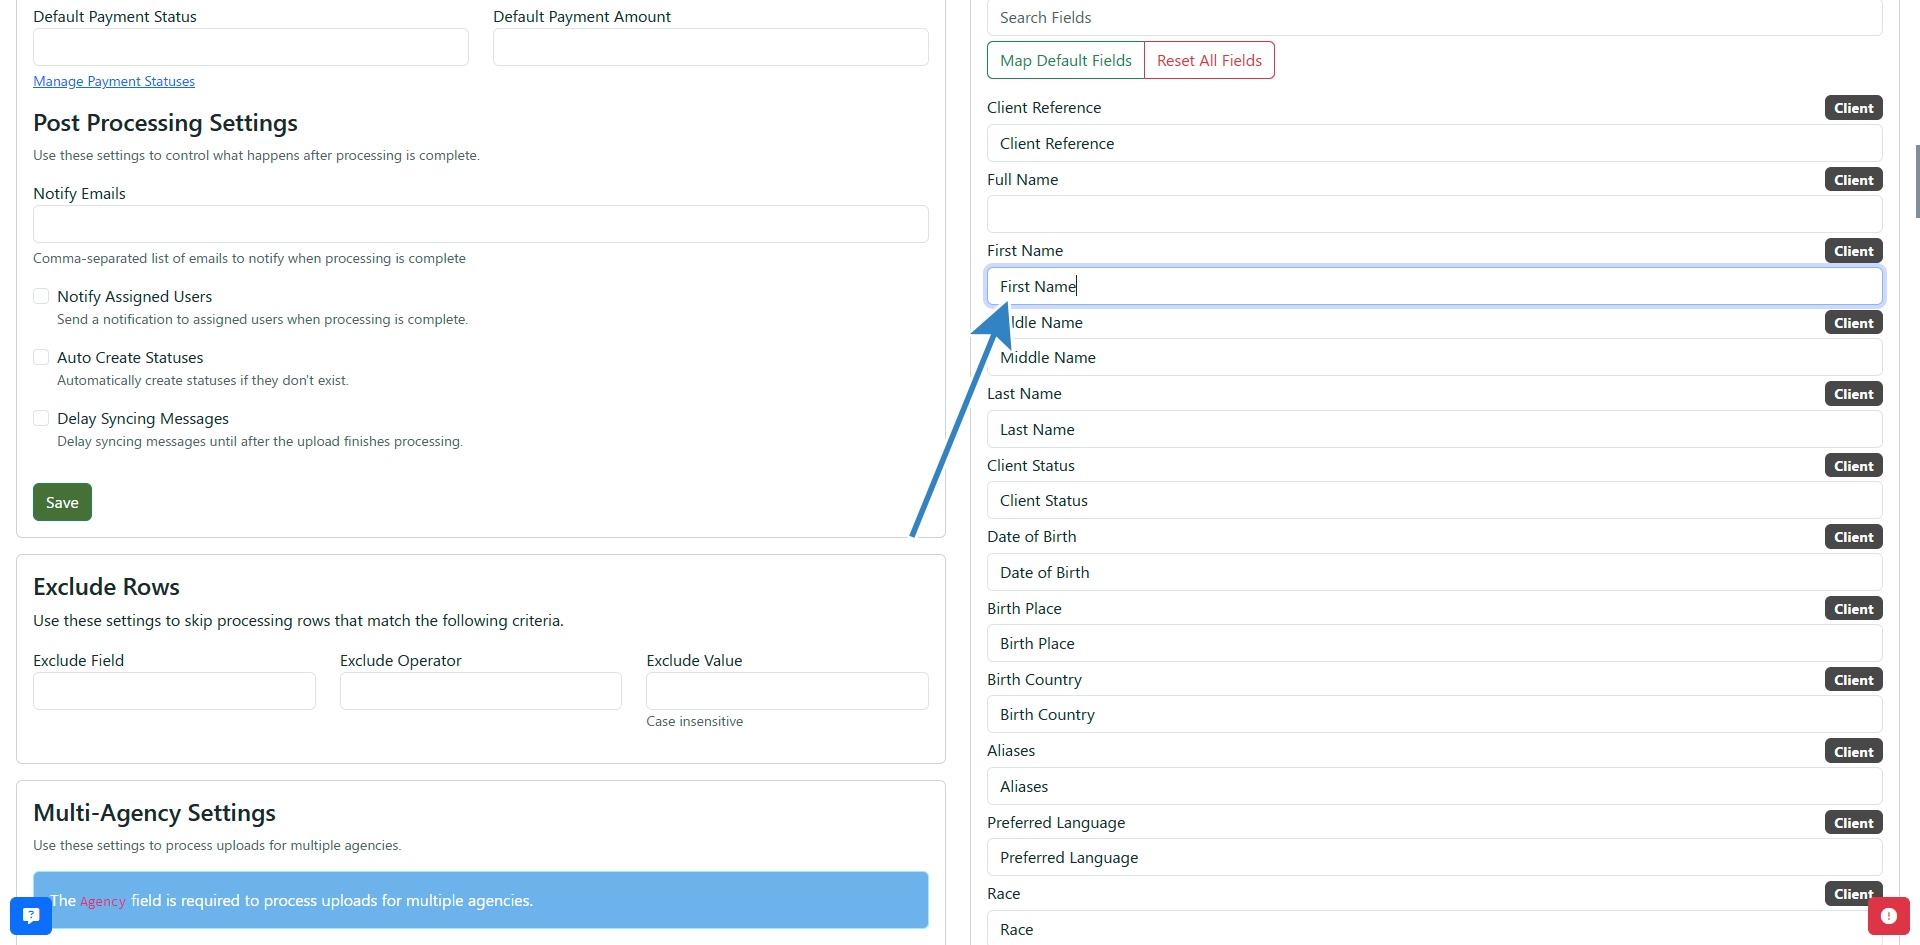
Each row represents an eCourtDate field. Enter the exact field name from your file into the corresponding eCourtDate field. Copy and paste field names exactly as they appear in your file to avoid mismatches.
Click the Save button to apply your changes.
Step 3: Configure the Processing Settings
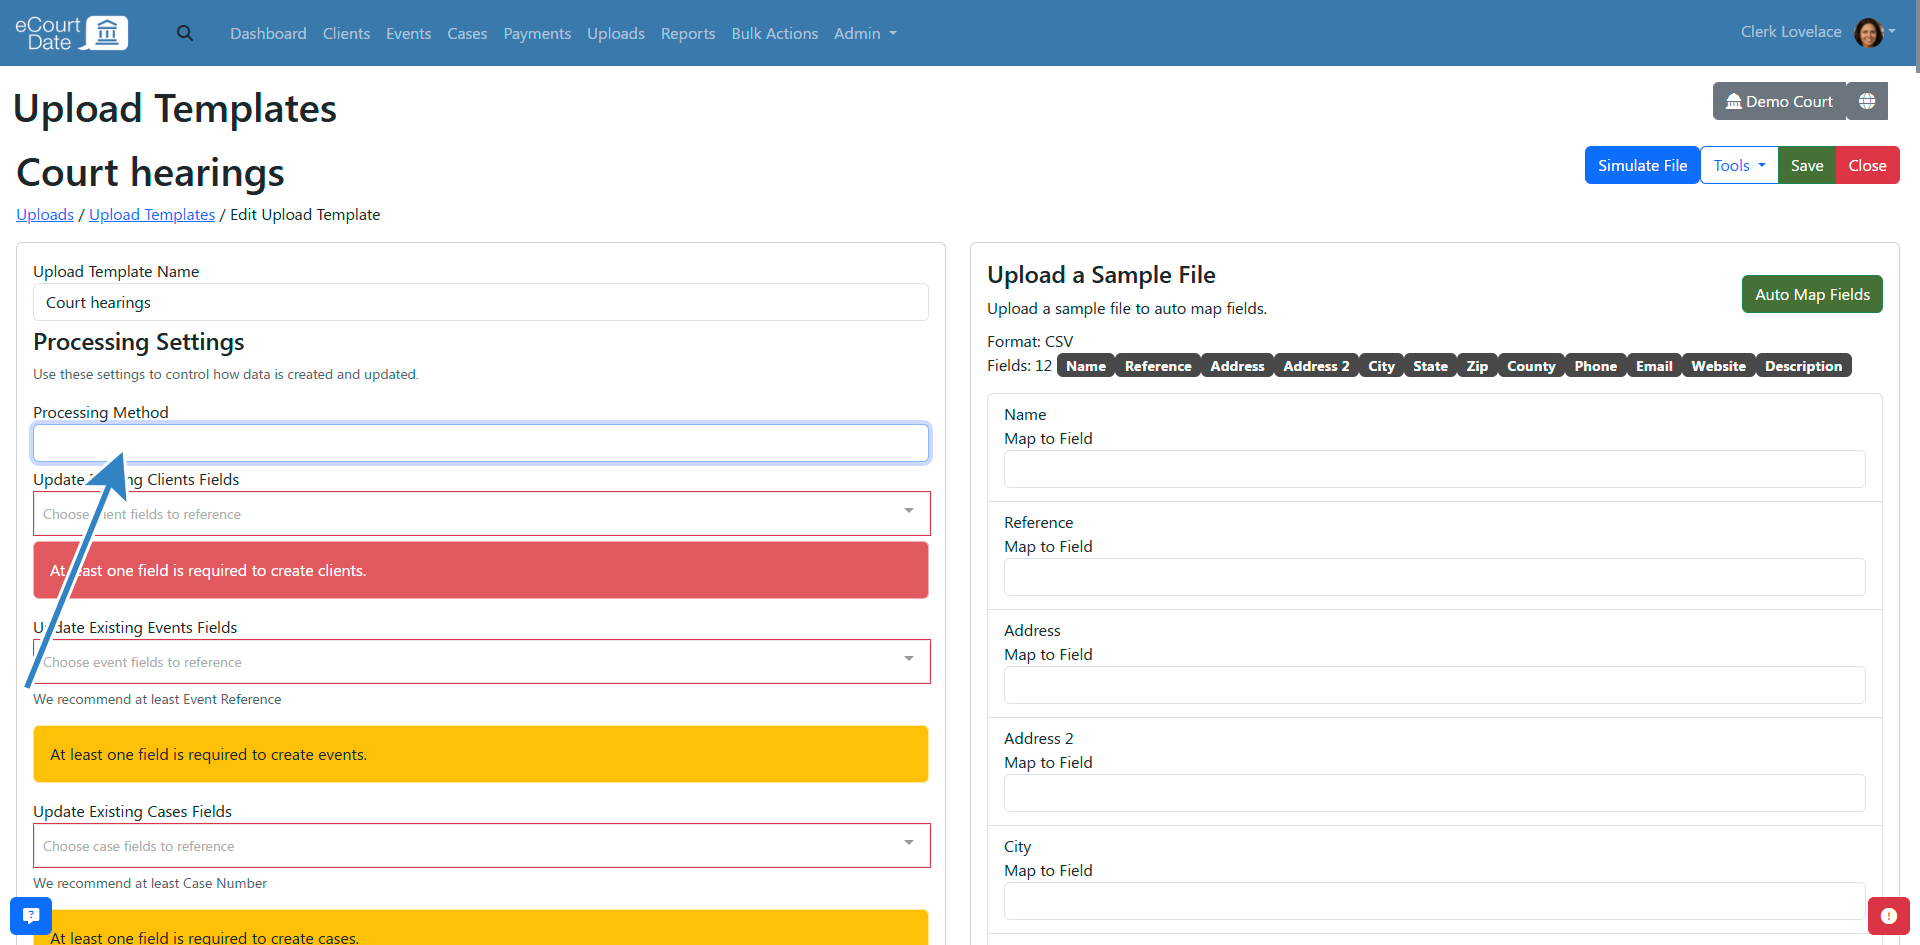
Processing Method
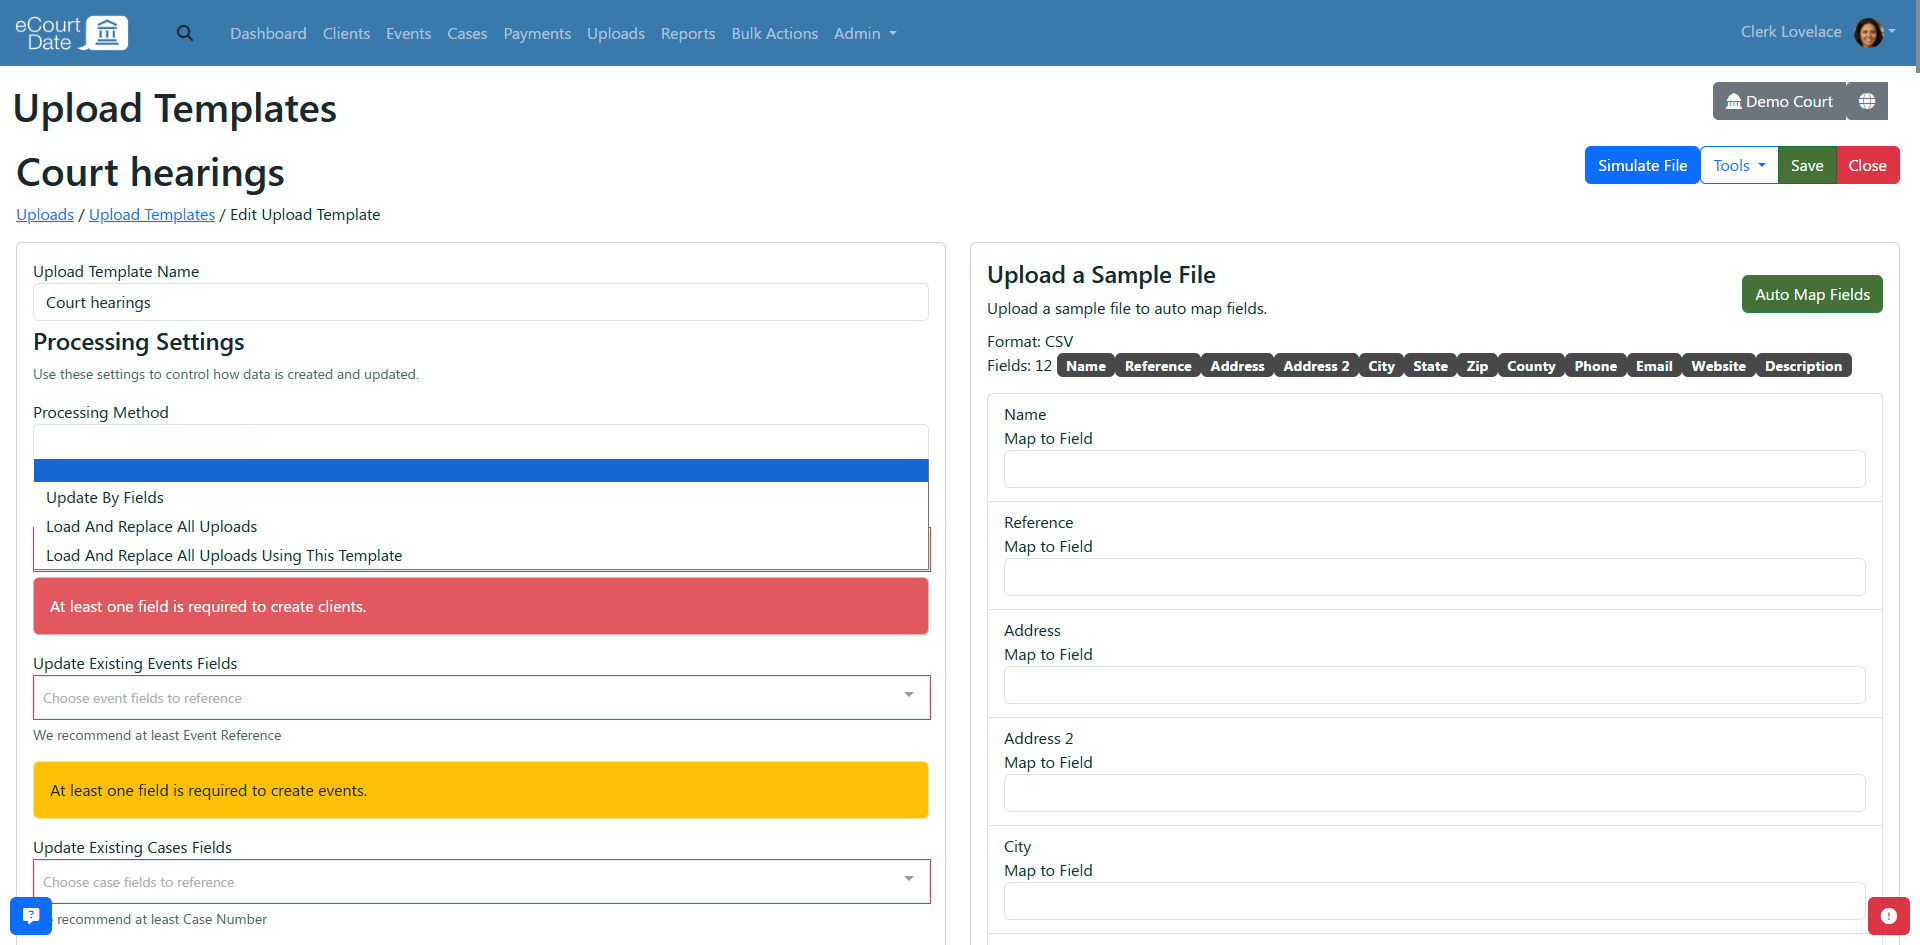
Select one of the following processing methods:
- Update by Fields (Recommended): Each new upload only needs to include new records or updates to existing records.
- Load and Replace All Uploads: Any existing records will be archived and new records will be created.
- Load and Replace All Uploads Using This Template: Any existing records created by this template will be archived and new records will be created.
If you choose a Load and Replace method, you can select which record types to replace:
- Load and Replace Clients: Clients and associated records will be archived
- Load and Replace Contacts: Only contacts will be archived
- Load and Replace Cases: Only cases will be archived
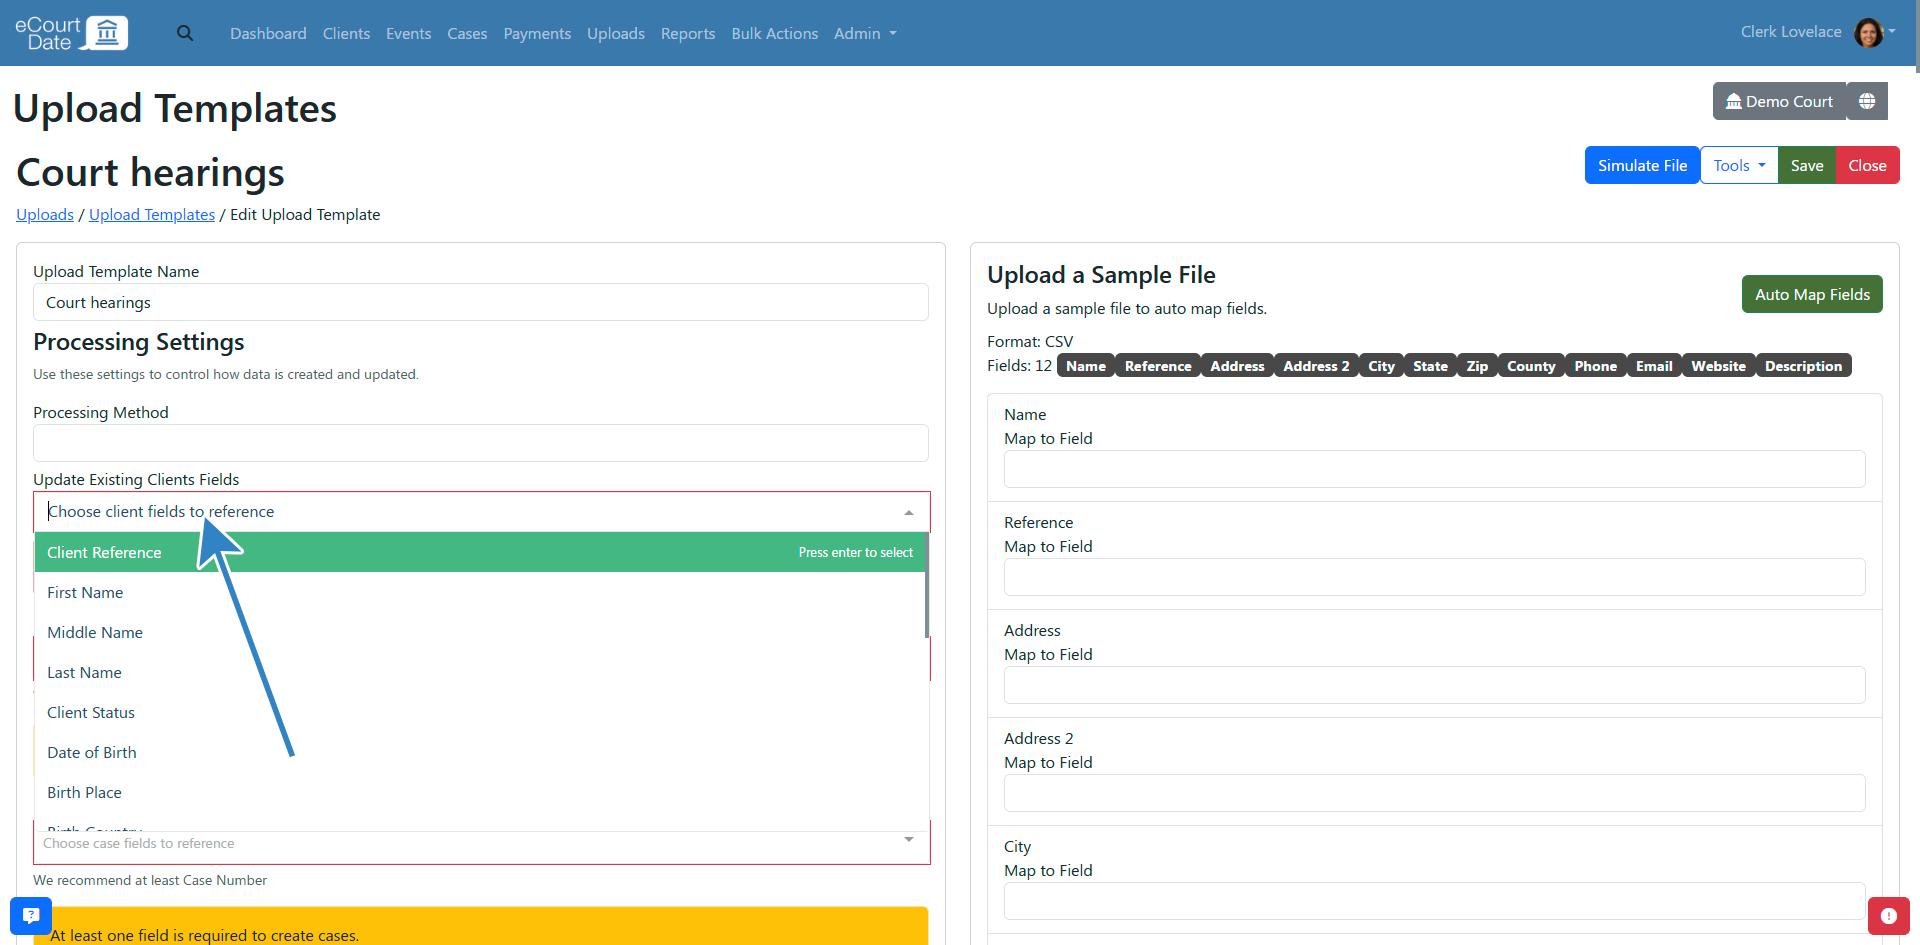
Update Existing Records
Configure the fields used to identify existing records for each record type you are processing:
- Update Existing Events
- Update Existing Cases
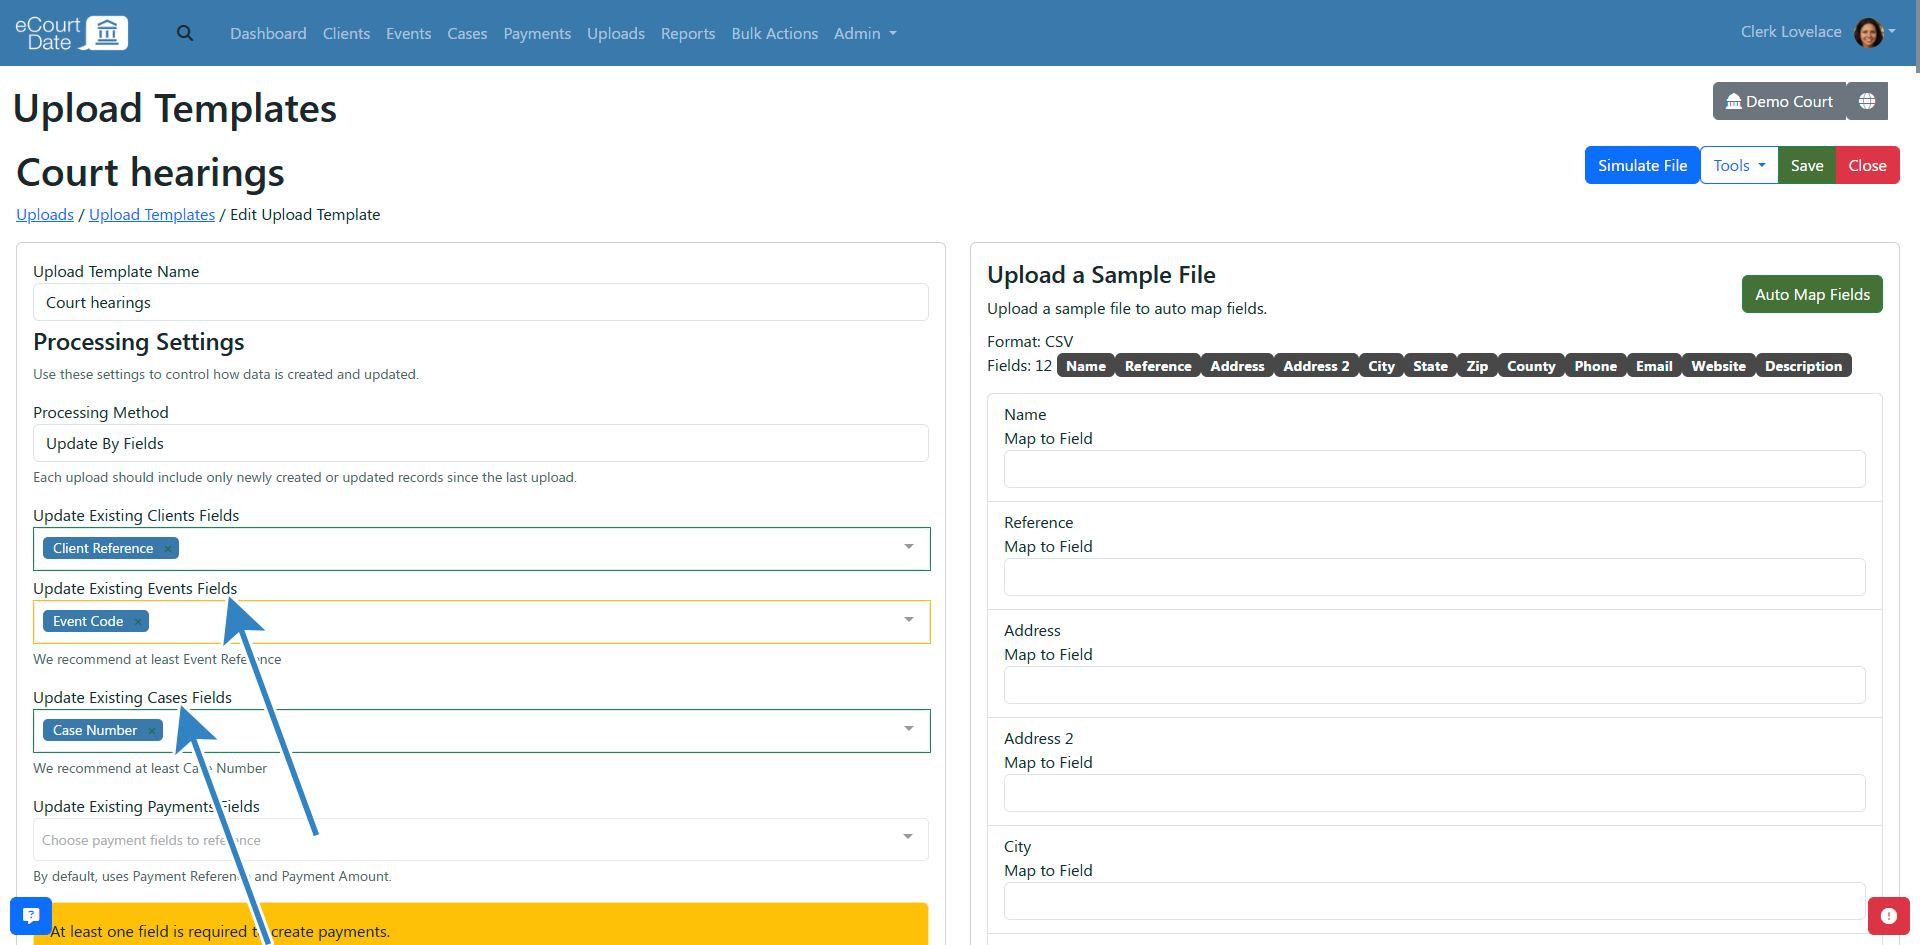
Use your internal reference ID for each record type. For example, use the Client Reference field to identify existing clients. Cases are identified by the Case Number field.
If you do not have a unique ID, you can use a combination of fields. For example, use the Event Case Number and Event Type fields to identify existing events.
Any fields configured in the Update Existing section should always be included in your upload. If you are not including a record type, leave the field blank.
Step 4: Preview and Test the File
- Click Uploads in the top navigation.
- Select your file and choose the upload template you created.
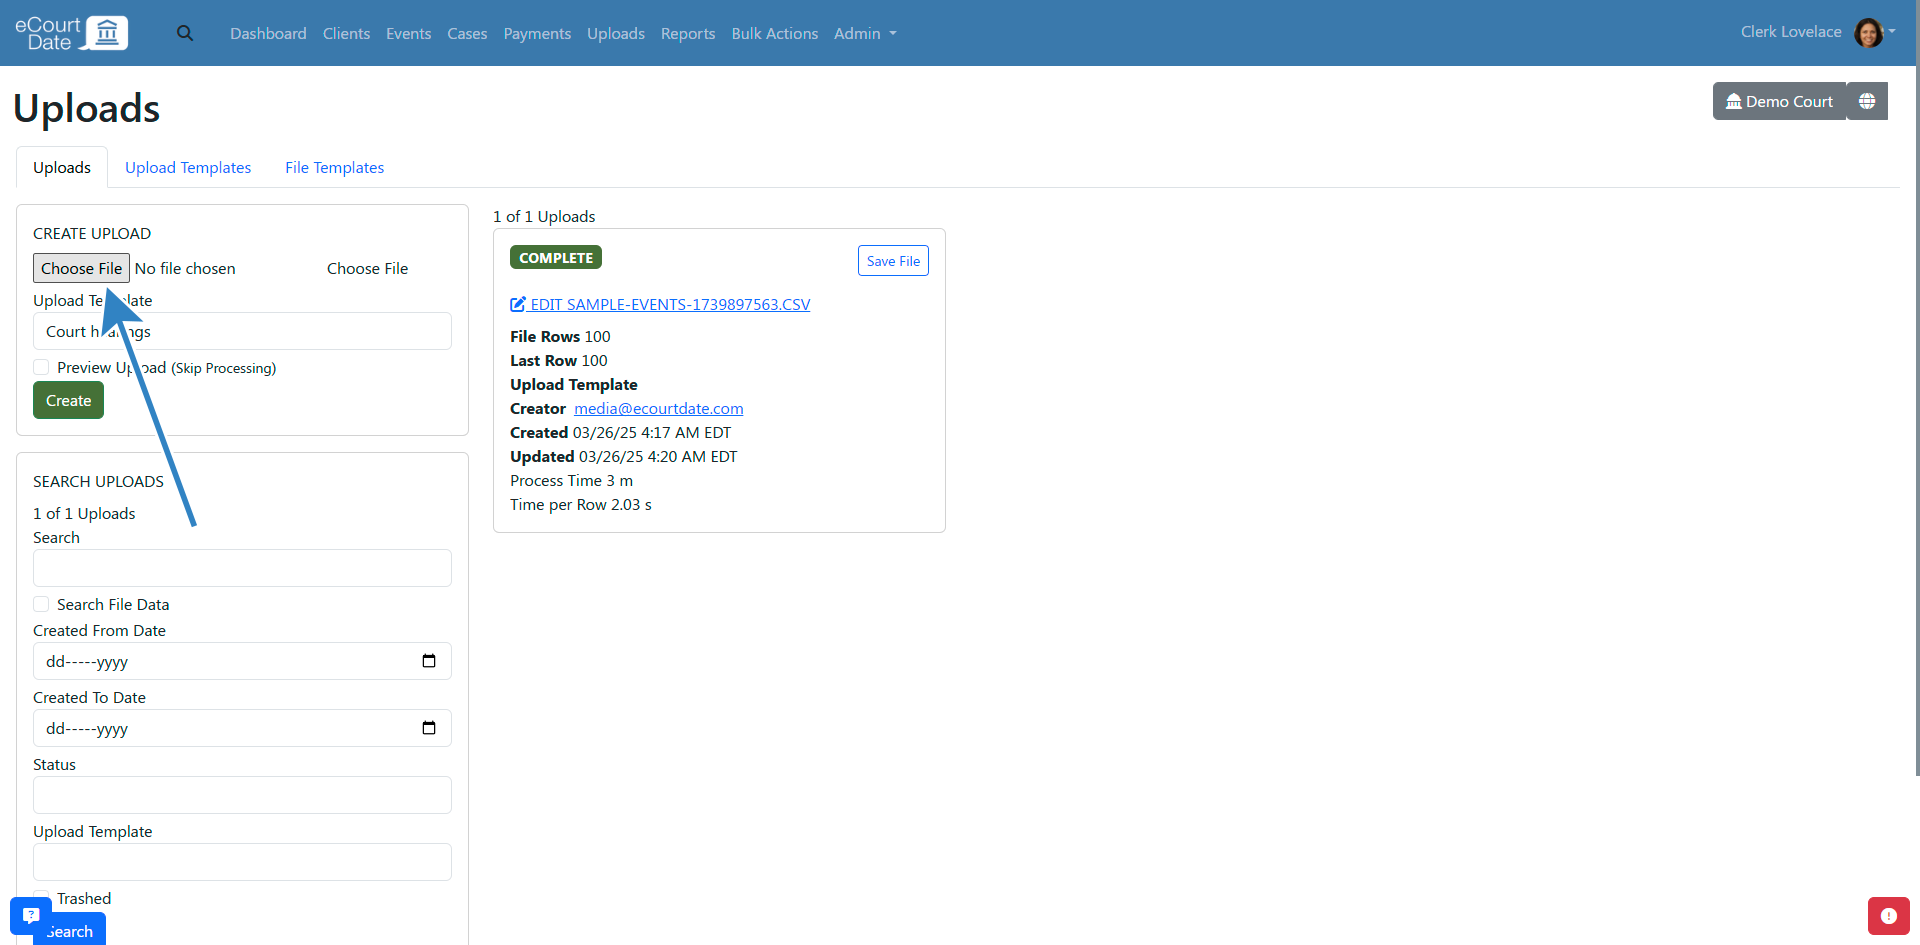
- Click the Preview Upload checkbox.
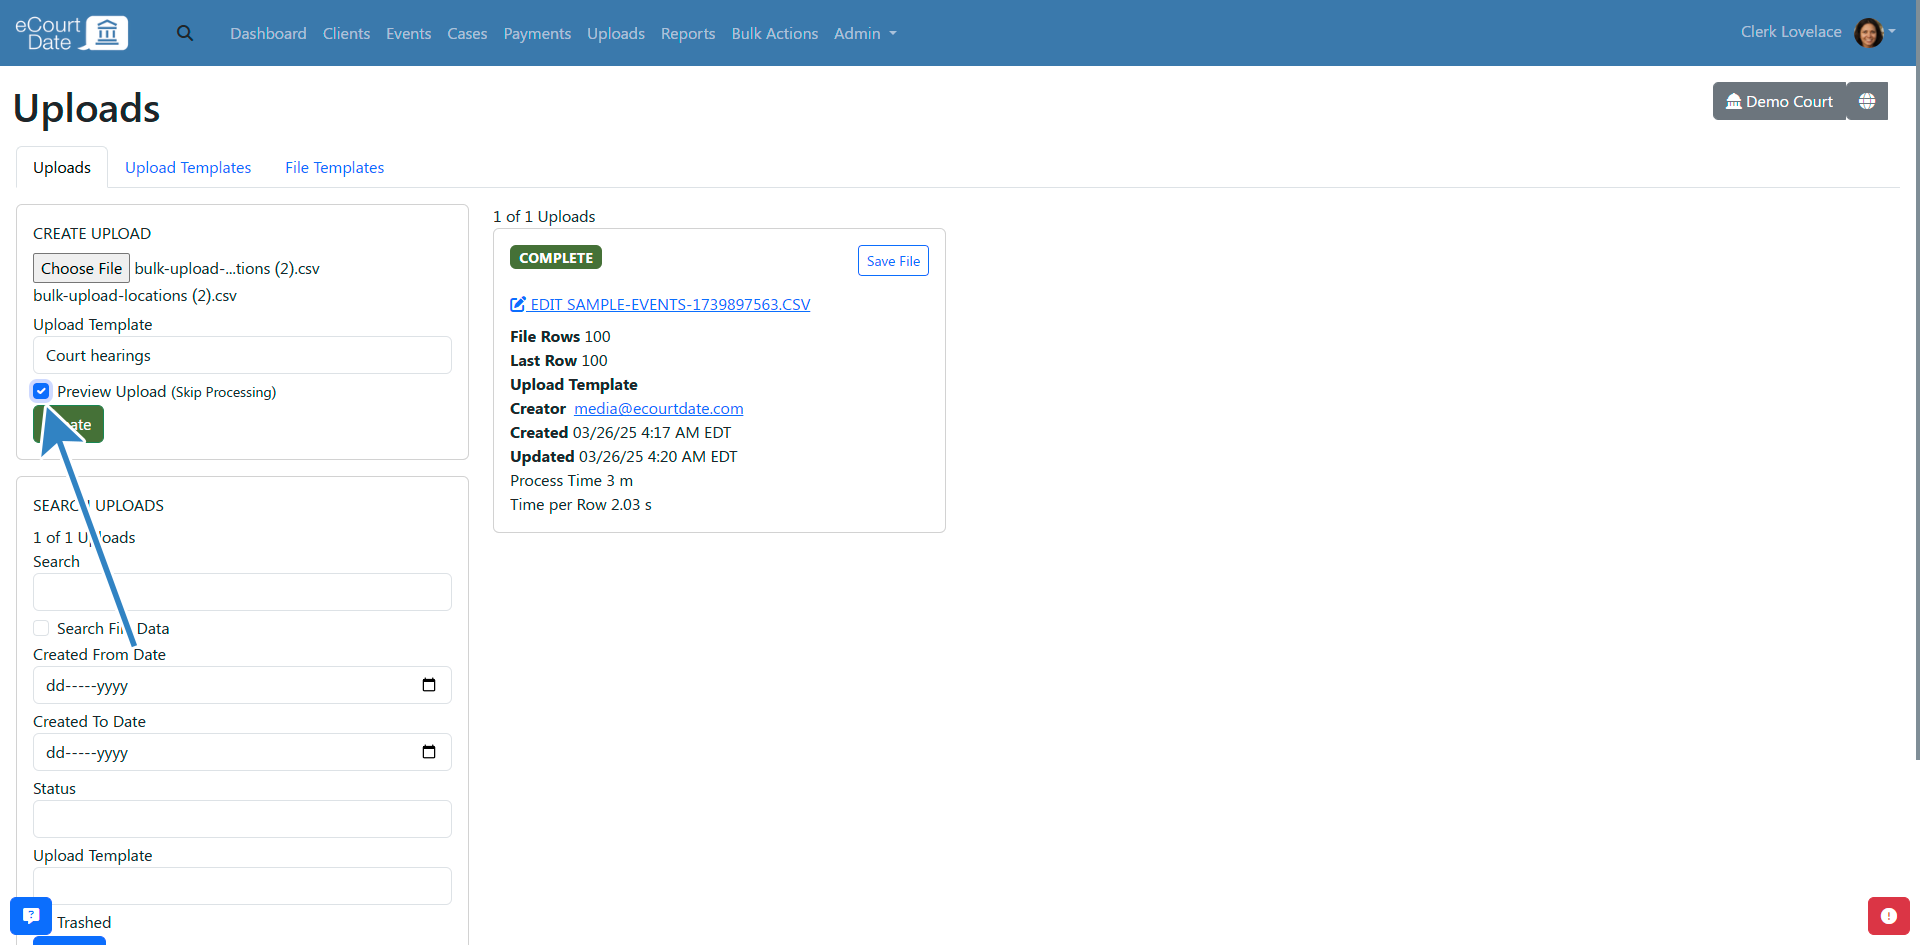
- Click the Create button.
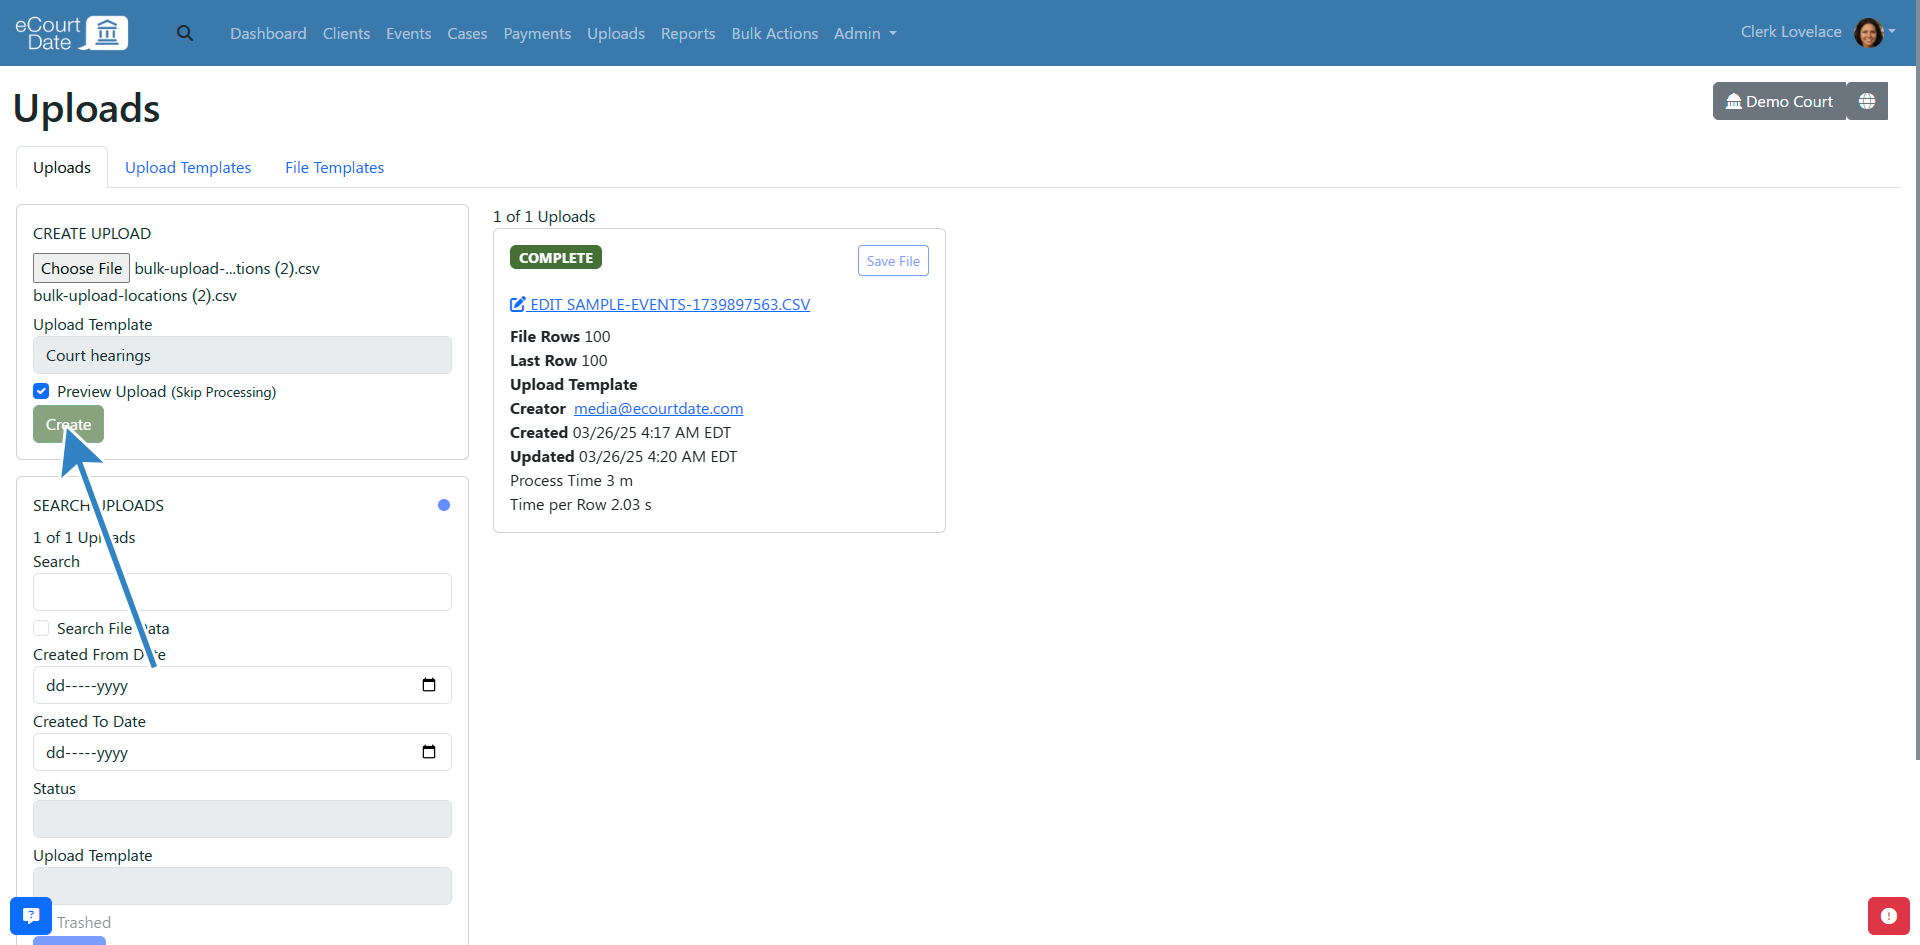
You will be redirected to the new upload. Review the field mapping and confirm there are no errors. If you make changes in the upload template, refresh the upload page to see the latest changes.
Step 5: Process the File
- Click the Process Upload button to process the file.
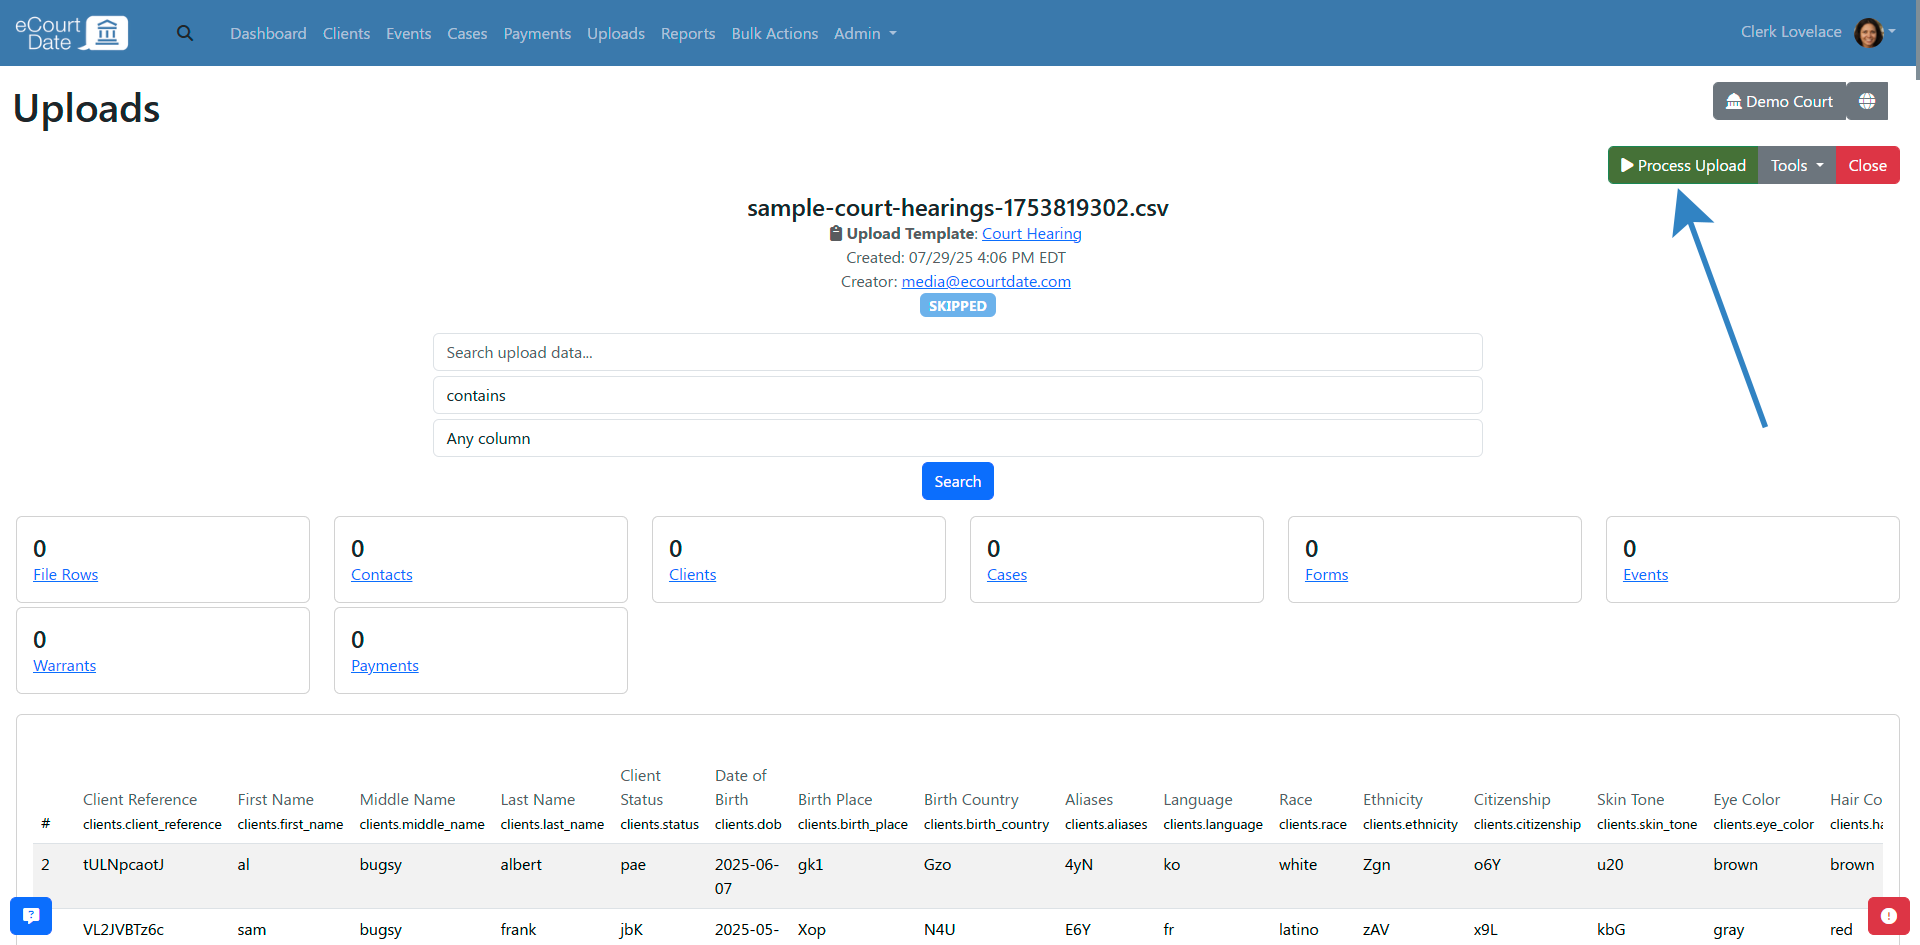
- The status will change to Queued until processing begins.
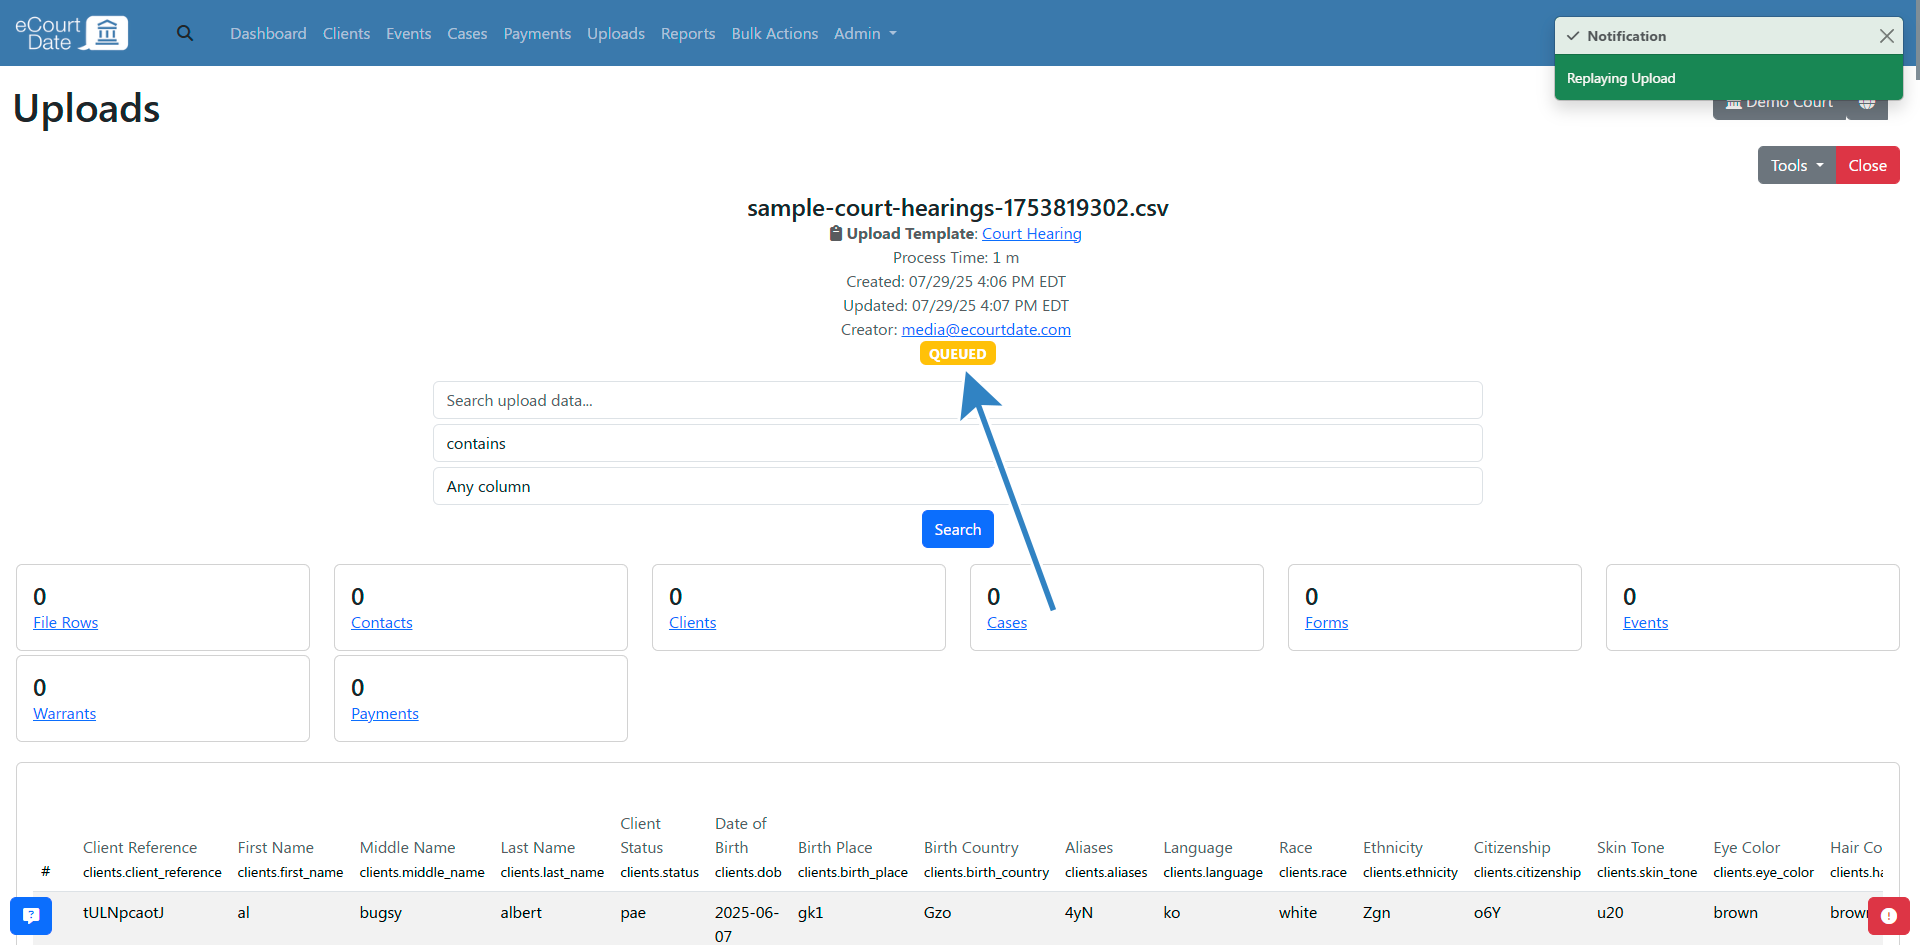
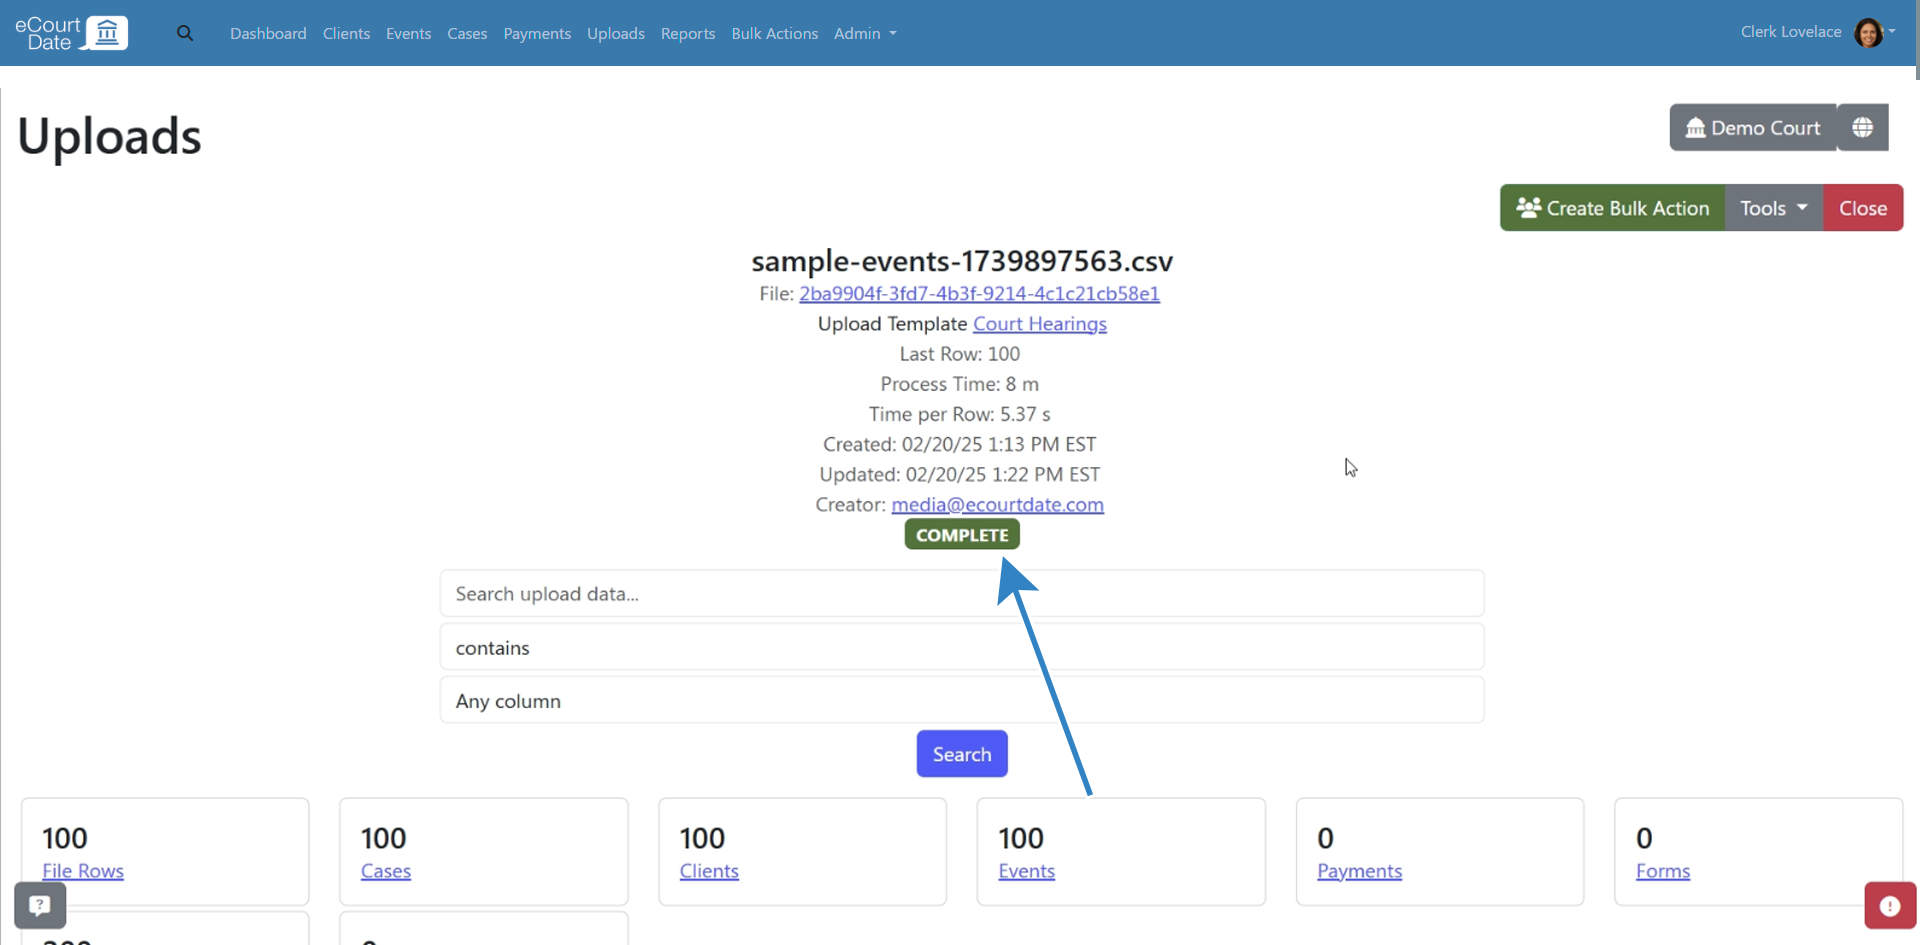
- Once the file is processed, you will receive an email notification. Review the following:
- The upload created the expected number of records
- The notification does not include any error messages
- Records are created or updated as expected
- Clients, events, cases, and payments reflect the correct data
- Messages are scheduled as expected
What to Expect
After processing, your data will be available in eCourtDate within minutes for most files. Larger files may take longer depending on the number of records. You will receive an email notification when processing completes. Any errors encountered during processing will be included in the notification email.
Best Practices
- Always preview your first upload with a new template to catch mapping errors before processing live data.
- Use the Update by Fields processing method unless you have a specific reason to load and replace all records.
- Include a unique reference ID (such as Client Reference or Case Number) in every upload to prevent duplicate records.
- Test new upload templates in your staging environment before running them in production.
- Keep your upload files clean by removing blank rows, extra columns, and special characters that may cause parsing issues.
Frequently Asked Questions
Q: Do I have to use the Preview when creating a new upload?
A: No. Once you are confident your upload template is correctly configured, you can skip the Preview Upload option when creating new uploads.
Q: How do I add a new field to my upload template?
A: In the upload template's Field Mapping section, find the field you want to add. Copy the field name from your file and paste it into the appropriate eCourtDate field. Click Save to apply the changes.
Q: My date and time fields are not being processed correctly. How do I fix this?
A: Review the Parsing Formats section of your upload template. Check the Date Format and Time Format settings. You can use the Auto option or configure the formats manually to match your file.
Q: I do not see any data when I preview the upload. What should I check?
A: Confirm your file is in CSV, TXT, or XLSX format. Check the upload template's File Format setting. If set to Auto, the format is determined by the file extension. If set to a specific format (CSV, TXT, or XLSX), only that file type will be processed.
Q: How do I configure status options from my upload?
A: In the upload template's Post Processing Settings section, enable the Auto Create Statuses option. This creates statuses based on values in your upload. After the upload is processed, go to Admin > Settings and click the Statuses tab to review and configure any new statuses.
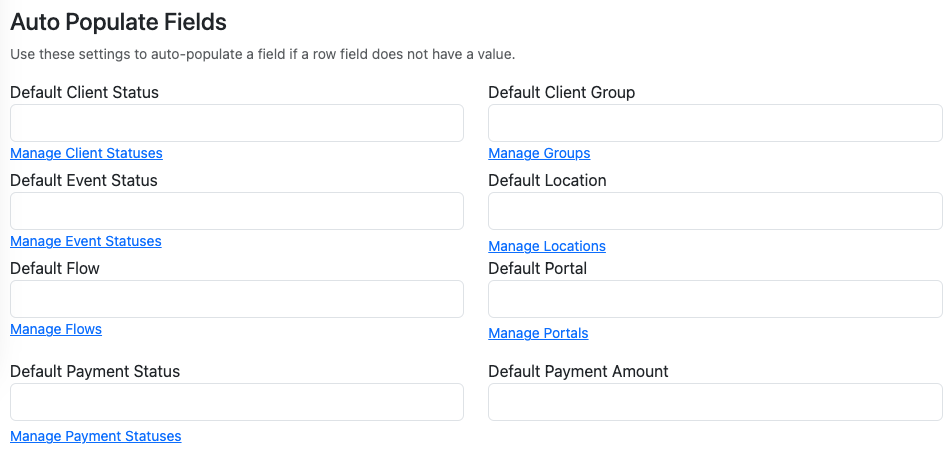
Q: How do I specify a default value for a field?
A: Use the upload template's Auto Populate Fields section to set default values. The following fields support default values:
- Client Status
- Client Group
- Event Status
- Location
- Flow
- Portal
- Payment Status
- Payment Amount
Troubleshooting
Issue: Upload fails with a file format error.
Symptoms: You receive an error message stating the file cannot be read, or the preview shows no data.
Solution: Verify your file is saved as CSV, TXT, or XLSX. Check the upload template's File Format setting. If it is set to a specific format, ensure your file matches. Try re-saving the file from your spreadsheet application and uploading again.
Issue: Records are duplicated after processing.
Symptoms: You see duplicate clients, events, or cases in your agency after an upload.
Solution: Review the Update Existing settings in your upload template. Ensure you have configured unique identifier fields (such as Client Reference or Case Number) so the system can match existing records instead of creating new ones.
Issue: Fields are mapped incorrectly or show wrong data.
Symptoms: Data appears in the wrong fields after processing, or fields are blank when they should have values.
Solution: Open your upload template and review the Field Mapping section. Ensure each field name from your file is copied exactly as it appears, including capitalization and spacing. Re-upload a sample file and use Auto Map Fields to verify the mapping.
Related Articles
Flat file uploads let you bulk create and update clients, events, cases, and payments in your agency using a CSV, TXT, or XLSX file. Whether you upload files manually or automate transfers via SFTP, this feature streamlines data management at scale.
### Overview
The flat file upload process involves creating an upload template, mapping your file fields to eCourtDate fields, configuring processing settings, and then uploading your file. Upload templates are reusable, so you only need to set them up once per file format. You can process clients, events, cases, payments, and contacts in a single upload.
### Prerequisites
- Administrator access to an eCourtDate agency
- A sample file in CSV, TXT, or XLSX format
- If your agency is live, test new uploads in a staging environment first
- Permissions: `create_uploads`, `update_uploads`, `create_upload_templates`
Learn more about [flat file uploads](https://ecourtdate.com/flat-file-uploads).
### How-To Steps
#### Step 1: Create an Upload Template
1. Log in to your eCourtDate [production](https://app.ecourtdate.com) or [staging](https://staging.ecourtdate.com) agency.
2. Click **Uploads** in the top navigation.

3. Click the **Upload Templates** tab.

4. Fill in the **Create Upload Template** form with a name and description.

5. Click the **Create** button.

You will be redirected to the newly created upload template.

#### Step 2: Map the Upload Template
1. In the **Upload a Sample File** section, select your sample file.

2. If the file is readable, you will see a list of fields that need to be mapped.

3. Click the **Auto Map Fields** button to auto-map, or use the **Map To Field** dropdown for each field.

4. Click the **Save** button to apply your changes.

#### (Optional) Manually Map Fields
If you need to manually map fields or fix auto-mapping issues, scroll to the **Field Mapping** section.

Each row represents an eCourtDate field. Enter the exact field name from your file into the corresponding eCourtDate field. Copy and paste field names exactly as they appear in your file to avoid mismatches.
Click the **Save** button to apply your changes.

#### Step 3: Configure the Processing Settings
##### Processing Method
Select one of the following processing methods:
- **Update by Fields (Recommended)**: Each new upload only needs to include new records or updates to existing records.

- **Load and Replace All Uploads**: Any existing records will be archived and new records will be created.
- **Load and Replace All Uploads Using This Template**: Any existing records created by this template will be archived and new records will be created.

If you choose a **Load and Replace** method, you can select which record types to replace:
- **Load and Replace Clients**: Clients and associated records will be archived
- **Load and Replace Contacts**: Only contacts will be archived
- **Load and Replace Cases**: Only cases will be archived
##### Update Existing Records
Configure the fields used to identify existing records for each record type you are processing:
- **Update Existing Clients**

- **Update Existing Events**
- **Update Existing Cases**

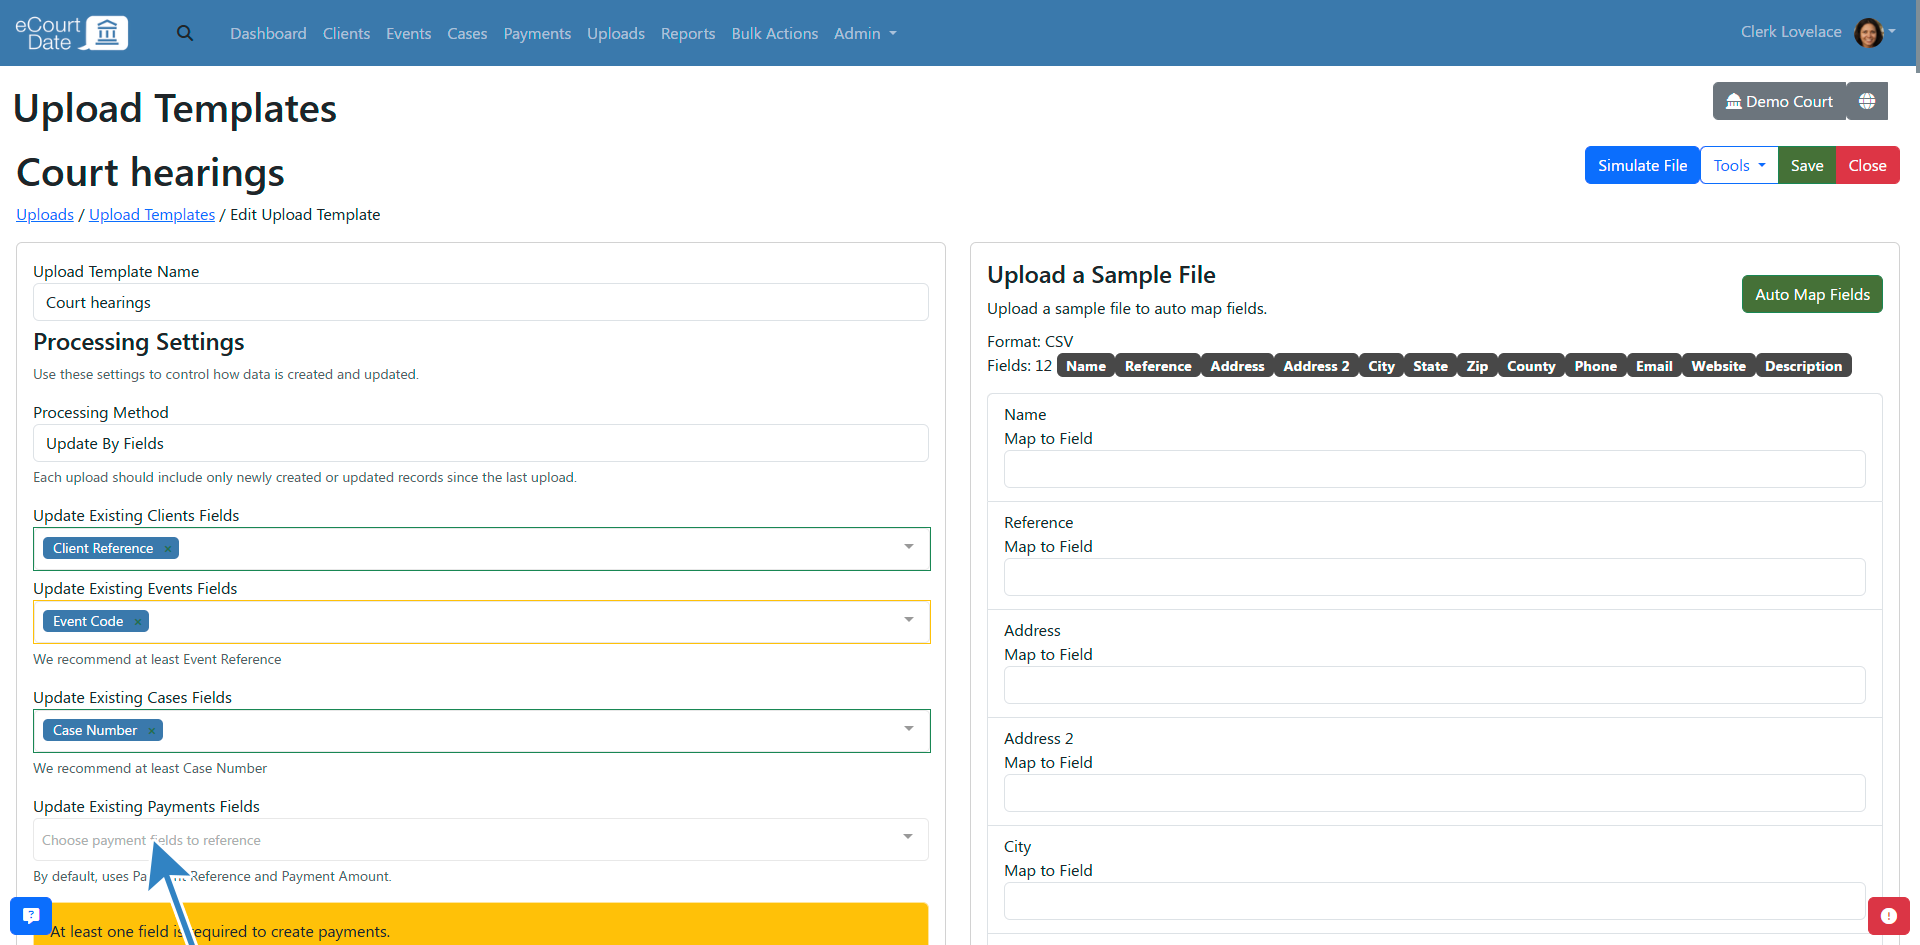
- **Update Existing Payments**

Use your internal reference ID for each record type. For example, use the **Client Reference** field to identify existing clients. Cases are identified by the **Case Number** field.
If you do not have a unique ID, you can use a combination of fields. For example, use the **Event Case Number** and **Event Type** fields to identify existing events.
Any fields configured in the **Update Existing** section should always be included in your upload. If you are not including a record type, leave the field blank.
#### Step 4: Preview and Test the File
1. Click **Uploads** in the top navigation.

2. Select your file and choose the upload template you created.

3. Click the **Preview Upload** checkbox.

4. Click the **Create** button.

You will be redirected to the new upload. Review the field mapping and confirm there are no errors. If you make changes in the upload template, refresh the upload page to see the latest changes.
#### Step 5: Process the File
1. Click the **Process Upload** button to process the file.

2. The status will change to **Queued** until processing begins.


3. Once the file is processed, you will receive an email notification. Review the following:
- The upload created the expected number of records
- The notification does not include any error messages
- Records are created or updated as expected
- Clients, events, cases, and payments reflect the correct data
- Messages are scheduled as expected
### What to Expect
After processing, your data will be available in eCourtDate within minutes for most files. Larger files may take longer depending on the number of records. You will receive an email notification when processing completes. Any errors encountered during processing will be included in the notification email.
### Best Practices
- Always preview your first upload with a new template to catch mapping errors before processing live data.
- Use the **Update by Fields** processing method unless you have a specific reason to load and replace all records.
- Include a unique reference ID (such as **Client Reference** or **Case Number**) in every upload to prevent duplicate records.
- Test new upload templates in your staging environment before running them in production.
- Keep your upload files clean by removing blank rows, extra columns, and special characters that may cause parsing issues.
### Frequently Asked Questions
**Q: Do I have to use the Preview when creating a new upload?**
A: No. Once you are confident your upload template is correctly configured, you can skip the **Preview Upload** option when creating new uploads.
**Q: How do I add a new field to my upload template?**
A: In the upload template's **Field Mapping** section, find the field you want to add. Copy the field name from your file and paste it into the appropriate eCourtDate field. Click **Save** to apply the changes.
**Q: My date and time fields are not being processed correctly. How do I fix this?**
A: Review the **Parsing Formats** section of your upload template. Check the **Date Format** and **Time Format** settings. You can use the **Auto** option or configure the formats manually to match your file.
**Q: I do not see any data when I preview the upload. What should I check?**
A: Confirm your file is in CSV, TXT, or XLSX format. Check the upload template's **File Format** setting. If set to **Auto**, the format is determined by the file extension. If set to a specific format (CSV, TXT, or XLSX), only that file type will be processed.
**Q: How do I configure status options from my upload?**
A: In the upload template's **Post Processing Settings** section, enable the **Auto Create Statuses** option. This creates statuses based on values in your upload. After the upload is processed, go to **Admin** > **Settings** and click the **Statuses** tab to review and configure any new statuses.
**Q: How do I specify a default value for a field?**
A: Use the upload template's **Auto Populate Fields** section to set default values. The following fields support default values:
- Client Status
- Client Group
- Event Status
- Location
- Flow
- Portal
- Payment Status
- Payment Amount

### Troubleshooting
**Issue:** Upload fails with a file format error.
**Symptoms:** You receive an error message stating the file cannot be read, or the preview shows no data.
**Solution:** Verify your file is saved as CSV, TXT, or XLSX. Check the upload template's **File Format** setting. If it is set to a specific format, ensure your file matches. Try re-saving the file from your spreadsheet application and uploading again.
**Issue:** Records are duplicated after processing.
**Symptoms:** You see duplicate clients, events, or cases in your agency after an upload.
**Solution:** Review the **Update Existing** settings in your upload template. Ensure you have configured unique identifier fields (such as **Client Reference** or **Case Number**) so the system can match existing records instead of creating new ones.
**Issue:** Fields are mapped incorrectly or show wrong data.
**Symptoms:** Data appears in the wrong fields after processing, or fields are blank when they should have values.
**Solution:** Open your upload template and review the **Field Mapping** section. Ensure each field name from your file is copied exactly as it appears, including capitalization and spacing. Re-upload a sample file and use **Auto Map Fields** to verify the mapping.
### Related Articles
- [How to Use Merge Tags](/how-to-use-merge-tags)
- [How to Create an Auto Message](/how-to-create-an-auto-message)
- [How to Manage Clients](/how-to-manage-clients)