Cases in eCourtDate allow you to organize client records, track case details, attach files, and send messages associated with dynamic case types and statuses. Managing cases effectively helps your age...
Cases in eCourtDate allow you to organize client records, track case details, attach files, and send messages associated with dynamic case types and statuses. Managing cases effectively helps your agency maintain accurate records and streamline court communications.
Overview
The Cases module in eCourtDate lets you create, search, update, archive, trash, and restore cases. Each case can be linked to clients, files, and messages. Cases support custom types, statuses, and workflows that integrate with Flows and Auto Messages for automated communication. You can access cases through the Cases tab in the top navigation bar.
Prerequisites
- You must have the create_cases permission to create new cases
- You must have the update_cases permission to edit existing cases
- Super Admin users have full access to all case functions
- At least one location should be configured under Admin > Locations
How-To Steps
How to Create a Case
- Click Cases in the top navigation bar.
- In the Create Case form, enter the Case Number.
- Select any additional options such as Case Type and Location.
- Click the Create button.
You are automatically redirected to the newly created case. To make further changes, follow the steps in "How to Update a Case" below.
How to Search Cases
- Click Cases in the top navigation bar.
- Locate the Search Cases section.
- Use any of the available filters. If you already know the case number, enter it in the Search field.
- Click the Search button to view results.
- Click the Edit button next to any case in the results.
Tips for searching:
- If your case is archived or trashed, enable the Archived or Trashed checkbox filter. Only one can be selected at a time.
- If your case is assigned to a client, use the quick search in the top navigation bar to search by case number. Clicking a result takes you to the client profile. Then click the Cases link in the left sidebar to view cases attached to that client.
How to Update a Case
When viewing a single case, you can edit case details, attach files, add comments, and manage subscribers.
The following fields are available for each case:
- Case Number
- Location
- Agency
- Type
- File Date
- Arrest Date
- Offense Date
- Judgment Date
- Arrest Tracking
- Victim Name
- Offender Name
- Codes
- Conditions
- Description
- Offense Type
- Offense Description
- Charge Number
- Warrant Status
- Make your desired changes to any of the fields above.
- Click the Save button to apply your changes.
How to Manage Case Files
Each case supports an unlimited number of files.
- Navigate to the case you want to manage.
- Locate the Case Files section.
- Drag and drop new files into the Case Files area to upload them.
- Click the Download button to download an existing file, or click the Trash button to delete a file.
If cases are enabled on your web portal, case files are accessible to the client and any case subscribers.
How to Attach Clients to Cases
- Navigate to the case you want to attach a client to.
- Locate the Search Clients field in the top right corner.
- Enter a client name or reference and click the Search button.
- You can click Search without entering text to list the most recently created clients.
- Click the Attach button next to the desired client.
After attaching a client:
- An Attached Client section appears with basic client information.
- If the client has at least one valid contact, a Send a Message form appears where you can send one-off messages regarding the case.
To remove the client from the case, click the Detach button.
How to Archive a Case
- Navigate to the case you want to archive.
- Click the Tools button.
- Click the Archive button.
What to expect after archiving:
- The case is immediately archived and any scheduled messages are trashed.
- The case is not searchable by default.
- The case does not trigger any Auto or Flow messages.
- The case is not accessible through a portal.
- The case is not used for merge tags on non-case messages.
- If Auto-Trash Archived Data is configured in Admin > Settings, the case is automatically trashed after the configured number of days (for example, 90 days).
How to Trash a Case
- Navigate to the case you want to trash.
- Click the Tools button.
- Click the Trash button.
What to expect after trashing:
- The case and any scheduled messages are immediately trashed.
- The case is not searchable by default.
- The case does not trigger any Auto or Flow messages.
- The case is not accessible through a portal.
- The case is not used for merge tags on non-case messages.
- If Auto-Delete Trashed Data is configured in Admin > Settings, the case is automatically deleted after the configured number of days (for example, 30 days).
To search for trashed cases, go to the Cases page and enable the Trashed checkbox in Search Cases.
How to Restore an Archived or Trashed Case
- Click Cases in the top navigation bar.
- Locate the Search Cases form.
- Enable the Archived or Trashed checkbox (select only one).
- Click the Edit button next to the desired case.
- Click the Tools button.
- Click the Restore button.
What to expect after restoring:
- The case becomes searchable again.
- Restoring the case alone does not trigger Auto Messages.
- If the case was assigned to a Flow, messages may be triggered based on the Flow configuration.
- The case is accessible through a portal. Case links previously sent in messages become active again (unless the link expired).
- The case can be used for merge tags on non-case messages.
How to Assign Attorneys to Cases
Link attorney records to cases for tracking representation.
- Navigate to the case you want to update.
- Scroll to the Attorney field.
- Search for and select the attorney from the dropdown.
- Click Save to apply the assignment.
Assigned attorneys can receive recurring case summaries via email. See How to Manage Attorneys for details.
How to Create Events for Cases
Schedule hearings, appointments, or other events directly from a case.
- Navigate to the case detail page.
- Scroll to the Events section.
- Click Create Event to add a new event linked to this case.
- Fill in the event details (date, time, location, type) and click Create.
Events created from a case are automatically linked to the case and any attached clients.
How to Configure Auto-Assignment Rules
Automatically assign cases to attorneys, locations, and judges based on configurable rules.
- Go to Admin > Settings.
- Navigate to the case assignment configuration.
- Configure rules to automatically assign cases based on criteria such as case type, location, or jurisdiction:
- Attorney assignment: Route cases to specific attorneys based on case type or location.
- Location assignment: Set a default location for cases based on jurisdiction or case type.
- Judge assignment: Assign judges to cases based on courtroom, case type, or rotation schedule.
- Click Save to apply the auto-assignment rules.
Once configured, new cases that match the rule criteria are automatically assigned without manual intervention.
How to Send Case Updates to Clients
Send notifications to clients when case details change or when you need to communicate case-related information.
- Navigate to the case you want to communicate about.
- Locate the Attached Client section. A client must be attached to the case to send messages.
- Use the Send a Message form to compose a one-off message to the client regarding this case.
- Select the delivery channel: SMS, Email, or both.
- Click Send to deliver the message.
To automate case notifications:
- Go to Admin > Automations > Auto Messages.
- Create an auto message triggered by case status changes (for example, notify clients when a case status changes to "Hearing Scheduled" or "Resolved").
- Select the message template and delivery channel.
- Click Save to activate the automated notification.
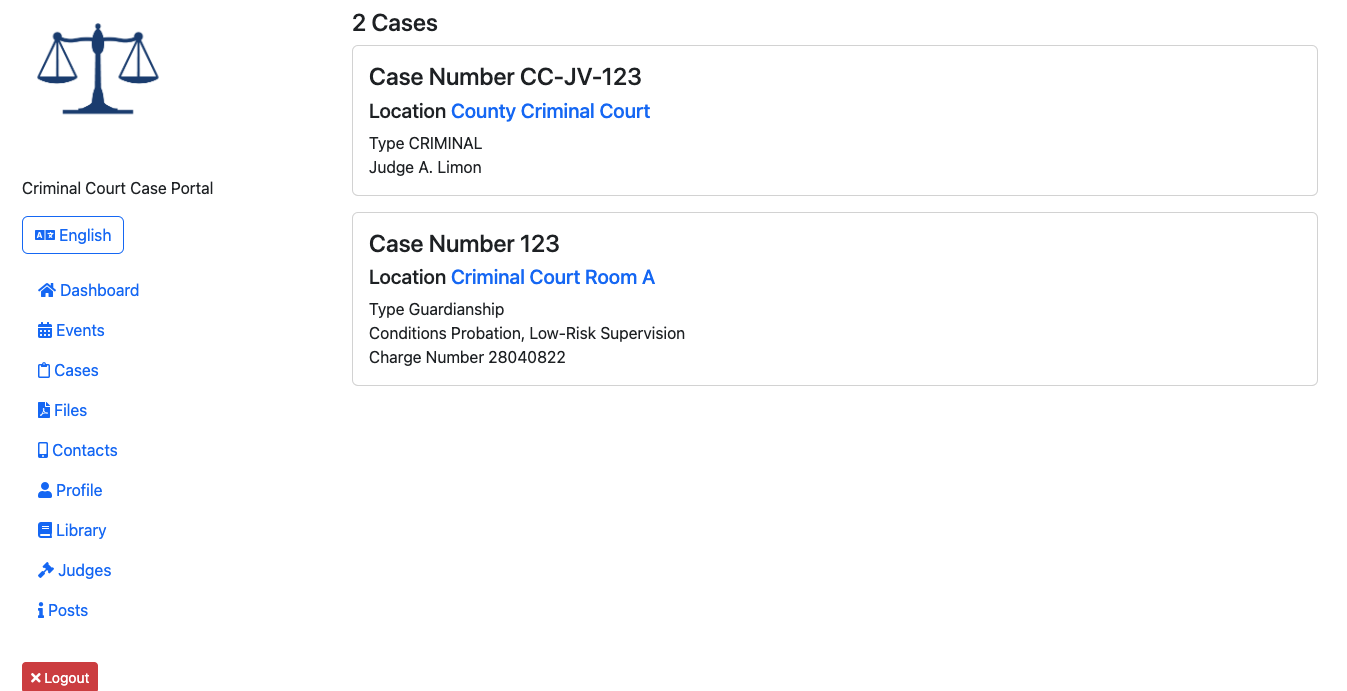
Clients with portal access can also view case updates directly through the web portal if cases are enabled on your portal configuration.
What to Expect
After setting up your cases, you have a centralized system for tracking case details, attaching clients and files, and managing communication workflows. Cases integrate with Flows and Auto Messages to automate reminders and notifications based on case type and status changes.
Best Practices
- Keep case numbers consistent with your case management system to make searching and cross-referencing easier.
- Attach clients to cases promptly so automated messages and Flow triggers work correctly.
- Use the Archive function for closed cases rather than Trash to preserve case history while removing the case from active searches.
- Configure Auto-Trash Archived Data and Auto-Delete Trashed Data in Admin > Settings to automate cleanup of old records.
- Upload relevant case files directly to each case so all documentation is accessible in one place and available through the client portal.
Frequently Asked Questions
Q: Can I attach multiple clients to a single case?
A: Yes. You can attach multiple clients to one case using the Search Clients field on the case detail page. Each attached client can receive messages related to that case.
Q: What happens to scheduled messages when I archive or trash a case?
A: When you archive or trash a case, all scheduled messages associated with that case are automatically trashed. No further automated messages are sent for that case.
Q: Can I restore a case after it has been trashed?
A: Yes. Navigate to the Cases page, enable the Trashed checkbox in Search Cases, find the case, click Edit, then click Tools > Restore. Note that if Auto-Delete Trashed Data is enabled, the case may be permanently deleted after the configured number of days.
Q: How do I find a case that seems to be missing?
A: The case may be archived or trashed. Go to the Cases page and enable either the Archived or Trashed checkbox filter in Search Cases to locate it.
Q: Can clients see case files through the portal?
A: Yes, if cases are enabled on your web portal, clients and case subscribers can access uploaded case files through their portal link.
Troubleshooting
Issue: Cannot find a case in search results.
Symptoms: Searching by case number returns no results even though the case was previously created.
Solution: The case may be archived or trashed. Navigate to the Cases page, enable the Archived or Trashed checkbox in Search Cases, and search again. Only one filter can be active at a time.
Issue: Automated messages are not being sent for a case.
Symptoms: A case is assigned to a Flow but no reminders are being generated.
Solution: Verify that the case is not archived or trashed. Confirm that the case has an attached client with valid contact information. Check that a Flow is assigned and marked as the Default or matches the case type.
Issue: Cannot create a new case.
Symptoms: The Create Case form is not visible or the Create button does not work.
Solution: Verify that your user account has the create_cases permission. Contact your Super Admin to update your role permissions under Admin > Users > Roles.
Related Articles
Cases in eCourtDate allow you to organize client records, track case details, attach files, and send messages associated with dynamic case types and statuses. Managing cases effectively helps your agency maintain accurate records and streamline court communications.

### Overview
The Cases module in eCourtDate lets you create, search, update, archive, trash, and restore cases. Each case can be linked to clients, files, and messages. Cases support custom types, statuses, and workflows that integrate with Flows and Auto Messages for automated communication. You can access cases through the **Cases** tab in the top navigation bar.
### Prerequisites
- You must have the **create_cases** permission to create new cases
- You must have the **update_cases** permission to edit existing cases
- Super Admin users have full access to all case functions
- At least one location should be configured under **Admin** > **Locations**
### How-To Steps
#### How to Create a Case
1. Click **Cases** in the top navigation bar.
2. In the **Create Case** form, enter the **Case Number**.
3. Select any additional options such as **Case Type** and **Location**.
4. Click the **Create** button.
You are automatically redirected to the newly created case. To make further changes, follow the steps in "How to Update a Case" below.
#### How to Search Cases
1. Click **Cases** in the top navigation bar.
2. Locate the **Search Cases** section.
3. Use any of the available filters. If you already know the case number, enter it in the **Search** field.
4. Click the **Search** button to view results.
5. Click the **Edit** button next to any case in the results.
Tips for searching:
- If your case is archived or trashed, enable the **Archived** or **Trashed** checkbox filter. Only one can be selected at a time.
- If your case is assigned to a client, use the quick search in the top navigation bar to search by case number. Clicking a result takes you to the client profile. Then click the **Cases** link in the left sidebar to view cases attached to that client.
#### How to Update a Case
When viewing a single case, you can edit case details, attach files, add comments, and manage subscribers.
The following fields are available for each case:
- Case Number
- Location
- Agency
- Type
- File Date
- Arrest Date
- Offense Date
- Judgment Date
- Arrest Tracking
- Victim Name
- Offender Name
- Codes
- Conditions
- Description
- Offense Type
- Offense Description
- Charge Number
- Warrant Status
1. Make your desired changes to any of the fields above.
2. Click the **Save** button to apply your changes.
#### How to Manage Case Files
Each case supports an unlimited number of files.
1. Navigate to the case you want to manage.
2. Locate the **Case Files** section.
3. Drag and drop new files into the **Case Files** area to upload them.
4. Click the **Download** button to download an existing file, or click the **Trash** button to delete a file.
If cases are enabled on your web portal, case files are accessible to the client and any case subscribers.
#### How to Attach Clients to Cases
1. Navigate to the case you want to attach a client to.
2. Locate the **Search Clients** field in the top right corner.
3. Enter a client name or reference and click the **Search** button.
- You can click **Search** without entering text to list the most recently created clients.
4. Click the **Attach** button next to the desired client.
After attaching a client:
- An **Attached Client** section appears with basic client information.
- If the client has at least one valid contact, a **Send a Message** form appears where you can send one-off messages regarding the case.
To remove the client from the case, click the **Detach** button.
#### How to Archive a Case
1. Navigate to the case you want to archive.
2. Click the **Tools** button.
3. Click the **Archive** button.
What to expect after archiving:
- The case is immediately archived and any scheduled messages are trashed.
- The case is not searchable by default.
- The case does not trigger any Auto or Flow messages.
- The case is not accessible through a portal.
- The case is not used for merge tags on non-case messages.
- If **Auto-Trash Archived Data** is configured in **Admin** > **Settings**, the case is automatically trashed after the configured number of days (for example, 90 days).
#### How to Trash a Case
1. Navigate to the case you want to trash.
2. Click the **Tools** button.
3. Click the **Trash** button.
What to expect after trashing:
- The case and any scheduled messages are immediately trashed.
- The case is not searchable by default.
- The case does not trigger any Auto or Flow messages.
- The case is not accessible through a portal.
- The case is not used for merge tags on non-case messages.
- If **Auto-Delete Trashed Data** is configured in **Admin** > **Settings**, the case is automatically deleted after the configured number of days (for example, 30 days).
To search for trashed cases, go to the **Cases** page and enable the **Trashed** checkbox in **Search Cases**.
#### How to Restore an Archived or Trashed Case
1. Click **Cases** in the top navigation bar.
2. Locate the **Search Cases** form.
3. Enable the **Archived** or **Trashed** checkbox (select only one).
4. Click the **Edit** button next to the desired case.
5. Click the **Tools** button.
6. Click the **Restore** button.
What to expect after restoring:
- The case becomes searchable again.
- Restoring the case alone does not trigger Auto Messages.
- If the case was assigned to a Flow, messages may be triggered based on the Flow configuration.
- The case is accessible through a portal. Case links previously sent in messages become active again (unless the link expired).
- The case can be used for merge tags on non-case messages.
#### How to Assign Attorneys to Cases
Link attorney records to cases for tracking representation.
1. Navigate to the case you want to update.
2. Scroll to the **Attorney** field.
3. Search for and select the attorney from the dropdown.
4. Click **Save** to apply the assignment.
Assigned attorneys can receive recurring case summaries via email. See [How to Manage Attorneys](/how-to-manage-attorneys) for details.
#### How to Create Events for Cases
Schedule hearings, appointments, or other events directly from a case.
1. Navigate to the case detail page.
2. Scroll to the **Events** section.
3. Click **Create Event** to add a new event linked to this case.
4. Fill in the event details (date, time, location, type) and click **Create**.
Events created from a case are automatically linked to the case and any attached clients.
#### How to Configure Auto-Assignment Rules
Automatically assign cases to attorneys, locations, and judges based on configurable rules.
1. Go to **Admin** > **Settings**.
2. Navigate to the case assignment configuration.
3. Configure rules to automatically assign cases based on criteria such as case type, location, or jurisdiction:
- **Attorney assignment:** Route cases to specific attorneys based on case type or location.
- **Location assignment:** Set a default location for cases based on jurisdiction or case type.
- **Judge assignment:** Assign judges to cases based on courtroom, case type, or rotation schedule.
4. Click **Save** to apply the auto-assignment rules.
Once configured, new cases that match the rule criteria are automatically assigned without manual intervention.
#### How to Send Case Updates to Clients
Send notifications to clients when case details change or when you need to communicate case-related information.
1. Navigate to the case you want to communicate about.
2. Locate the **Attached Client** section. A client must be attached to the case to send messages.
3. Use the **Send a Message** form to compose a one-off message to the client regarding this case.
4. Select the delivery channel: **SMS**, **Email**, or both.
5. Click **Send** to deliver the message.
To automate case notifications:
1. Go to **Admin** > **Automations** > **Auto Messages**.
2. Create an auto message triggered by case status changes (for example, notify clients when a case status changes to "Hearing Scheduled" or "Resolved").
3. Select the message template and delivery channel.
4. Click **Save** to activate the automated notification.
Clients with portal access can also view case updates directly through the web portal if cases are enabled on your portal configuration.
### What to Expect
After setting up your cases, you have a centralized system for tracking case details, attaching clients and files, and managing communication workflows. Cases integrate with Flows and Auto Messages to automate reminders and notifications based on case type and status changes.
### Best Practices
- Keep case numbers consistent with your case management system to make searching and cross-referencing easier.
- Attach clients to cases promptly so automated messages and Flow triggers work correctly.
- Use the **Archive** function for closed cases rather than **Trash** to preserve case history while removing the case from active searches.
- Configure **Auto-Trash Archived Data** and **Auto-Delete Trashed Data** in **Admin** > **Settings** to automate cleanup of old records.
- Upload relevant case files directly to each case so all documentation is accessible in one place and available through the client portal.
### Frequently Asked Questions
**Q: Can I attach multiple clients to a single case?**
A: Yes. You can attach multiple clients to one case using the **Search Clients** field on the case detail page. Each attached client can receive messages related to that case.
**Q: What happens to scheduled messages when I archive or trash a case?**
A: When you archive or trash a case, all scheduled messages associated with that case are automatically trashed. No further automated messages are sent for that case.
**Q: Can I restore a case after it has been trashed?**
A: Yes. Navigate to the **Cases** page, enable the **Trashed** checkbox in **Search Cases**, find the case, click **Edit**, then click **Tools** > **Restore**. Note that if **Auto-Delete Trashed Data** is enabled, the case may be permanently deleted after the configured number of days.
**Q: How do I find a case that seems to be missing?**
A: The case may be archived or trashed. Go to the **Cases** page and enable either the **Archived** or **Trashed** checkbox filter in **Search Cases** to locate it.
**Q: Can clients see case files through the portal?**
A: Yes, if cases are enabled on your web portal, clients and case subscribers can access uploaded case files through their portal link.
### Troubleshooting
**Issue:** Cannot find a case in search results.
**Symptoms:** Searching by case number returns no results even though the case was previously created.
**Solution:** The case may be archived or trashed. Navigate to the **Cases** page, enable the **Archived** or **Trashed** checkbox in **Search Cases**, and search again. Only one filter can be active at a time.
**Issue:** Automated messages are not being sent for a case.
**Symptoms:** A case is assigned to a Flow but no reminders are being generated.
**Solution:** Verify that the case is not archived or trashed. Confirm that the case has an attached client with valid contact information. Check that a Flow is assigned and marked as the **Default** or matches the case type.
**Issue:** Cannot create a new case.
**Symptoms:** The **Create Case** form is not visible or the **Create** button does not work.
**Solution:** Verify that your user account has the **create_cases** permission. Contact your Super Admin to update your role permissions under **Admin** > **Users** > **Roles**.
### Related Articles
- [How to Manage Clients](/how-to-manage-clients)
- [How to Manage Events](/how-to-manage-events)
- [How to Manage Files](/how-to-manage-files)
- [How to Send a One-off Message](/how-to-send-a-one-off-message)
- [How to Search for Outbound Messages Using Filters](/how-to-search-for-outbound-messages-using-filters)